Pickleball is easy to start and surprisingly hard to play well. Most beginners can rally within minutes, yet the same loose shots keep costing them points for months.
Drills fix that gap faster than extra games do. A game rewards whatever already works, while a drill isolates one skill and repeats it until it feels natural.
This guide gives you a complete beginner drill programme. It starts with absolute basics, then moves step by step toward the shots that win real rallies.
Every drill below includes a time or repetition target and a clear picture of success. You do not need fancy equipment, a coach, or a full court booking to begin.
All you need is a paddle, a few balls, a partner when possible, and a court or a flat wall. If you are still learning the basic rules, start with our guide to how to play pickleball before your first drill session.
Key Takeaways
- Drill one skill at a time, in short blocks, and finish each session with relaxed play.
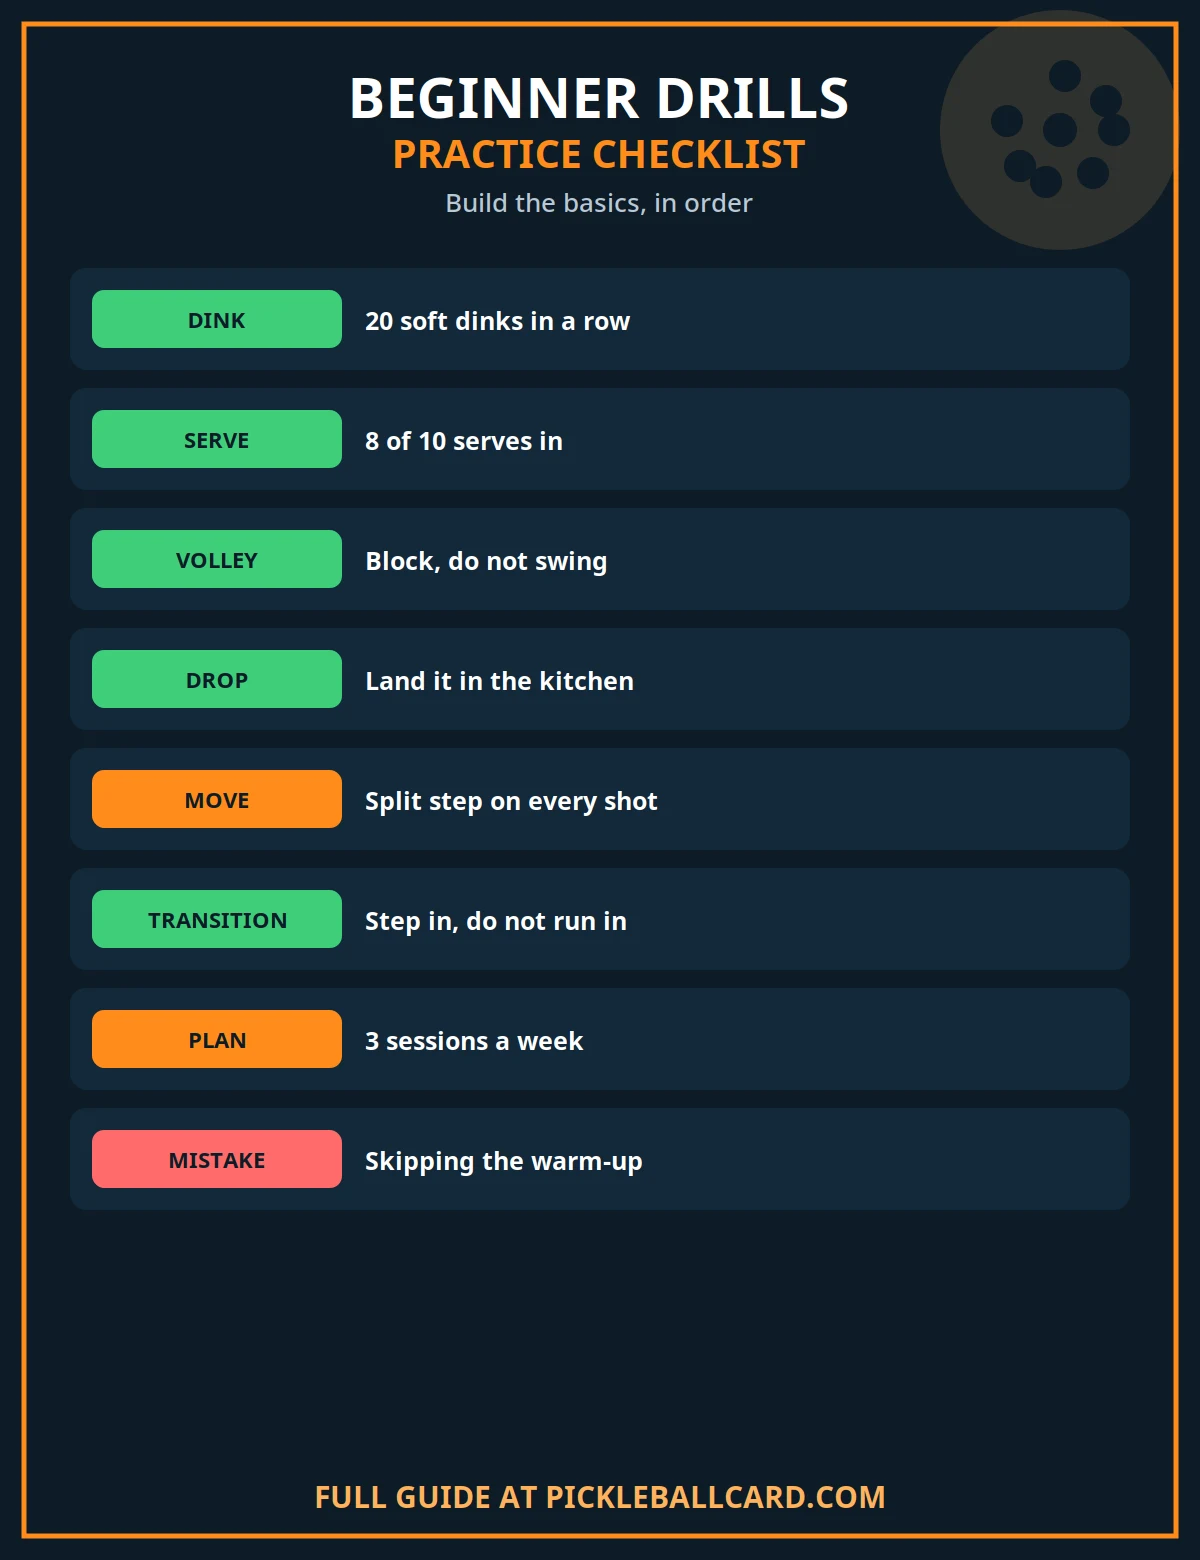
- Start at the kitchen line with soft dinks, then work backward to serves, returns, and volleys.
- Depth and consistency beat power for beginners on almost every shot.
- A good drill has a target, a time limit, and a simple way to tell whether it worked.
- Move on to third-shot drops and transition drills only when your dinks and returns feel steady.
- Three short weekly sessions will build skill faster than one long, tiring session.
- Stop and rest if a drill causes pain, and keep your feet moving instead of reaching.
How to Structure a Beginner Practice Session
A good practice session has a clear shape. Warm up first, drill one or two skills, then play a short game that uses those skills.
That shape matters because tired players practise bad habits. Short, focused blocks keep your attention sharp and your technique clean throughout the session.
Aim for forty-five to sixty minutes in total. Beginners rarely need more, and longer sessions often turn into casual hitting with little learning.
The Simple Session Template
Begin with five minutes of gentle movement. Walk, jog lightly, swing your paddle slowly, and hit a few easy balls with your partner.
Next, spend ten minutes on a warm-up rally. Stand close to the net and trade soft shots, then step back gradually as your control improves.
Then drill for twenty to twenty-five minutes. Pick one main drill and one supporting drill, rather than trying to cover everything at once.
Finish with fifteen to twenty minutes of play. Use the skill you just drilled on purpose, even if it feels awkward at first.
Close with a short cool-down and a quick review. Ask yourself which drill felt easiest, which felt hardest, and what you will repeat next time.
Rules for Useful Repetition
Count your repetitions, but count quality first. Ten careful dinks teach more than thirty rushed ones that fly long or bounce too high.
Reset calmly after every mistake. Collect the ball, return to your ready position, and start again without rushing the next shot.
Keep the pace cooperative at first. Your partner is not an opponent in a drill, and a rally that lasts is worth more than a winner.
Change only one thing at a time. If you are working on depth, do not also change your grip, stance, and swing in the same drill.
Finally, practise both sides of your body. Forehand drills feel easier, but backhand control is what keeps you in rallies under pressure.
Absolute-Beginner Drills
Absolute-beginner drills build touch, timing, and confidence. They use short distances, slow balls, and simple targets, so you can succeed from the first session.
Stay at this stage until you can keep a soft rally going without chasing wild balls. That control is the foundation for everything that follows.
Dinking: The Soft Kitchen Rally
Dinking is a soft shot that lands in the non-volley zone, often called the kitchen. It keeps the ball low and forces your opponent to hit upward.
Stand just behind the kitchen line, facing your partner across the net. Keep your paddle in front of you and use a short, gentle pushing motion.
Start with straight-ahead dinks, hitting forehand to forehand. Aim for the middle of the kitchen, not the sidelines, so rallies last longer.
Spend ten minutes on this drill, in blocks of about twenty exchanges. Rest briefly between blocks and reset your feet each time.
Good looks like this: the ball clears the net by a small margin, bounces in the kitchen, and stays low enough that your partner cannot attack it.
When straight dinks feel steady, try cross-court dinks. Stand diagonally opposite your partner and aim for the far corner of the kitchen.
Good cross-court dinking looks calm and repeatable. You move your feet to the ball, keep your paddle steady, and rarely lift the ball high.
For more detail on soft net play, read our pickleball dinking strategies guide before adding pace or angles to this drill.
Dinking on Your Own: The Wall Dink
No partner? Use a flat wall and a line on the ground to mark an imaginary net. Stand close and tap soft shots that would land low over a real net.
Keep the ball below a mark at net height on the wall. This simple limit teaches the low, controlled arc that real dinking needs.
Spend five to ten minutes on wall dinks, alternating forehand and backhand. Stop when your arm tires, because tired arms start lifting the ball.
Serve and Return: Deep and Repeatable
The serve starts every rally, so a reliable serve removes pressure from the rest of your game. Beginners should aim for depth and consistency, not speed.
Stand behind the baseline and serve underhand, with a smooth upward swing. Aim for the back third of the opposite service box, away from the sidelines.
Hit ten serves from the right side, then ten from the left. Count how many land in, and note whether misses go long, wide, or into the net.
Spend ten minutes on serves alone. Good serving looks like this: at least eight out of ten serves land in, and most land deep rather than short.
Next, practise returns with a partner. The server serves gently, and the receiver aims a deep, lofted return toward the baseline.
A deep return buys time to move forward. It also keeps the serving team back, which makes your next shot much easier.
Trade roles every ten serves. Spend ten minutes total, and judge success by depth: returns should land near the baseline, not in the kitchen.
Serve Targets for Focus
Place a spare paddle, towel, or cone in the deep corners of the service box. These visible targets give your serve practice a clear purpose.
Aim for the target area, not the target itself. Trying to hit a tiny object often tightens your swing and harms your rhythm.
Volley: Short, Calm Hands at the Net
A volley is a shot hit before the ball bounces. At the kitchen line, volleys are short blocks, not big swings, and they reward a steady paddle.
Stand at the kitchen line with your partner opposite you. One player feeds a gentle ball, and the other blocks it back with a short paddle movement.
Keep your paddle in front of your chest and your feet still. Let the ball come to the paddle instead of swinging hard at it.
Spend ten minutes on volleys, swapping the feeder role every two minutes. Start with forehand volleys, then add backhand volleys.
Good volleying looks controlled and quiet. The ball stays low, your paddle barely moves, and you stay balanced after each contact.
Next, try a gentle volley rally. Both players stay at the kitchen line and trade soft volleys, aiming for the middle of the court.
Keep this rally cooperative and slow. Five minutes is enough, and success means ten or more exchanges without a wild pop-up.
Advancing-Beginner Drills
Advancing-beginner drills connect the basics into real point patterns. They still use simple targets, but they add movement, timing, and decisions.
Move here when your dinks stay low, your serves land deep, and your returns give you time to reach the kitchen line.
Third-Shot Drop: An Introduction
The third-shot drop is a soft shot hit after the serve and return. It arcs into the opponent’s kitchen and lets the serving team move forward safely.
Start with a drop feed, not a full rally. Stand at the baseline while your partner tosses a gentle ball toward you from the net.
Hit the ball softly, with a slightly open paddle face, aiming for the kitchen on your partner’s side. Think lift and arc, not speed.
Take ten attempts, then swap roles. Spend ten minutes on drop feeds, and rest briefly whenever your shots start flying long.
Good drop feeds land in the kitchen and bounce low. Your partner should have to hit upward, rather than volleying the ball aggressively.
Next, build the full pattern. Your partner serves gently, you return deep, and your partner then hits a third-shot drop.
Pause after the drop and reset, rather than playing the point out. Repeating the pattern teaches the sequence without the pressure of scoring.
Run this pattern for ten minutes, alternating the serving side every five minutes. Success means drops that land soft, low, and in the kitchen.
For a deeper explanation of this shot, read our third-shot drop guide alongside this drill.
Third-Shot Drop From Mid-Court
Once baseline drops feel possible, try the same shot from mid-court. Stand halfway between the baseline and the kitchen line for this version.
The shorter distance makes the arc easier to judge. It also teaches you to soften your swing as you move closer to the net.
Have your partner feed gentle balls from the kitchen line. Aim each drop into the kitchen and step forward after a successful shot.
Spend five to ten minutes here. Good mid-court drops still land softly, and you should feel balanced as you step toward the net.
Transition: Moving Forward in Stages
Transition means moving from the baseline to the kitchen line without rushing. Many beginners sprint forward and arrive off balance, ready to be passed.
Try the two-step transition drill. Start at the baseline, hit a groundstroke, then move to mid-court and pause in a ready position.
Your partner feeds a second ball to mid-court. Hit a controlled shot, then move to the kitchen line and pause again.
Spend ten minutes on this drill, swapping roles halfway through. Move in short, balanced steps and keep your paddle in front of you.
Good transition looks unhurried. You stop before you hit, your feet are set, and your next shot stays controlled rather than desperate.
Next, add the split-step. As your partner strikes the ball, take a small hop and land with feet apart, ready to move either way.
Practise split-steps during a gentle rally for five minutes. Good split-stepping feels light, not jumpy, and it leaves you ready for the next ball.
Transition With a Partner Rally
Play a cooperative rally with a simple rule: the baseline player may only move forward after hitting a controlled shot, not after a wild one.
This rule rewards patience. It also shows how a soft, well-placed shot creates a safer path to the net than a hard, risky one.
Play for ten minutes, then swap roles. Good transition rallies end with both players at the kitchen line, still balanced and still in control.
Movement: Shuffle, Stop, and Reset
Good movement in pickleball is mostly sideways shuffling and small adjustment steps. Long crossover steps and lunges leave you stranded.
Try the sideline shuffle without a ball first. Shuffle from the centre line to each sideline and back, staying low with your paddle up.
Move for two minutes, rest for one minute, and repeat twice. Good shuffling keeps your feet apart and your head level throughout.
Next, add a ball. Your partner feeds gentle dinks alternately to your forehand and backhand sides while you stay at the kitchen line.
Shuffle to each ball, stop, hit, and return to the centre. Spend ten minutes on this drill, keeping the feeds slow and cooperative.
Good movement here means you arrive early enough to stop. If you are still moving when you hit, the feed is too fast or too wide.
Finish movement work with a recovery drill. After each shot, return to a central ready spot before your partner feeds the next ball.
Weekly Practice Plan
Three sessions a week give most beginners steady progress without overload. Each session below lasts about an hour, including warm-up and play.
Use the same drills for two or three weeks before changing them. Familiar drills let you measure improvement instead of relearning instructions each time.
| Day | Main Focus | Drills (30 Minutes) | Play (20 Minutes) |
|---|---|---|---|
| Monday | Soft game | Kitchen dinks, cross-court dinks, wall dinks if alone | Kitchen-only games to 7 points |
| Wednesday | Serve and return | Deep serves, deep returns, serve targets | Half-court games starting with a serve |
| Friday | Net and transition | Volley blocks, third-shot drop feeds, transition stages | Full games, moving forward after returns |
| Weekend (optional) | Free review | Repeat your weakest drill from the week | Social games with a focus on that skill |
If you can only practise twice a week, combine Monday and Wednesday in one session. Keep the total time near an hour and cut play, not drill time.
Track one simple measure each week. For example, record your longest dink rally, your serves in out of ten, or your drops that land in the kitchen.
Common Beginner Mistakes to Drill Out
Most beginner mistakes come from rushing. Players swing too big, move too late, or attack balls that should have been played softly.
Drills help because they slow the game down. They let you notice a habit, correct it once, and repeat the better version many times.
Hitting Too Hard From the Kitchen
Hard shots from the kitchen often pop up or fly out. They also give your opponent an easy ball to attack.
Fix this with the soft dink drill. Set a rule: any dink above net height by a wide margin ends the rally, and both players reset.
This rule trains restraint. Within a few sessions, your hands learn that soft and low beats hard and hopeful.
Standing Still After a Shot
Beginners often watch their own shot instead of preparing for the reply. That pause leaves them flat-footed and out of position.
Fix this with the recovery drill above. After every shot in practice, return to a ready spot before the next ball arrives.
Running Forward Without a Plan
Rushing to the net feels aggressive, but it often ends with an off-balance volley or a ball passing you. Move forward only after a controlled shot.
Fix this with the two-step transition drill. Pausing at mid-court teaches you to arrive ready, rather than arriving first and unprepared.
Reaching Instead of Moving
Reaching stretches your arm, opens your paddle face, and weakens your shot. Moving your feet keeps your contact point close and controlled.
Fix this with the shuffle drill. If you cannot reach a ball without leaning far, treat that as a signal to take an extra step next time.
USA Pickleball’s tips for new players echo the same basics: keep serves simple, return deep, and move to the non-volley line when you can.
Skipping the Warm-Up
Cold muscles and stiff joints make early rallies sloppy. A short warm-up also gives you time to judge the court surface and ball bounce.
Fix this by treating the first five minutes as part of the drill, not wasted time. Gentle rallies and light movement prepare both body and touch.
Stop any drill that causes sharp pain, dizziness, or unusual discomfort, and seek appropriate advice if symptoms persist.
Frequently Asked Questions
How long should a beginner drill session last?
Forty-five to sixty minutes is plenty for most beginners. That window allows a warm-up, twenty to twenty-five minutes of drills, and a short game.
Shorter sessions also help you stay focused. If your technique starts falling apart, it is better to stop early than to practise tired mistakes.
Should beginners drill alone or with a partner?
Both work, and they build different strengths. Partner drills teach rally timing and placement, while wall drills build repetition and control.
If you can, mix the two. Use wall work on solo days and partner drills when a court and a playing partner are available.
When should I start practising the third-shot drop?
Start with drop feeds once your dinks and returns feel steady. You do not need perfect dinks, but you do need basic control and patience.
Begin from mid-court if the baseline version feels too hard. The shorter distance makes the arc easier to learn before you move back.
How do I know a drill is working?
Use the success measures in each drill. Longer rallies, deeper serves, and drops landing in the kitchen are all clear signs of progress.
How often should beginners practise each week?
Two or three sessions a week suit most beginners. That rhythm builds skill steadily while leaving recovery time between sessions.
Consistency matters more than volume. Three short weekly sessions will usually beat a single exhausting weekend marathon.
What if I keep making the same mistake?
Slow the drill down and shrink the target. Return to a shorter distance, a softer feed, or a simpler version of the same skill.
If the mistake persists, check one element only, such as paddle height or foot position. Fixing one thing at a time usually clears the fault faster.
For the official basics behind these drills, see USA Pickleball’s how to play pickleball guide, which covers serving, scoring, and the kitchen rule.

Shoaib is the publisher of Pickleball Card. He oversees the site’s guides to pickleball rules, ratings, strategy and gear, all researched from primary sources — the USA Pickleball Rulebook, DUPR and manufacturer documentation — and updated as the game changes.