• Skip to primary navigation
  • Skip to main content
  • Skip to primary sidebar

Pickleballcard

All About Pickleball Gears

  • About Pickleball
    • How To Play Pickleball
    • Pickleball Rules
    • Pickleball Kitchen Rules
    • Serving Rules
    • Pickleball Ratings
    • Pickleball Tips
    • Pickleball History
  • Pickleball Shoes
    • Best Pickleball Shoes
    • Best Pickleball Shoes For Men
    • Best Pickleball Shoes For Women
  • Pickleball Paddles
    • Best Pickleball Paddles
    • Elongated Pickleball Paddles
    • Graphite Pickleball Paddles
    • Onix Pickleball Paddles
    • Pickleball Paddles for Women
    • Pickleball Paddles For Spin
  • Vs
    • Pickleball Vs Tennis
    • Paddle Tennis Vs Pickleball
    • Indoor Vs Outdoor Pickleball

Let Serve in Pickleball: What Happens When the Serve Hits the Net

October 27, 2026 by shoaib

You serve, the ball clips the net, and the whole court freezes. One player calls for a replay. Another player is already moving to return it.

That moment causes more arguments than almost any other serve in recreational pickleball. The confusion usually comes from tennis, where a net-cord serve is replayed.

Modern pickleball works differently. There is no let replay for a serve that touches the net. The ruling depends on where the ball lands, not on whether it touched the net.

Key Takeaways

Keep this short version in mind, and most net-cord disputes will end before they start.

  • A serve that touches the net and lands in the correct service court is live. Play continues.
  • A serve that touches the net and lands in the kitchen is a fault. The kitchen line counts as kitchen.
  • A serve that touches the net and lands outside the correct service court is a fault.
  • A serve that touches the net post or net support system is a fault, even if it might otherwise land in.
  • Calling “let” does not stop play or earn a replay under current pickleball rules.
  • A replay happens only when both sides agree to one before play, or when a referee orders one for another reason.
  • Watch the landing, not the net. The landing decides live or fault every time.

The Short Answer: There Is No Let Replay in Modern Pickleball

In current pickleball, the word “let” does not create a serve replay. A serve may clear the net or touch the net on its way across.

If that serve then lands in the correct diagonal service court, and clears the non-volley zone, it is a legal serve. The receiver must play it.

The server does not get a second attempt. The receiving side does not get to stop the rally and ask for a redo.

This rule applies in singles and doubles. It applies whether the net touch was a light graze or a heavy clip that changed the ball.

What Counts as a Net-Cord Serve

Players use several terms for the same event. Sorting out the words first makes the ruling much easier to apply on court.

Net Cord, Net Tape, and the Top Band

The net cord, net tape, and top band all describe the top edge of the net. A ball that brushes, clips, or rolls over that edge is a net-cord serve.

The size of the touch does not matter. A faint tick and a hard deflection are treated exactly the same way by the ruling.

What matters is what happens next. The ball must still cross the net and land where a legal serve must land.

What Is Not a Net-Cord Serve

A ball that hits the body of the net below the top band and drops back is not a live net-cord serve. It never reached the receiving court.

A ball that hits a net post, a centre support, or another part of the net support system is a different case. That contact is treated separately below.

A ball that clears the net cleanly is simply a normal serve. The net-cord ruling adds nothing to it, and it also takes nothing away.

Live or Fault: The Ruling Table

Use this table as a quick court-side check. Find the landing first, then read across to the ruling.

Serve Outcome Ruling What Happens Next
Hits net, lands in correct service court Live Play continues; receiver must return it
Hits net, lands on a service court line Live Lines are in, except the kitchen line
Hits net, lands in the kitchen Fault Server loses the serve or the rally
Hits net, lands on the kitchen line Fault The kitchen line counts as kitchen
Hits net, lands outside the service court Fault Server loses the serve or the rally
Hits net, drops back on the server side Fault The serve never reached the receiving court
Hits net post or support system Fault Fault on the server, whatever the landing
Hits net, then touches the receiver Point to serving side The ball was live when it touched the receiver

Serve by Serve: Every Outcome Explained

The table gives the answer at a glance. This section explains why each outcome is ruled that way, so the call feels clear rather than arbitrary.

Hits the Net and Lands in the Correct Service Court

This is the classic case that used to be called a let. Today, it is simply a legal serve, and the rally is live.

The receiver must be ready to play it, even if the ball drops short or bounces awkwardly. An awkward bounce is part of the game, not a reason for a replay.

The serving side keeps any advantage the net gave it. That may feel unfair in the moment, but it is the rule for both sides equally.

Hits the Net and Lands in the Kitchen

A net-cord serve often loses speed and drops short. If it lands in the non-volley zone, it is a fault.

The kitchen line is part of the kitchen for a serve. Landing on that line is therefore a fault, even by a fraction of an inch.

This fault is no different from a clean serve that lands in the kitchen. The net touch does not rescue a short serve.

Hits the Net and Lands Outside the Service Court

A serve that clips the net and then flies long or wide is a fault. The net touch does not change an out ball into a good ball.

Line calls still belong to the receiving side for balls landing on its side. If the ball is clearly out, call it out and move on.

If the ball lands on the sideline or baseline of the correct service court, it is in. Only the kitchen line is treated differently on a serve.

Hits the Net and Drops Back on the Server Side

Sometimes a serve hits the tape, loses all forward motion, and falls back on the server side. That serve has failed.

It never crossed the net, so it never reached the receiving court. There is nothing for the receiver to play, and no rally to continue.

Call it a fault and continue with the next server or the next rally, just as you would for any other failed serve.

Hits the Net Post or the Net Support System

The net posts and supports are not part of the playing net for this purpose. A serve that contacts them is a fault.

This applies even if the ball might have landed in the correct court afterwards. The support contact itself ends the serve as a fault.

Do not confuse a post with the top band. The top band is the net itself, while the post is the structure holding the net up.

Hits the Net and Then Touches the Receiver

A net-cord serve that crosses the net is a live ball. If it then touches the receiver or the receiver partner, the serving side wins the point.

This is why receivers must stay alert after a net touch. Standing still and letting the ball hit you does not earn a replay.

The same principle applies to a clean serve that touches a receiver before bouncing. A live serve that strikes a player is not a do-over.

Doubles: Receiver Positioning on Net-Cord Serves

Net-cord serves cause the most trouble in doubles, because two receivers must react as one team. Clear roles prevent most of the confusion.

The Designated Receiver Stays Ready

Only the designated receiver should return the serve. That player should stand behind the baseline, ready to move forward for a short ball.

A net-cord serve often drops shorter than a normal serve. A receiver who stands too deep will struggle to reach it before the second bounce.

Stay light on your feet during the serve. A small split step as the server strikes helps you move either forward or sideways.

The Partner Stays Clear and Calls It

The non-receiving partner should stand where the serve cannot easily strike them. Do not crowd the receiver or block their view of the ball.

A good partner position is near the kitchen line on the opposite side, ready for the third shot. That spot keeps you out of the serve path.

Call the landing early and clearly. A simple “in,” “out,” or “short” helps the receiver commit, rather than hesitating at the worst moment.

If the serve touches the partner before bouncing, the serving side wins the point. Moving clear is therefore a real tactical duty, not just good manners.

Covering the Short Net-Cord Drop

When a net-cord serve drops just past the kitchen line, the receiver must move forward fast. The partner should not rush across and cause a collision.

The receiver takes the short ball, while the partner holds position and prepares for the next shot. That division keeps the court covered.

After a short return, expect a fast reply. Net-cord rallies often speed up quickly, because both teams are already close to the net.

Let Serve Checklist: Decide It in Three Seconds

Run through this checklist in order. Stop at the first answer that fits, and you will have the ruling.

  • Did the serve touch a post or support? If yes, it is a fault.
  • Did the serve cross the net? If no, it is a fault.
  • Did it land in the kitchen or on the kitchen line? If yes, it is a fault.
  • Did it land outside the correct diagonal service court? If yes, it is a fault.
  • Did it land in the correct service court? If yes, it is live. Play on.
  • Did it touch a receiver while live? If yes, the point goes to the serving side.
  • Did anyone call “let”? Ignore the word and apply the checklist instead.
  • Are you still unsure about the landing? Apply the normal line-call rule for your game.
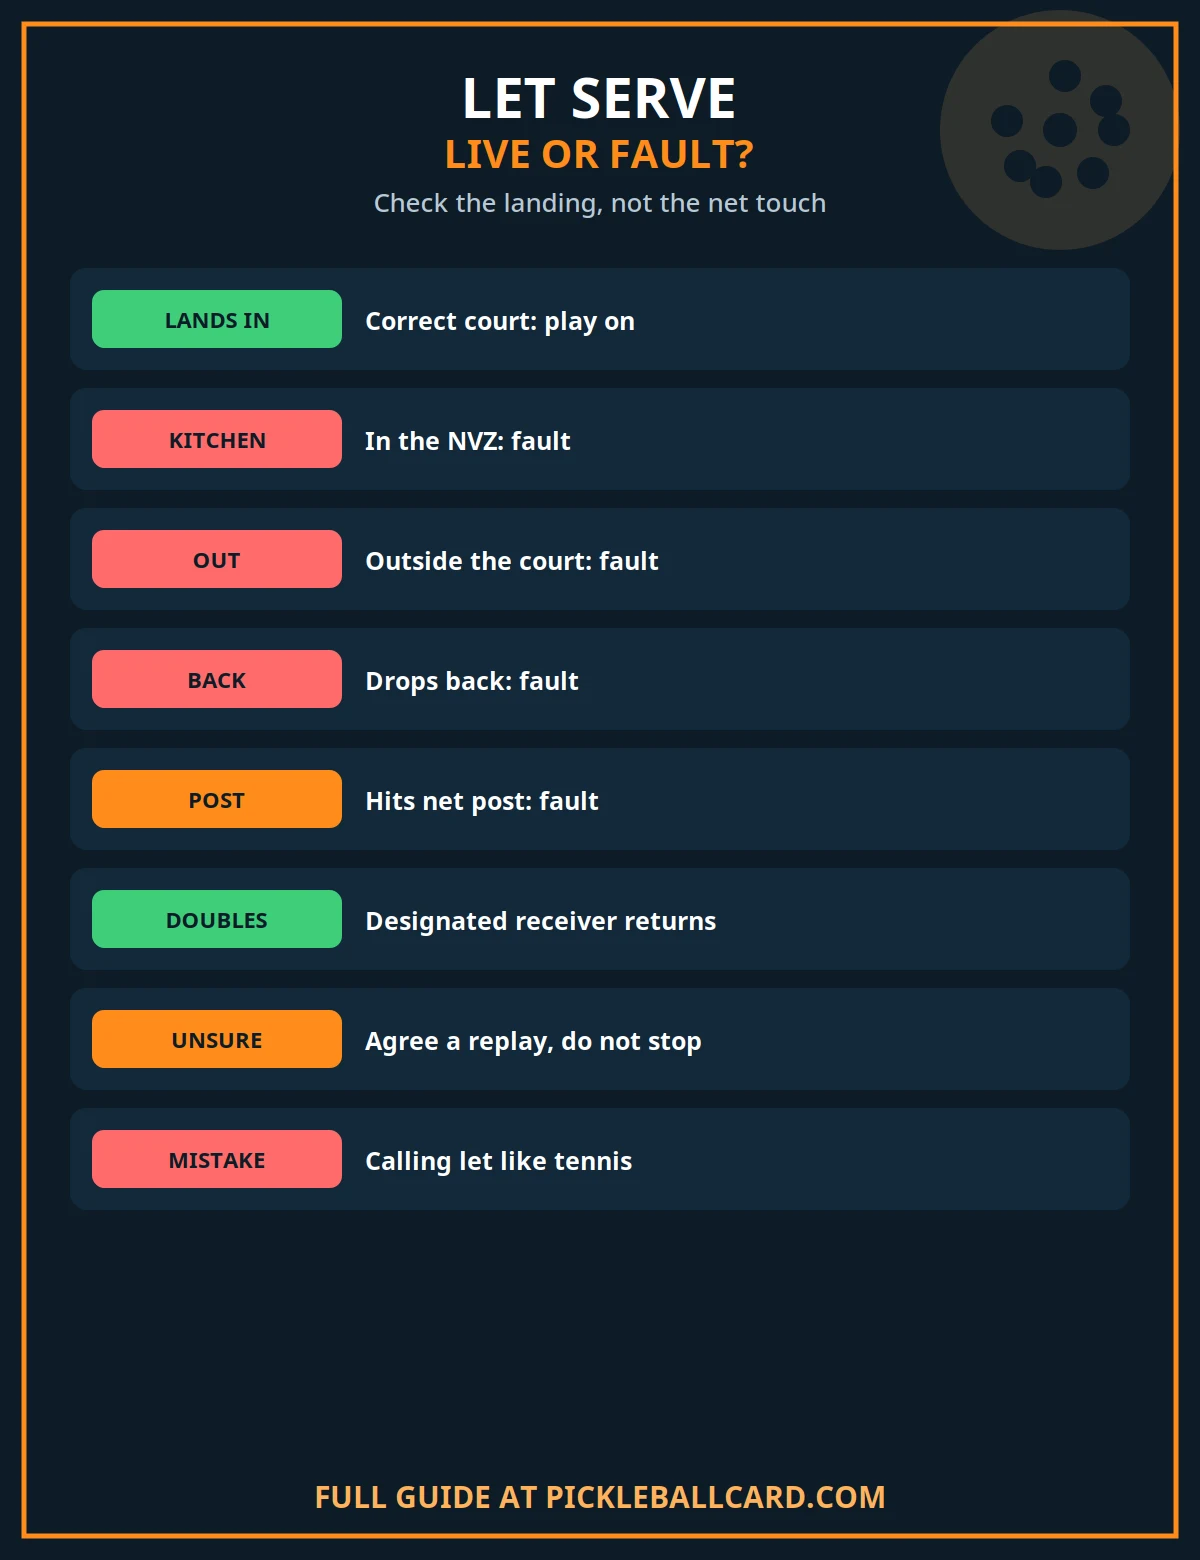
let serve pickleball checklist
Check the landing, not the net touch. In the correct court means play on. In the kitchen or out means fault.

Why Players Still Call Let: Tennis Habits and the Pre-2021 Rule

Most let calls come from habit, not from the current rulebook. Tennis players learn early that a net-cord serve is replayed, and that instinct travels with them.

Pickleball borrowed that idea in its early years. A serve that touched the net and landed in the correct court was replayed without penalty.

That old let rule ended with the rule changes effective 1 January 2021. From that date, a net-cord serve that lands in is live, with no replay.

The change removed a constant source of disputes. Players no longer had to agree on whether a serve had grazed the net before deciding what to do.

It also removed an unfair edge. Under the old rule, a server could keep a lucky net-cord serve out of play by claiming a let, then try again.

Tennis Let Rules Are Not Pickleball Rules

Tennis still replays a serve that touches the net and lands in the correct service box. That is a tennis rule, and it stays in tennis.

Pickleball has no second serve to fall back on. A fault ends the serve, so a replay rule would change the balance of every service game.

When you switch sports, switch the rule too. Carrying the tennis let into pickleball will cost your team points and patience.

When You Are Unsure: What to Do

Uncertainty is normal, especially when a serve clips the net at speed. The answer is not to invent a replay, but to follow a clear order.

Do Not Stop Play on Your Own

If you are the receiver and the ball may be live, play it. Stopping to argue gives away a ball you might have returned.

If you are the server and the ball may be live, stay ready. A serve you assume is dead can still be returned for a winner.

Stopping play unilaterally can itself create a fault or a dispute. Play first, discuss second, and only after the rally ends.

Replay Only by Agreement, Not by Rule

There is no official replay for a net-cord serve that lands in. A group may still agree, before a match starts, to replay such serves as a house rule.

That agreement must be made in advance and apply to everyone equally. It is a social choice, not an official ruling.

Do not spring a house rule on opponents mid-match. If it was not agreed before play, the official ruling stands.

In a Refereed Match, the Referee Decides

In a refereed match, play to the referee call. The referee judges the landing and any fault, just as for any other serve.

Players should not call a let to the referee and expect a replay. State what you saw, briefly, and accept the ruling.

After the match, you can check the rulebook together. During the match, the referee ruling keeps play moving fairly.

Common Mistakes With Net-Cord Serves

These errors appear in almost every open-play session. Avoiding them will make your games smoother and your calls more respected.

  • Calling “let” and stopping, when the ball landed in and was live.
  • Assuming a hard net clip must be a fault, whatever the landing.
  • Treating the kitchen line as in on a serve, when it counts as kitchen.
  • Standing where a live serve can strike you, then asking for a replay.
  • Replaying a serve because one player felt it was unlucky, without prior agreement.
  • Arguing about whether the net was touched, instead of judging the landing.

Frequently Asked Questions

Is there a let serve in pickleball?

No. Modern pickleball has no let serve replay. A serve that touches the net and lands in the correct service court is live.

The old let replay ended with the rule changes effective 1 January 2021. Since then, the landing alone decides the outcome.

What happens if the serve hits the net and lands in?

Play continues. The receiver must return the ball, and the rally proceeds exactly like any other legal serve.

The server keeps the point if the receiver fails to return it. The net touch gives neither side a second chance.

What happens if the serve hits the net and lands in the kitchen?

It is a fault. The serve failed to clear the non-volley zone, so the server loses the serve or the rally.

Landing on the kitchen line is also a fault. For serves, that line belongs to the kitchen, not to the service court.

Does a serve that hits the net post count as live?

No. A serve that contacts a net post or another part of the net support system is a fault on the server.

This is different from touching the top band of the net. The top band is the net itself, while the post is its support.

Can we agree to replay net-cord serves in a friendly game?

Yes, if everyone agrees before the match starts. That is a house rule for your group, and it must apply equally to both sides.

Without that prior agreement, the official ruling applies. Do not introduce a replay rule halfway through a match.

What should I do if I am not sure whether the serve landed in?

Play the ball if you can, then resolve the call after the rally. Use the normal line-call practice for your game.

For balls on your side, the receiving side makes the call. Genuine doubt should favour the opponent, not your own team.

The Bottom Line

Forget the word “let” when a pickleball serve touches the net. Ask one question instead: where did the ball land?

If it landed in the correct service court, play on. If it landed in the kitchen, on the kitchen line, or out, it is a fault.

That single test settles almost every net-cord serve. It also keeps games fast, fair, and free of the old let argument.

For the full serving rules, see our guide to serving rules in pickleball, and for the wider game, see pickleball rules. For a close cousin of this ruling, see ball comes back over the net.

Sources: USA Pickleball Official Rulebook, via the USA Pickleball official rules page. Rulings are summarised in plain language; check the current rulebook edition for the exact wording.

shoaib
shoaib

Shoaib is the publisher of Pickleball Card. He oversees the site’s guides to pickleball rules, ratings, strategy and gear, all researched from primary sources — the USA Pickleball Rulebook, DUPR and manufacturer documentation — and updated as the game changes.
pickleballcard.com

Filed Under: About Pickleball

Overhead Smash in Pickleball: How to Hit It

October 27, 2026 by shoaib

The overhead smash is the most satisfying shot in pickleball. A high ball floats up, you move under it, and the rally ends with one clean swing.

It is also one of the most wasted shots in the game. Players rush it, hit it off balance, or swing so hard that the ball sails long.

This guide fixes that. You will learn how to read the high ball, move to it safely, set up correctly, and choose placement over raw power.

Key Takeaways

  • Read the lob early, turn sideways, and move under the ball with small shuffle steps.
  • Never backpedal blindly. Turn, shuffle, and keep your eyes on the ball at all times.
  • Contact the ball above and slightly in front of your hitting shoulder for a clean downward strike.
  • Aim for big targets, especially at the feet and down the middle, rather than swinging at full power.
  • Smash only when the ball is high and you are balanced. Otherwise, place it or drop it back.
  • Recover to a ready position after every smash, because a good opponent may return it.
  • Short, focused drills build a reliable smash faster than endless full-power practice swings.

What Is an Overhead Smash in Pickleball?

An overhead smash is a hard, downward shot hit from above shoulder height. It is usually played against a lob, a high return, or a ball that pops up.

The official rulebook defines the overhead slam as a hard overhand shot. That simple definition hides a lot of technique, timing, and judgment.

Most smashes happen in doubles, when one team lobs and the other team attacks. The smashing team holds the advantage, but only if the shot is controlled.

A smash is not a serve, and it is not a groundstroke. It borrows its motion from throwing a ball, with the paddle acting as an extension of your arm.

Reading the Lob and the High Ball

Every good smash starts before the swing. It starts with the read. The sooner you judge the height, depth, and direction of the ball, the easier the shot becomes.

Watch your opponent’s paddle at contact. An open paddle face and an upward swing usually mean a lob is coming, not a drive.

Watch the ball as soon as it leaves the paddle. A steep, floating arc means you have time. A flat, fast ball means you must react at once.

Three Early Reads That Save the Point

First, judge depth. A short lob lands near the kitchen line and is easy to attack. A deep lob pushes you toward the baseline and demands more care.

Second, judge direction. Balls over your hitting shoulder are the easiest to smash. Balls over your non-hitting shoulder need a quick adjustment or a switch of hands in doubles.

Third, judge height. A ball that will peak above your head is a smashing ball. A ball that peaks at shoulder height is usually better placed than smashed.

Call the ball early in doubles. A loud, clear call such as “Mine!” prevents hesitation and stops both partners from chasing the same ball.

For a full breakdown of the shot you are attacking, read our guide to the Pickleball Lob Shot and how it is built.

Footwork and Positioning: Move Under the Ball

Footwork makes or breaks the overhead smash. The best swing in the world cannot rescue a player who arrives late, leaning backward, and off balance.

Your goal is simple: arrive early, stand balanced, and hit the ball from a stable base. Everything else follows from that position.

Turn Sideways First

Turn your body sideways as soon as you read a lob. Your non-hitting shoulder should point toward the net, and your feet should align with the flight of the ball.

The sideways turn opens your hitting shoulder, loads your body like a coiled spring, and lets you track the ball without twisting your neck.

Players who stay square to the net often reach across their body. That reach costs power, accuracy, and balance in equal measure.

Shuffle, Do Not Backpedal

Move with small, quick shuffle steps or a crossover step. Keep your feet under your hips and your weight on the balls of your feet.

Never run backward with your back to the ball. Backpedaling blindly is how players trip, collide with partners, and lose sight of the ball entirely.

If the lob goes deep, turn and shuffle back while watching the ball over your shoulder. If it goes very deep, let it bounce and reset instead.

Get Under the Ball, Then Stop

Position yourself so the ball will drop just in front of your hitting shoulder. That spot gives you a full, natural swing without reaching.

Stop your feet before you swing. A moving player cannot control contact height, paddle angle, or direction with any consistency.

A small adjustment step at the last moment is fine. A full sprint through contact is not. Arrive, settle, and then swing.

Good footwork starts before the lob arrives. Our guide to the Pickleball Split Step explains the small hop that keeps you ready to move in any direction.

Paddle Preparation: Set Early, Stay Relaxed

Raise your paddle early, while you are still moving into position. A late paddle preparation forces a rushed, arm-only swing.

Take the paddle back and up, with the paddle head above your hand and the face slightly open. Think of a throwing motion, not a tennis serve wind-up.

Keep your grip relaxed and your wrist loose. A tight grip locks the wrist, slows the paddle head, and sends the ball anywhere but your target.

Your non-hitting hand plays a real role here. Point it at the ball to help track its flight, then pull it down as you swing.

That pointing arm is also your balance aid. It keeps your shoulders level and stops your body from spinning open too early.

Contact Point: High and Slightly in Front

The ideal contact point is above your head and slightly in front of your hitting shoulder. From there, you can strike down into the court with control.

Contact too far behind you forces an upward or flat swing. The ball then floats long or pops up for an easy counterattack.

Contact too low turns the smash into a drive. It may still win the point, but it gives your opponents far more time to react.

Reach up to meet the ball at its highest comfortable point. Do not jump unless you must, because a jump adds timing risk and landing trouble.

If the ball is already falling past shoulder height when you arrive, change your plan. Place it firmly or drop it back, and live to attack the next ball.

The Swing and Follow-Through

The swing should be compact, fast, and smooth. Start with your shoulder and upper body, let the arm follow, and snap the wrist through contact.

Lead with the edge of the paddle, then rotate the face through the ball. This throwing action generates paddle-head speed without a wild, looping swing.

Strike down and through the ball, aiming into the court rather than at the net. A slightly closed paddle face at contact keeps the ball down.

Follow through across your body and down toward your opposite hip. A full follow-through keeps the swing smooth and prevents a jerky, arm-only hit.

Do not stop your swing at contact. A checked swing often leaves the ball sitting up, which is the worst possible outcome from a smash.

Aiming: Placement Beats Pure Power

Most recreational players overhit the overhead smash. They aim for a highlight, swing at full power, and watch the ball sail long or into the net.

Placement wins more points than power. A well-placed smash at moderate pace is far harder to return than a wild blast that misses.

Aim for large, high-percentage targets. The middle of the court, the feet of your opponents, and the open space behind a retreating player are all excellent choices.

Hitting at the feet is especially effective. A ball landing at an opponent’s feet forces an upward, defensive reply or no reply at all.

Down the middle works well in doubles. It can create confusion between partners, and neither player can attack it comfortably.

When to Smash, Place, or Drop

Not every high ball deserves a full smash. The right choice depends on the height of the ball and where you are standing when you reach it.

Use this decision table before you commit to a swing. It keeps you honest about which balls are true attacking chances.

Ball height and your position Best choice Why it works
High ball, balanced, near the kitchen line Full smash You can strike down steeply into a big target.
High ball, balanced, at midcourt Firm placed smash Power at about three-quarter pace keeps the ball in play.
Medium ball, off balance or on the move Place it at the feet A controlled placement beats a wild swing from a poor base.
Deep ball near the baseline Drop or reset A smash from deep court usually sails long or sits up.
Ball falling below shoulder height Drive or drop The downward angle is gone, so attack with placement instead.

When in doubt, choose the safer shot. A placed ball keeps you in the rally, while a missed smash hands the point away for free.

Overhead Smash Checklist

Run through this checklist during practice until each step feels automatic. Then use it as a quick self-check between games.

  • Read the lob early from the opponent’s paddle face and swing path.
  • Call the ball loudly in doubles so both partners know who takes it.
  • Turn sideways and point your non-hitting shoulder toward the net.
  • Shuffle under the ball with small steps, and never backpedal blindly.
  • Stop your feet and settle your balance before you start the swing.
  • Raise the paddle early, with a relaxed grip and a loose wrist.
  • Contact the ball above and slightly in front of your hitting shoulder.
  • Aim at the feet or down the middle, not at the smallest corner.
  • Follow through across your body and recover to a ready position.
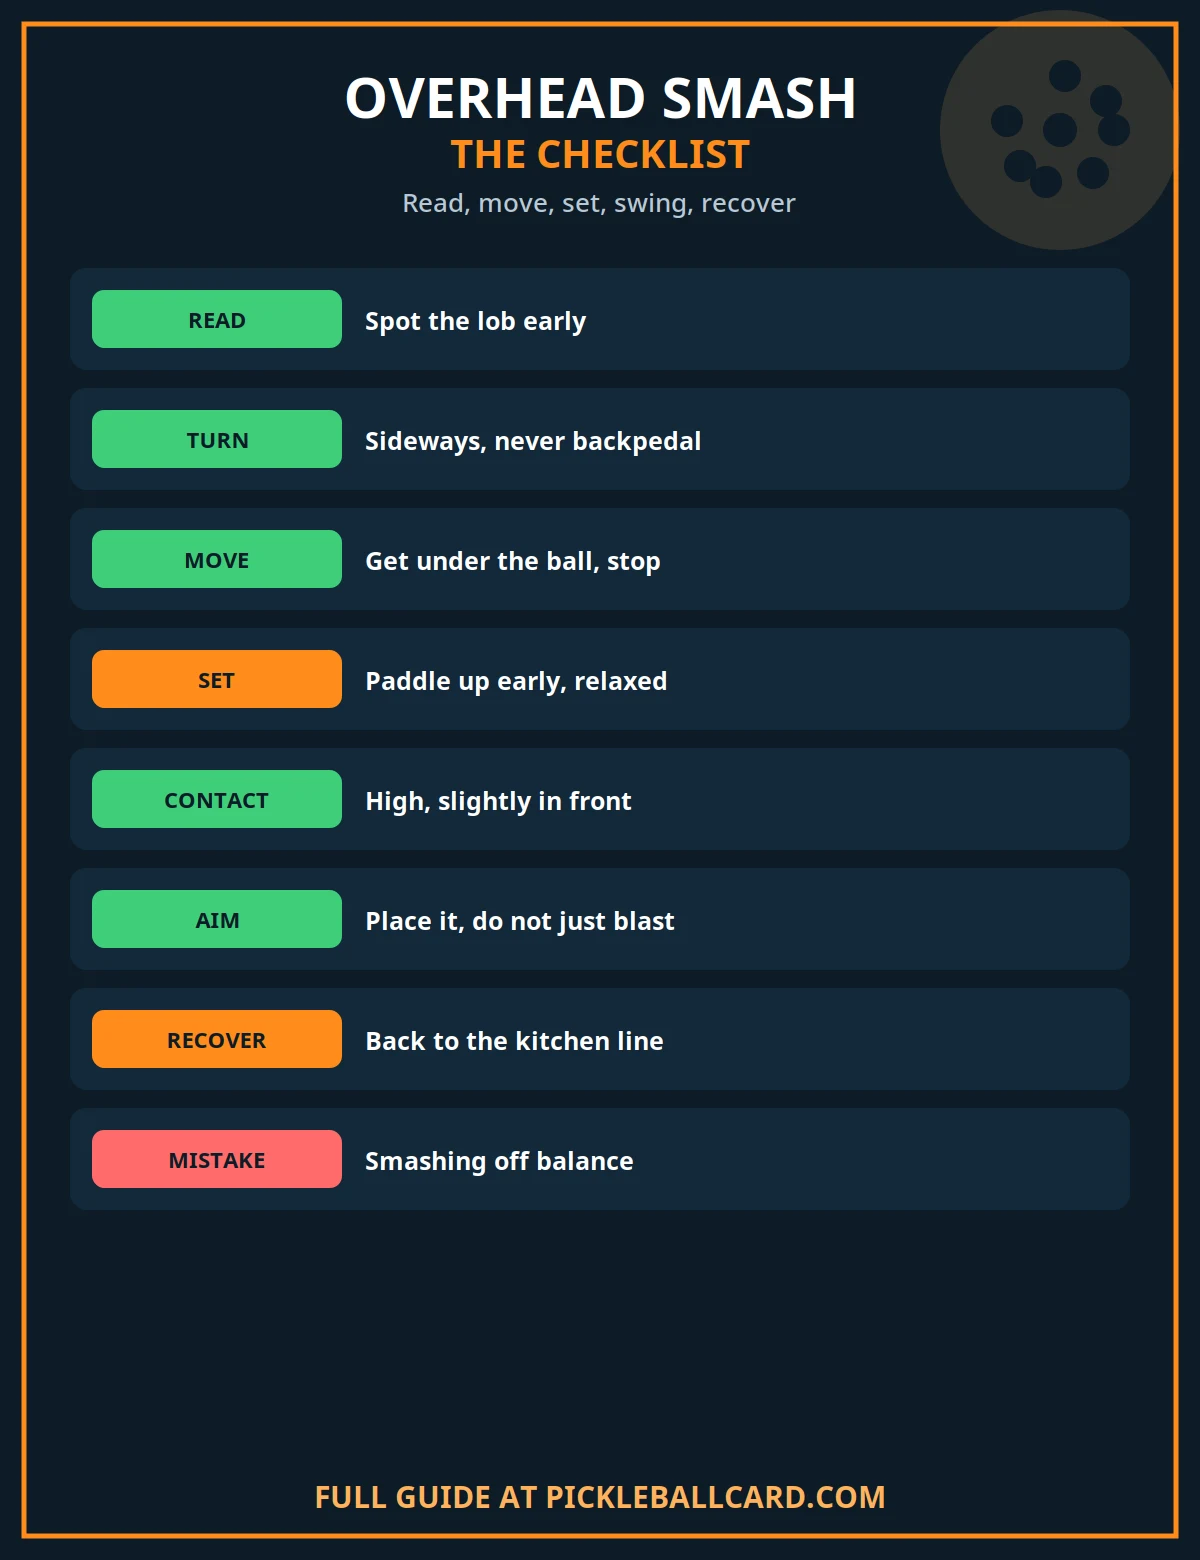
Overhead smash pickleball checklist
Run through this checklist before every high ball so your smash stays balanced, placed and under control.

Defending Against the Smash: A Brief Word

Understanding defense makes your own smash better, because it shows you what a prepared opponent will do with a poor smash.

Against a smash, the defender should split step, stay low, and hold the paddle up in front of the body. The goal is a block, not a counterattack.

Blocking the ball back low, especially into the kitchen, can turn defense into a new rally. Trying to win the point outright from a smash usually fails.

That is why your smash targets matter so much. A smash hit straight at a ready opponent comes back. A smash hit at the feet usually does not.

Common Overhead Smash Mistakes

Most smash errors come from a handful of repeatable faults. Fix one at a time, and your consistency will climb quickly.

Hitting Off Balance

Smashing while still moving backward or sideways is the most common error. The paddle face wobbles, the timing slips, and the ball sprays wide or long.

The fix is patience. Arrive, stop, and swing. If you cannot stop in time, place the ball instead of smashing it.

Overhitting Every Ball

Full-power swings feel strong but destroy accuracy. The ball travels farther, the margin for error shrinks, and small timing mistakes become big misses.

Practice at three-quarter pace until you can place ten smashes in a row. Then add pace gradually, without losing placement.

Smashing From Too Deep

A smash from the baseline looks brave and usually ends badly. The distance is long, the angle is flat, and the net becomes a real obstacle.

From deep court, reset with a drop or a drive. Save the smash for balls you can attack from midcourt or closer.

Contacting the Ball Too Late

Letting the ball drop behind you turns a downward smash into an upward push. The result is often a soft ball your opponents attack.

Move earlier and trust your read. If the ball still gets behind you, step aside and let your partner take it when possible.

Forgetting to Recover

Players often admire their smash instead of preparing for the return. A blocked return then lands in open court while they stand still.

Recover at once. Return to a ready stance, paddle up, and expect the next ball. A smash is one shot, not the end of the rally.

Smashing at the Net Player Every Time

Repeatedly targeting the same opponent teaches them your pattern. They will adjust, block better, and eventually punish your predictability.

Vary your targets and your pace. A slower, well-placed smash often wins more points than a faster, predictable one.

Drills to Build a Reliable Overhead Smash

Drills work best when they isolate one skill at a time. Start slow, build consistency, and only then add pace or pressure.

Drill 1: Lob and Smash Rally

One partner lobs gently from the kitchen line while the other practices the full routine: read, turn, shuffle, stop, and smash at the feet.

Keep the pace moderate and count consecutive successful smashes. Aim for ten in a row before either player increases the pace.

Drill 2: Placement Targets

Place two cones or towels on the court: one down the middle and one at the feet of a target zone. Smash ten balls, alternating between the two targets.

Score only balls that land in a target zone. This drill teaches placement discipline far better than open-court smashing ever will.

Drill 3: Deep Lob Decisions

Have your partner mix short lobs and deep lobs. Smash the short ones, and reset the deep ones with a drop or a controlled drive.

This drill builds judgment, which is the skill most players skip. Good decisions turn a wild smasher into a reliable attacker.

Drill 4: Smash and Recover

After every smash, sprint back to a ready position at the kitchen line before the next ball is fed. No admiring the shot is allowed.

This drill links the smash to the next shot, which is where real matches are won. A smash plus recovery beats a smash plus standing still.

When a lob beats your smash, the other side of the rally matters too. Our guide to How to Defend the Lob in Pickleball explains reading, positioning and resets from the defender’s side.

Rules to Remember: The Kitchen Line

The non-volley zone, known as the kitchen, shapes every overhead. You may not volley a ball, including a smash, while standing in the kitchen or on its lines.

Momentum matters too. If your follow-through carries you into the kitchen after a volley, that is a fault even if the ball is already dead.

The safe habit is simple. Smash from behind the kitchen line, keep your feet clear of it, and only step in after a ball has bounced.

For the authoritative wording, see the Official USA Pickleball Rulebook published by USA Pickleball, which governs the non-volley zone and fault rules.

Frequently Asked Questions

What is the best grip for an overhead smash in pickleball?

Use your normal forehand grip, usually a continental or mild eastern grip. Avoid changing grips mid-rally, because a late grip change ruins timing and paddle control.

Keep the grip pressure relaxed, around a four out of ten. A loose grip lets the wrist snap naturally and keeps the paddle head fast through contact.

Should I let the ball bounce before smashing it?

Usually, no. Hitting the ball out of the air gives you a higher contact point and a steeper downward angle, which makes the smash harder to return.

Let it bounce only when you are out of position, the ball is very deep, or the bounce gives you a cleaner, more balanced strike.

Why does my overhead smash keep going into the net?

The most common cause is contacting the ball too low or too far behind you. Both faults flatten the swing and send the ball into the net tape.

Move under the ball earlier, contact it above and in front of your shoulder, and aim down into the court rather than across it.

Why does my overhead smash keep going long?

Going long usually means too much power, an open paddle face, or a smash attempted from too deep in the court. Any one of these shrinks your margin.

Reduce your swing to three-quarter pace, close the paddle face slightly, and choose a bigger target such as the middle of the court.

Can I smash a ball while standing in the kitchen?

No, not as a volley. Volleying from inside the non-volley zone, or touching its lines while volleying, is a fault under the official rules.

You may hit a ball from the kitchen only after it has bounced. Step back out, or wait for the bounce, before attacking a high ball.

How do I smash in doubles without colliding with my partner?

Call the ball early and clearly, and agree in advance who covers lobs over the middle. The player facing the ball usually takes it.

The other partner should move aside and prepare for the next shot, not crowd the smasher or reach across for the same ball.

Final Thoughts: Smash Smart, Not Just Hard

A great overhead smash is built from small, repeatable habits. Read early, move safely, set up calmly, and aim with intent.

Practice placement before power, and let the full-power smash earn its place in your game. When it does, it will be a weapon, not a gamble.

Start with the lob-and-smash rally drill, add the placement targets, and track your consistency over two weeks. The results will show up in your matches.

shoaib
shoaib

Shoaib is the publisher of Pickleball Card. He oversees the site’s guides to pickleball rules, ratings, strategy and gear, all researched from primary sources — the USA Pickleball Rulebook, DUPR and manufacturer documentation — and updated as the game changes.
pickleballcard.com

Filed Under: About Pickleball

Forehand Drive in Pickleball: Power and Consistency

October 27, 2026 by shoaib

The forehand drive is the shot that turns a neutral rally into pressure. It is a firm, flat-to-slightly-topsin groundstroke hit from the forehand side, usually from the baseline or midcourt, with the goal of pushing opponents back or forcing a weak reply.

Many players chase power by swinging harder with the arm. That approach produces errors, sore shoulders, and drives that sail long. Real drive power comes from the legs, hip rotation, and a repeatable swing path, with the arm guiding rather than muscling the ball.

This guide breaks the forehand drive into teachable parts: grip, stance, swing path, contact point, and follow-through. It also covers when to drive instead of dropping or dinking, the mistakes that ruin consistency, and drills that make the shot hold up in matches.

Key Takeaways

  • Power comes from the legs and hip rotation, not from swinging harder with the arm.
  • Use an eastern or mild semi-western grip, with a relaxed hand and a firm wrist at contact.
  • Contact the ball in front of your body, between knee and waist height, whenever possible.
  • Keep the backswing compact and the swing path smooth, finishing toward your target.
  • Drive when the ball sits up and you are balanced; drop or dink when it stays low.
  • Consistency is built by repeating the same setup, not by changing your swing every rally.

What Is a Forehand Drive in Pickleball?

A drive is a groundstroke, meaning the ball bounces before you hit it. That distinction matters because the two-bounce rule shapes the early part of every rally, and the non-volley zone rules shape what you can do near the net.

Unlike a dink, which is soft and played at the net, a drive travels with pace and depth. Unlike a lob, which arcs high to buy time, a drive stays flatter and aims to keep opponents pinned behind the baseline.

The drive is most often a third shot, a return of serve, or a passing shot. In each case the goal is the same: hit through the ball with control, land it deep, and take time away from your opponents.

Your forehand is usually your stronger side, which is why drives tend to come from it. If you are still deciding which side to favor in different situations, our forehand vs backhand in pickleball comparison explains the strengths and limits of each side.

The Forehand Drive Grip

Start with the eastern forehand grip, the standard choice for a drive. Hold the paddle as if you were shaking hands with it, with the V between your thumb and index finger resting on the top bevel of the handle.

The eastern grip keeps the paddle face naturally square to the target at contact. That makes it easier to drive the ball flat and deep without fighting the paddle angle.

Players who want a little more topspin can rotate the hand slightly toward a mild semi-western grip.

How Tight Should You Hold the Paddle?

Hold the paddle firmly enough that it does not twist at contact, but loosely enough that your wrist stays free during the swing. A death grip locks the wrist, slows the swing, and sends shock into the forearm.

Think of a grip pressure of about four out of ten during preparation, rising briefly to six or seven at contact. The squeeze happens at the ball, not during the whole swing.

Check Your Grip Before Every Session

Grips drift without players noticing, especially after switching between forehand and backhand shots. Before you drill, set the eastern grip deliberately and hit ten easy drives to confirm the face angle.

If drives keep sailing long, check the grip first. A hand that has rotated too far under the handle opens the face and launches the ball. A hand rotated too far over it closes the face and drives the ball into the net.

Stance and Ready Position

Good drives start before the ball arrives. From the ready position, stand with feet shoulder-width apart, knees bent, weight on the balls of your feet, paddle in front of your body.

As the ball comes to your forehand side, turn sideways. Your non-dominant shoulder points roughly toward the net, and your weight loads onto the back foot. This sideways unit turn is what lets your hips unwind into the shot.

Step toward the ball with your front foot as you swing. The step does two jobs at once: it moves your weight forward into the shot, and it positions your body so contact happens in front of you rather than beside you.

The Swing Path, Step by Step

The forehand drive swing has four phases: preparation, backswing, forward swing with contact, and follow-through. Keeping each phase compact is what makes the shot repeatable under pressure.

Phase 1: Preparation and Unit Turn

Turn your shoulders and hips together as soon as you read the ball to your forehand side. Keep both hands on the paddle during the turn, which keeps the swing short and the paddle face stable.

Your paddle should drop slightly below the expected contact height during preparation. Starting low makes the low-to-high swing path natural, and it stops you from chopping down on the ball.

Phase 2: A Compact Backswing

Take the paddle back only as far as you need to generate pace. For most drives, the paddle head stops roughly beside or just behind your back hip, not wrapped far behind your body.

A long backswing feels powerful but costs time and balance. Against faster balls, it leaves you late and jammed. A compact backswing lets you meet the ball out front, which is where control lives.

Phase 3: Forward Swing and Contact

Unwind your hips first, then your shoulders, then let the arm and paddle follow. This sequence is the kinetic chain: big muscles fire first, and the smaller ones finish the job.

Swing from low to high through the ball, with the paddle moving toward your target. The swing should feel smooth and unhurried, even when you are hitting firmly. Rushing the forward swing usually means the hips never fired at all.

Phase 4: Follow-Through and Recovery

Finish with the paddle pointing toward your target, roughly at shoulder height, with your chest facing the net. A full follow-through is not decoration; it is evidence that you swung through the ball instead of stopping at it.

After the finish, recover immediately. Return to a balanced ready position, paddle in front, and watch your opponents. Drives that win points still require you to be ready for the next ball.

Where Power Really Comes From

Power in a forehand drive starts at the ground. Bent knees let you push upward and forward as you swing, and that leg drive feeds directly into hip rotation. Players who stand tall and arm the ball give up their biggest power source.

Hip rotation is the engine. When your hips unwind from the sideways loaded position toward the net, your shoulders and arm are carried along for free. The arm adds the final snap of pace, but it should never be the main source.

Weight transfer ties it together. Load onto the back foot during preparation, then shift onto the front foot through contact. If your weight is still on the back foot when you hit, the ball will float or fall short.

  • Legs: bend your knees, push through the ground, and drive your weight forward.
  • Hips: rotate from the sideways position toward the net as the swing begins.
  • Core: keep the trunk firm so rotation transfers cleanly from hips to shoulders.
  • Shoulders and arm: let them follow the rotation, guiding the paddle to the target.

Contact Point and Paddle Face

The ideal contact point is in front of your body, slightly ahead of your front foot, between knee and waist height. Hitting out front lets you see the ball onto the paddle and direct it with the full swing behind it.

When contact drifts too close to your body, you lose power and direction. When it drifts too far in front, you reach and lose balance. Small footwork adjustments matter more than big swing changes for fixing contact problems.

Keep the paddle face square to slightly closed at contact for a flat drive. A face that is too open sends the ball long.

A face that is too closed sends it into the net. If your drives are consistently long or short, check the face angle before changing anything else.

When to Drive, Drop, or Dink

Choosing the right shot matters as much as hitting it well. The decision usually comes down to three things: the height of the ball, your balance, and where your opponents are standing.

Drive when the ball bounces up into your strike zone and you are set and balanced. Drop when the ball stays low, you are moving, or your opponents are already at the net waiting to attack.

Dink when everyone is at the net and the rally is a patience contest.

Situation Best Shot Why
Ball bounces up, you are balanced Drive You can hit through the ball with control and depth.
Ball stays low at your feet Drop A drive from low contact usually sails long or nets.
Opponents are back, you are at midcourt Drive Depth pushes them further back and opens the court.
Opponents are set at the net Drop or dink A drive into set opponents comes back faster than it left.
You are stretched or off balance Drop or reset Power without balance produces errors, not winners.
All four players are at the net Dink Soft, low shots keep you safe until an attackable ball appears.

The rules also shape this choice. Under the USA Pickleball official rules, the ball must bounce before it can be volleyed in the non-volley zone.

That zone extends seven feet from the net on each side. A drive from behind that zone is a groundstroke, so it is legal from anywhere once the ball has bounced.

Common Forehand Drive Mistakes

Most drive problems come from a small set of repeatable errors. Fixing one of these usually improves several symptoms at once, so work through them in order rather than rebuilding your whole swing.

Mistake 1: Swinging Only With the Arm

An arm-only swing feels fast but produces little real pace and no consistency. If your drives lack depth despite hard swings, your hips and legs are not involved. Practice shadow swings with the paddle held lightly, focusing on hip rotation.

Mistake 2: A Backswing That Is Too Big

Wrapping the paddle far behind your body looks powerful and plays late. Against any ball with pace, a big backswing means contact happens beside you instead of in front. Shorten the backswing until contact is consistently out front.

Mistake 3: Hitting Late or Too Close to the Body

Late contact turns drives into defensive blocks. The fix is footwork, not a faster arm: move sooner, take a smaller adjustment step, and meet the ball ahead of your front foot.

Mistake 4: Stopping the Follow-Through

Players who stop the paddle at contact decelerate through the ball, which costs pace and direction. Finish every practice drive toward the target, even on easy balls, so the full swing becomes automatic.

Mistake 5: Driving Every Ball

The drive is tempting, but driving low balls, balls hit while stretched, or balls against set net players hands opponents easy attacks. Patience is part of drive technique: the best drive is often the one you wait one ball to hit.

Forehand Drive Checklist

Run through this checklist during warm-ups until it becomes automatic. If a drive goes wrong in a match, walk through the list to find the missing step instead of guessing.

  • Set the eastern grip deliberately, with a relaxed hand and firm wrist at contact.
  • Turn sideways early, loading your weight onto the back foot.
  • Keep the backswing compact, with the paddle below contact height.
  • Step toward the target with your front foot as the swing begins.
  • Fire hips first, then shoulders, letting the arm follow the rotation.
  • Meet the ball in front of your body, between knee and waist height.
  • Finish toward the target at shoulder height, then recover to ready position.
  • Drive only when balanced and the ball sits up; drop or dink otherwise.
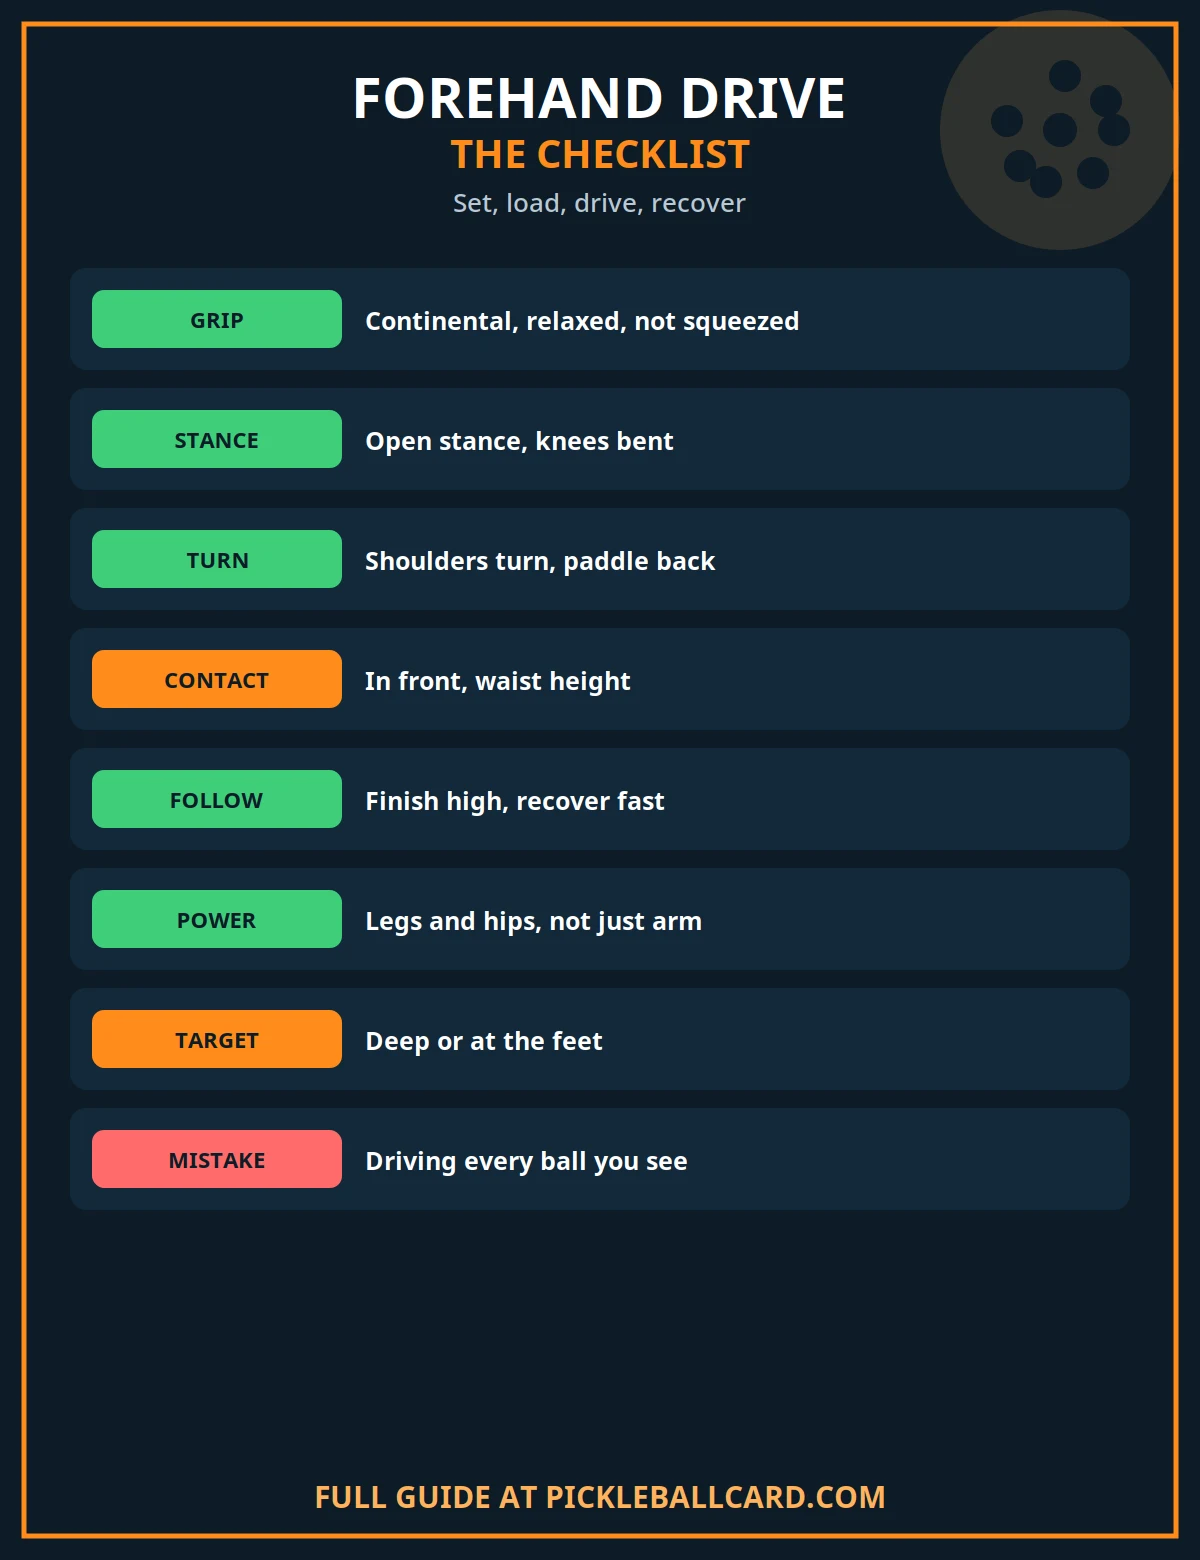
Forehand drive pickleball checklist
Run through this checklist before every drive: grip, stance, contact point, follow-through, and recovery.

Drills That Build a Reliable Drive

Drills work best when they isolate one part of the shot. Practice the pieces separately first, then combine them in rally drills that look like real match situations.

Drill 1: Shadow Swings With Hip Rotation

Without a ball, practice the full swing in slow motion, focusing on the sequence: legs, hips, shoulders, arm. Do twenty repetitions before hitting a ball.

This drill builds the kinetic chain without the pressure of timing a moving ball. If the shadow swing feels arm-heavy, slow down until the hips clearly lead the motion.

Drill 2: Deep Target Driving

Stand at the baseline with a partner feeding balls to your forehand. Aim each drive at a deep target zone near the baseline, alternating crosscourt and down the line.

Score yourself on depth, not pace. Ten drives that land deep with moderate pace beat five winners and five errors. Consistency at depth is what makes drives tactically useful.

Drill 3: Drive, Then Recover

Hit a forehand drive, then immediately return to the ready position and split step before the next feed arrives. This drill trains the habit that most players skip: recovery after a good shot.

Drill 4: Low Ball Discipline

Have a partner feed a mix of high and low balls. Drive only the balls that bounce into your strike zone, and drop the low ones. This drill trains the judgment that separates good drivers from reckless ones.

Drive Variations and Spin

Most drives are fairly flat, but a small amount of topspin helps the ball dip into the court and lets you swing a little harder with less risk of going long. The spin comes from the low-to-high swing path, not from a separate wrist flick.

Keep spin as a variation, not the main event. A drive with a slight topspin finish is still a drive; if spin becomes the focus, the shot turns into a different stroke with different timing.

Our guide on how to add topspin in pickleball covers the spin mechanics in full.

Two other variations are worth knowing. A drive aimed at the backhand side often draws a weaker reply. And a drive hit with slightly later contact can work as a passing shot when an opponent approaches the net.

When the ball comes to your backhand side instead, the decision changes. A two-handed backhand in pickleball gives many players more stability on that side, especially against fast balls at the body.

Target Selection and Placement

Depth beats pace. A drive that lands within a few feet of the baseline forces opponents to hit from deep positions, where their replies are weaker and their angles are smaller.

Crosscourt drives are the safer default because the court is longer diagonally and the net is lower in the middle. Down-the-line drives are riskier but more rewarding.

Aim at the weaker opponent or the open space, not at the strongest defender. In doubles, a drive at the feet of the player who just moved, or into the gap between partners, causes more trouble than a hard drive straight at a set player.

Frequently Asked Questions

What grip should I use for a forehand drive in pickleball?

Use the eastern forehand grip as your default. It keeps the paddle face square at contact, which makes flat, deep drives easier to control.

Players who want more topspin can rotate slightly toward a mild semi-western grip. Avoid extreme grips until the basic drive is consistent.

Why does my forehand drive keep going long?

Drives go long when the paddle face is too open at contact, the swing path is too flat, or the ball is hit late. Check the grip and face angle first.

Adding a slightly more low-to-high swing path also helps, since it brings the ball down into the court. Slow the swing down until depth is under control.

How do I add more power without losing consistency?

Add power through your legs and hip rotation, not through a bigger arm swing. Bend your knees, load the back foot, and unwind the hips into the shot.

Keep the backswing compact and the swing smooth. Most players gain pace simply by meeting the ball further in front.

Should I drive or drop on the third shot?

Drive when the return sits up and you are balanced. Drop when the return stays low, you are moving, or your opponents are already set at the net.

The third shot decision is situational, not a fixed rule. Let the height of the ball and your balance decide, rally by rally.

What is the ideal contact point for a forehand drive?

Contact the ball in front of your body, slightly ahead of your front foot, between knee and waist height. This position gives you the full swing behind the ball.

If contact keeps happening beside your body, move your feet sooner and shorten your backswing. Footwork fixes contact more reliably than swing changes.

How can I practice the forehand drive on my own?

Practice shadow swings against a wall, focusing on hip rotation and a full follow-through. Wall rallies also work well for grooving contact out front.

Set a deep target zone and score yourself on depth over ten or twenty balls. Solo practice builds the repeatable swing that match pressure tests.

Putting the Forehand Drive Together

A reliable forehand drive is not one perfect swing. It is the same good swing, repeated: eastern grip, sideways turn, compact backswing, hip-led forward swing, contact out front, and a full finish toward the target.

Practice the pieces, then practice the decision of when to use them. A player who drives the right balls, with repeatable mechanics, will beat a harder hitter who drives everything.

shoaib
shoaib

Shoaib is the publisher of Pickleball Card. He oversees the site’s guides to pickleball rules, ratings, strategy and gear, all researched from primary sources — the USA Pickleball Rulebook, DUPR and manufacturer documentation — and updated as the game changes.
pickleballcard.com

Filed Under: About Pickleball

Common Pickleball Injuries and How to Prevent Them

October 27, 2026 by shoaib

Common Pickleball Injuries and How to Prevent Them

Pickleball looks gentle from the sideline. The court is small, the paddle is light, and the rallies often look relaxed and social.

Under that friendly surface, however, the game asks a lot of your body. You stop suddenly, change direction, lunge wide, reach overhead, and repeat the same swing many times in a single session.

Important: This article gives general information only. It is not medical advice. If you have pain, an injury, or a medical concern, see a qualified health professional promptly. Do not use this guide to diagnose yourself or to decide treatment.

Key Takeaways

  • Most common pickleball injuries come from sudden movement, repeated swings, falls, or doing too much too soon.
  • Ankles, knees, elbows, shoulders, and wrists take the most strain during normal play.
  • A short dynamic warm-up before every session is one of the simplest injury prevention habits.
  • Court shoes with lateral support protect your feet far better than running shoes on a pickleball court.
  • Building playing time gradually matters more than any single stretch, brace, or piece of equipment.
  • Falls are a serious risk, especially when players backpedal, chase lobs, or play on a wet surface.
  • Sharp pain, swelling, instability, numbness, or pain that keeps returning are signals to stop and seek care.
  • Strength, balance, rest, and good technique work together as a prevention system, not as separate quick fixes.

Why Pickleball Injuries Happen

Injuries rarely have a single cause. Usually, several small factors combine: a cold start, tired legs, a slippery patch, a long rally, and one awkward step.

Understanding those patterns helps you change them. Prevention starts with recognising what the game actually demands, rather than assuming a small court means a small physical load.

Short Bursts and Sudden Direction Changes

Pickleball is a stop-start game. You stand ready, explode a few steps sideways, stop hard, and then move again in the opposite direction.

Those bursts load your ankles, knees, Achilles tendons, and calf muscles in quick succession. The joints must absorb force, stabilise, and then produce force again almost immediately.

Players who arrive cold or fatigued are less able to control those movements. A foot can land slightly off balance, a knee can drift inward, or an ankle can roll before the muscles react.

The Court Surface and Your Footwear

Hard courts give little cushioning. Every step, landing, and lateral push sends force back through your feet, ankles, knees, and hips.

Wet leaves, dust, cracks, and worn patches change grip without warning. A shoe that sticks suddenly can twist an ankle, while a shoe that slides can send a player to the ground.

Running shoes are built mainly for forward motion. They often lack the side support and wide, stable base that lateral court movement requires.

Overuse and Doing Too Much Too Soon

Overuse injuries build slowly. The same tendons and muscles are loaded again and again, with too little recovery between sessions.

New players are especially vulnerable. Enthusiasm can lead to several long sessions in a first week, before tendons, joints, and fitness have adapted to the load.

Returning players face a similar trap. After a break, the skills may still feel familiar, but the tissues may no longer be ready for the same volume or intensity.

Falls and Collisions

Falls often happen during ordinary play, not dramatic dives. A player backpedals for a lob, turns to chase a ball, or steps sideways and loses balance.

When a fall happens, hands instinctively reach out to break it. That reflex can protect the head, but it also puts wrists, elbows, and shoulders at risk.

In doubles, partners can also collide or cross paths. Clear communication about who takes the middle ball reduces that risk considerably.

Pickleball Elbow: The Classic Overuse Problem

Pickleball elbow is a common name for pain on the outer side of the elbow, linked to repeated wrist and forearm movement. It is closely related to the condition often called tennis elbow.

The pain often builds gradually rather than appearing after one shot. Gripping, lifting, shaking hands, or turning a door handle can become uncomfortable as the irritation develops.

Technique and equipment both matter. A grip that is too tight, a paddle that feels heavy or poorly balanced, and a swing that relies on the wrist can all add strain.

For a full guide to causes, warning signs, and prevention habits, read our dedicated article on pickleball elbow prevention. That guide goes deeper than this overview, so this section stays deliberately brief.

Medical authorities describe lateral epicondylitis as an overuse problem of the forearm muscles and tendons, often linked to repeated wrist and arm motion. The Mayo Clinic overview of tennis elbow explains how the pain develops and when to seek care.

Ankle Sprains and Achilles Issues

Ankle sprains are among the most familiar court injuries. They usually follow a sudden sideways step, a landing on an uneven foot, or a twist during a quick change of direction.

Ankle pain after such a moment should not be played through casually. Resting the joint and seeking professional advice are sensible first steps when pain, swelling, or instability appears.

Achilles problems are different. They often develop gradually around the back of the ankle and lower calf, especially when playing volume rises quickly.

Morning stiffness, tenderness along the tendon, or discomfort at the start of play are common early patterns. Those signs are a reason to reduce load and seek advice, not to push harder.

Prevention here is practical. Court shoes with lateral support, a gradual build-up of playing time, calf and ankle strength work, and attention to court conditions all reduce strain.

Balance practice also helps. Single-leg balance and controlled lateral steps train the small stabilising muscles that protect the ankle when a step goes slightly wrong.

Knee Pain and Meniscus-Type Problems

Knees absorb force every time you lunge, squat low for a dink, or stop suddenly. They also twist when the foot stays planted while the body turns.

General knee soreness after a hard session is not the same as a specific injury. Still, persistent pain, swelling, locking, catching, or a feeling that the knee gives way deserves professional assessment.

Meniscus-type problems are often discussed in general terms among players. The meniscus is cartilage inside the knee that helps cushion and stabilise the joint.

Damage to that cartilage can occur through twisting, deep squatting under load, or gradual wear. This article does not diagnose such problems, and players should not try to self-diagnose them.

Strong hips, thighs, and core muscles help the knee track better during movement. Controlled lunges, step-ups, and squats performed with good form support that stability.

Technique matters too. Keeping the knee aligned over the foot during a lunge, avoiding deep twisting under load, and shortening your steps on wide balls can all reduce knee stress.

Shoulder and Rotator-Cuff Strain

The shoulder works hard in pickleball. Serves, overheads, and fast volleys all ask the joint to move quickly through a wide range of motion.

Rotator-cuff strain is a general term for irritation or injury to the group of muscles and tendons that stabilise the shoulder. Overhead shots and repeated reaching can aggravate it.

Pain during overheads, weakness when lifting the arm, or aching after play are signals worth attention. They do not automatically mean a serious injury, but they should not be ignored.

Warm-up is especially important for shoulders. Arm circles, gentle band work, and gradual overhead practice prepare the joint far better than starting with full-power smashes.

Strength work should cover the whole shoulder girdle, not just the pressing muscles. Balanced strength around the shoulder blade helps the joint stay centred during fast swings.

Overhead technique also protects the shoulder. Positioning under the ball, using the legs, and avoiding desperate backward reaches reduce awkward overhead strain.

Wrist and Hand Issues

Wrists absorb vibration from every shot and bear weight during falls. Repeated gripping, flicking, and off-centre hits can irritate tendons around the wrist and hand.

Players sometimes notice aching after long sessions, stiffness in the morning, or discomfort when gripping the paddle firmly. Those patterns are worth noting, especially if they return regularly.

A relaxed grip helps. Squeezing the paddle handle constantly adds tension through the forearm, wrist, and hand without improving control.

Hand and wrist strength should be built gradually. Light grip work, wrist mobility exercises, and rest between heavy playing days support the tissues without overloading them.

Falls and Head and Eye Safety

Falls deserve special attention because their consequences can be serious. A fall can injure a wrist, shoulder, hip, or head in a single moment.

Backpedalling is the highest-risk habit. Turning and running to a lob, or shuffling sideways while facing the net, keeps balance and vision in a safer position.

Eye safety is often overlooked. A fast ball or an accidental paddle swing in doubles can strike the face, and protective eyewear is a simple safeguard.

Any head strike, loss of consciousness, confusion, vomiting, or worsening headache after a fall needs urgent professional care. Do not return to play and hope it settles.

Balance and leg strength are the long-term fall defences. Public health guidance for older adults emphasises muscle-strengthening and balance activities, as explained in the CDC guidance on physical activity for older adults.

Injury, Cause, and Prevention at a Glance

The table below summarises the main patterns in this guide. It is a planning tool, not a diagnostic chart.

Injury area Typical cause Prevention focus
Elbow Repeated gripping and wrist movement Technique, grip size, gradual load
Ankle Sudden sideways steps and twists Court shoes, balance, court checks
Achilles and calf Rapid rise in playing volume Gradual build-up, calf strength
Knee Lunging, twisting, deep squats Hip and thigh strength, aligned movement
Shoulder Overheads and repeated reaching Warm-up, balanced shoulder strength
Wrist and hand Gripping, vibration, falls Relaxed grip, suitable paddle, rest
Falls Backpedalling and wet surfaces Turn and run, court checks, balance
Eyes and head Fast balls and doubles collisions Protective eyewear, clear calls

Prevention Systems That Actually Work

No single habit prevents every injury. The players who stay healthiest usually combine several simple systems, repeated every session.

Think of prevention as a routine, not a rescue. Warm-up, footwear, court awareness, load management, and recovery each do a small job, and together they cover most risks.

Warm Up Every Time

Start with light movement, such as walking, gentle jogging, or easy side shuffles. This raises your heart rate and warms the muscles gradually.

Follow with dynamic movements for the hips, legs, shoulders, and ankles. Leg swings, arm circles, controlled lunges, and gentle torso turns prepare the joints for play.

Finish with easy rallies before competitive points. Soft dinks, gentle groundstrokes, and short volleys let timing and footwork settle before intensity rises.

Our guide to effective stretches and warm-up exercises for pickleball gives a fuller routine you can use before every session.

Choose Footwear for Lateral Movement

Court shoes are designed for side-to-side movement. They usually offer a stable base, lateral support, and a sole that grips without sticking suddenly.

Check your shoes regularly. Worn soles, collapsed sides, or uneven wear change how your foot lands and how your ankle is supported.

Replace shoes when support fades, not only when they look worn out. A shoe that feels loose around the midfoot is no longer doing its main job.

Read the Court Before You Play

Walk the court before the first serve. Look for wet patches, leaves, cracks, loose balls, bags, and obstacles near the sidelines.

Agree on simple safety habits with your group. Keep spare balls off the playing surface, and stop play immediately if a ball rolls onto your court.

Avoid playing on a wet court. Slippery surfaces change every movement, and the risk of a fall rises sharply when grip becomes unpredictable.

Manage Your Load

Load means total playing time, intensity, and frequency combined. Increasing only one factor at a time gives your body a chance to adapt.

New players can start with shorter sessions and fewer days per week. Add time gradually, and keep at least one rest day between heavier sessions at first.

Returning players should rebuild similarly. Skill returns faster than tissue tolerance, so patience in the first weeks protects the rest of the season.

Cross-training helps too. Walking, cycling, swimming, strength work, and balance practice build general fitness without repeating the same court stresses daily.

Recover Between Sessions

Recovery is part of training, not an optional extra. Sleep, hydration, and regular meals support the repair processes that follow hard play.

A gentle cool-down after play helps the body settle. Slow walking, easy movement, and light stretching can ease stiffness after a long session.

Notice patterns across weeks, not just single days. Soreness that fades within a day differs from pain that grows, spreads, or returns every session.

Your Injury Prevention Checklist

Use this checklist before and after play. It takes only a few minutes, and it covers the habits that matter most.

  • Warm up with light movement, dynamic stretches, and easy rallies before competitive points.
  • Wear court shoes with lateral support, and check soles and sides for wear.
  • Inspect the court for wet patches, leaves, cracks, and stray balls.
  • Agree with partners on calls for middle balls and stray balls.
  • Turn and run for lobs instead of backpedalling.
  • Consider protective eyewear, especially in fast doubles play.
  • Keep your grip relaxed and check that your paddle grip size suits your hand.
  • Build playing time gradually, and add only one load factor at a time.
  • Include strength and balance work away from the court each week.
  • Rest between sessions, hydrate, and note any pain that keeps returning.
  • Stop playing and seek care if pain is sharp, swelling grows, or a joint feels unstable.
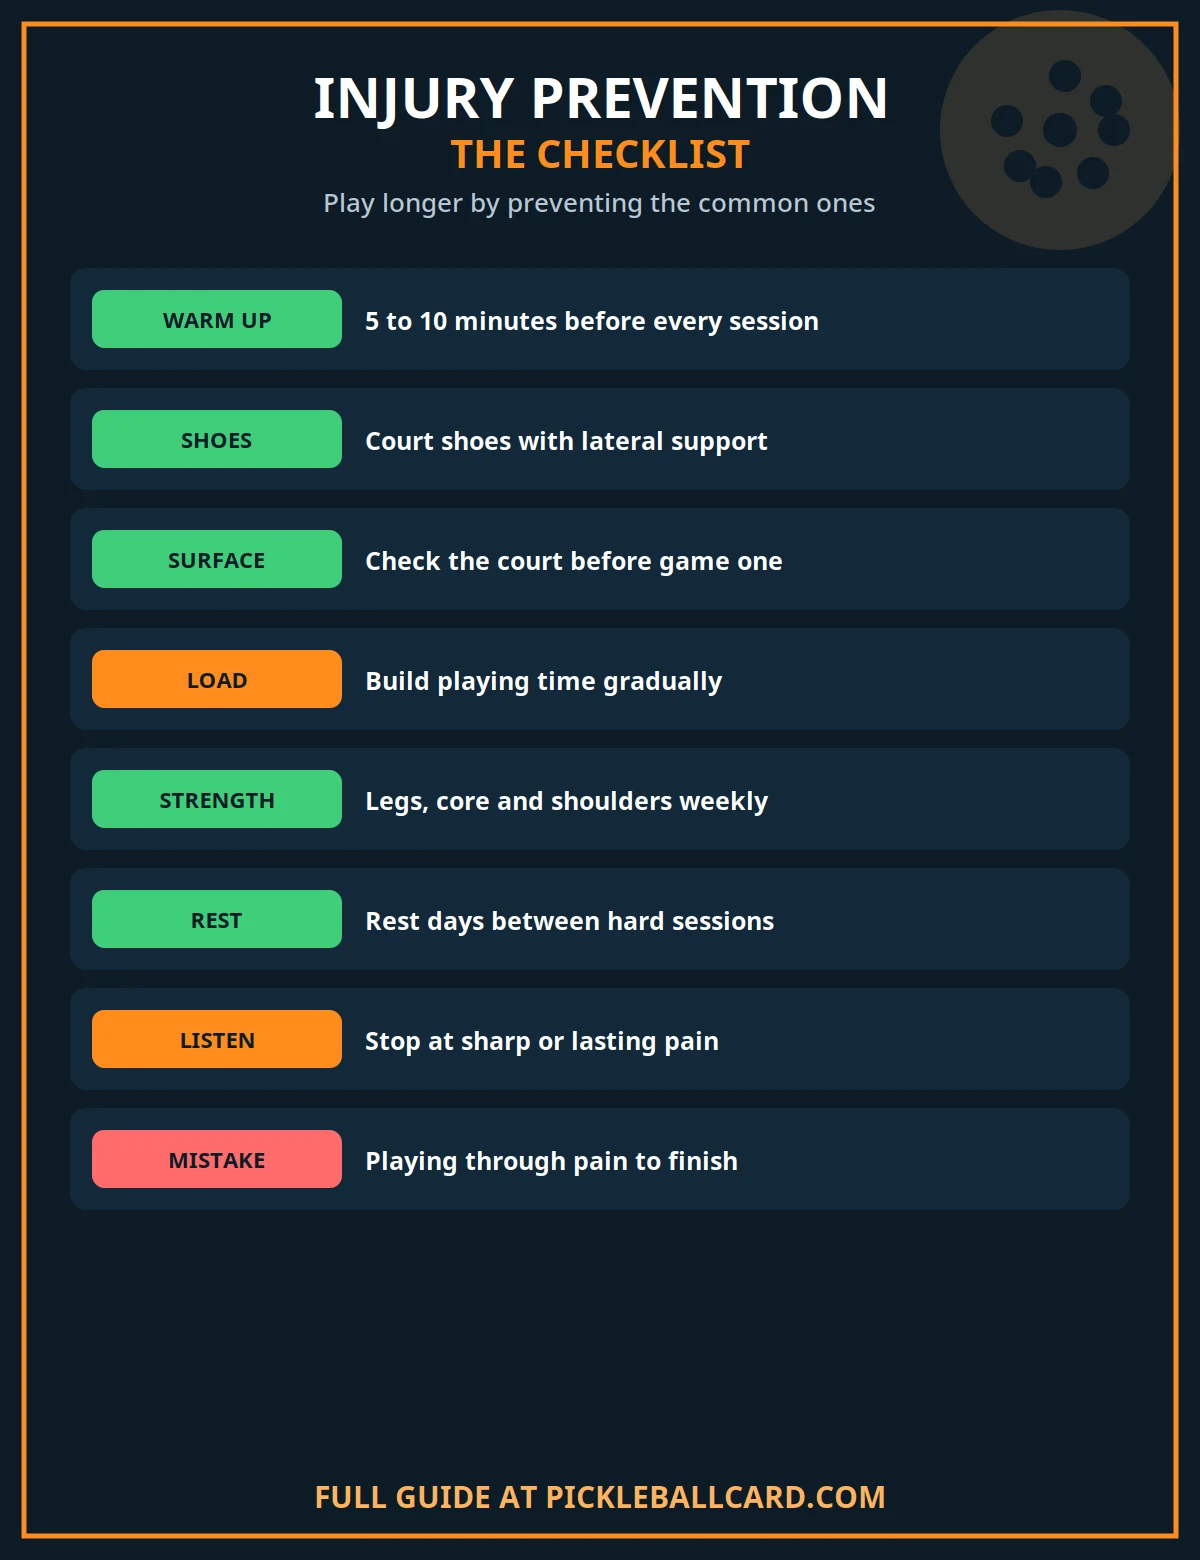
Injury Prevention Checklist
Warm up, wear court shoes, check the court, build up slowly, and stop when pain changes the way you move.

Warning Signs: Stop Playing and Seek Care

Most players know the difference between tired muscles and something wrong. Trust that difference, and act on it early rather than finishing the match first.

Stop playing and seek professional care promptly if you notice any of the following general red flags. This list is a safety guide, not a diagnosis.

  • Sharp, sudden, or severe pain during play.
  • Swelling that grows quickly or a joint that looks deformed.
  • Inability to bear weight, move a joint, or grip normally.
  • A joint that feels unstable, locks, catches, or gives way.
  • Numbness, tingling, weakness, or loss of feeling.
  • Pain that worsens over days instead of easing with rest.
  • Any head strike, confusion, dizziness, or loss of consciousness.
  • Chest pain, severe breathlessness, or collapse — seek emergency care immediately.

If you are unsure whether a problem is serious, seeking advice is the safer choice. Early assessment often leads to simpler care and a faster return to play.

Returning too soon is a common cause of re-injury. Follow professional guidance on return to play, and rebuild volume gradually rather than jumping back to full sessions.

Playing Longer, Not Just Harder

Pickleball rewards consistency. Players who protect their bodies tend to play more often, improve steadily, and enjoy the social side of the game for longer.

The health benefits of regular, enjoyable activity are real, and they are worth protecting. Our guide to pickleball health benefits explains why so many players find the game such a sustainable way to stay active.

Start with one change this week. Add a proper warm-up, replace worn shoes, or shorten your next session slightly. Small, repeatable habits protect your game better than any single dramatic fix.

Frequently Asked Questions

What are the most common pickleball injuries?

Ankle sprains, knee pain, elbow irritation, shoulder strain, wrist problems, Achilles issues, and falls are among the injuries players report most often.

The exact pattern varies with age, fitness, technique, and playing volume. Sudden movement, overuse, and falls explain most cases, rather than a single dramatic cause.

How can beginners avoid pickleball injuries?

Beginners should warm up every time, wear court shoes, start with shorter sessions, and learn basic footwork and technique early.

Building playing time gradually matters most. Enthusiasm is welcome, but several long sessions in a first week can overload tissues that have not yet adapted.

Should I play through pain?

No, not if the pain is sharp, sudden, worsening, or linked to swelling, instability, or numbness. Stop playing and seek professional advice in those cases.

Mild muscle tiredness after play is different from joint pain that changes how you move. When in doubt, rest and seek advice rather than pushing through.

Are court shoes really necessary for pickleball?

Court shoes are strongly recommended. They are built for lateral movement, with side support and a stable base that running shoes often lack.

Good shoes will not prevent every injury, but they reduce ankle twisting risk and give more predictable grip during quick direction changes.

How long should I warm up before pickleball?

A short warm-up of a few minutes is far better than none. Include light movement, dynamic stretches, and easy rallies before competitive points.

Older players, morning players, and anyone returning from a break may need a longer, gentler warm-up. Let your body, not the clock, guide the pace.

When should I see a health professional about a pickleball injury?

Seek care promptly for sharp pain, growing swelling, instability, numbness, weakness, or pain that does not ease with rest.

Also seek urgent care for any head injury, chest pain, severe breathlessness, or collapse. Early professional assessment is safer than self-diagnosis.

shoaib
shoaib

Shoaib is the publisher of Pickleball Card. He oversees the site’s guides to pickleball rules, ratings, strategy and gear, all researched from primary sources — the USA Pickleball Rulebook, DUPR and manufacturer documentation — and updated as the game changes.

pickleballcard.com

Filed Under: About Pickleball

Pickleball Tournament Formats Explained

October 26, 2026 by shoaib

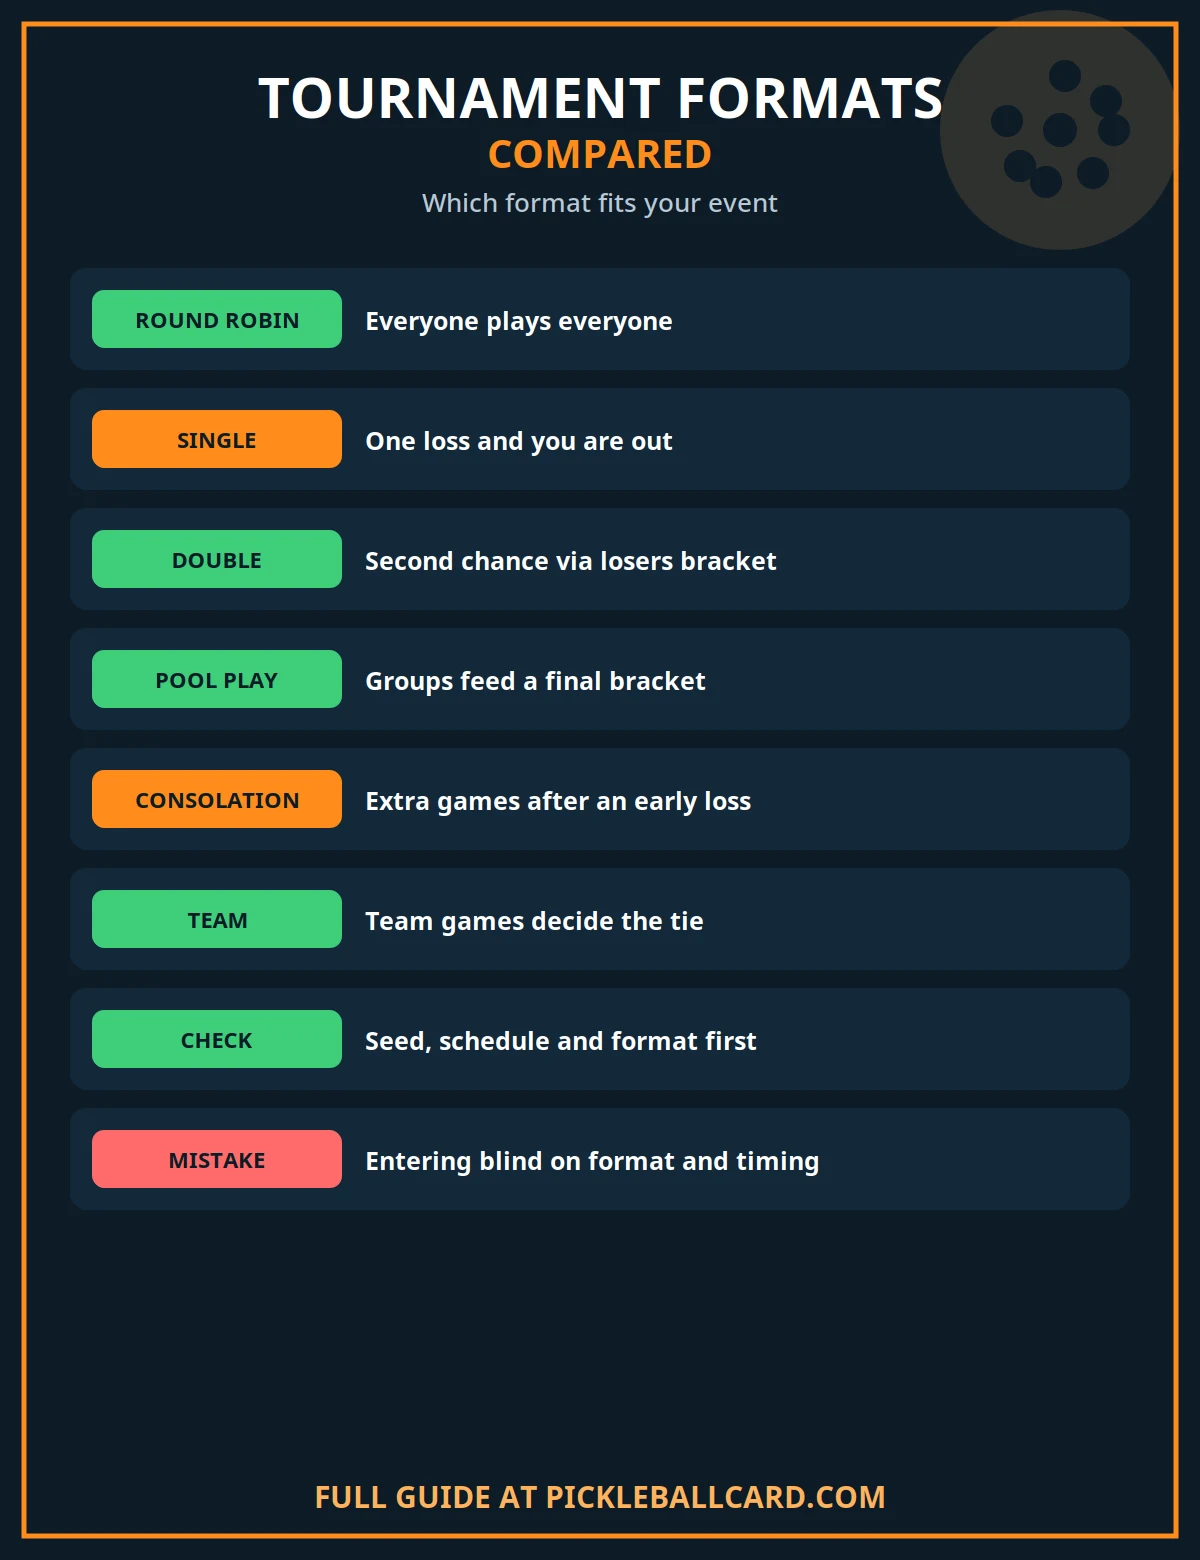
Every pickleball tournament follows a format, and that format shapes your whole day. It decides how many matches you play, how long you wait between them, and what happens after a loss.

Some formats guarantee several matches no matter what. Others end your event with a single defeat. Knowing the difference helps you pick events you will enjoy and prepare for the day ahead.

Key Takeaways

  • Round robin gives every entrant a set number of matches against the other players or teams in their group.
  • Single elimination ends your event after one loss, which keeps brackets fast but unforgiving.
  • Double elimination gives you a second life through a losers bracket after your first defeat.
  • Pool play combines a round robin stage with a knockout bracket for the top finishers.
  • Consolation brackets give early losers extra matches and a shot at third place.
  • The right format depends on your skill level, the time available, and the size of the field.
  • Always read the draw, seeding, match scoring, and schedule before you enter an event.

Why Tournament Formats Matter

A format is simply the structure that decides who plays whom and how a winner is found. Two events with the same players can feel completely different because their formats differ.

A round robin event feels social and steady, with matches spread across the day. A single elimination event feels tense and fast, because every match could be your last.

Format also affects fairness. A format with more matches gives a truer picture of who played best on the day. A format with fewer matches rewards hot streaks and punishes slow starts.

Organizers choose formats for practical reasons too. Court availability, daylight, entry numbers, and volunteer staffing all shape what a tournament can realistically run.

How To Read A Tournament Draw

A draw is the published bracket or schedule for your division. It shows your opponents, your match times, and the path to the final.

Start by finding your division, which is usually set by skill level and age group. Then check whether you are in a bracket, a pool, or a round robin group.

Seeding places the strongest entrants apart in the draw so they do not meet too early. Seeding is commonly based on ratings, past results, or the judgment of the tournament director.

If you are unsure how ratings feed into seeding, our guide to pickleball ratings explains the systems organizers commonly use.

Also note the match format printed beside each round. Early rounds may be one game to 15, while medal matches may be best two games out of three to 11.

Finally, check whether losers move into a consolation bracket. That single detail changes how much play you are guaranteed.

Round Robin

Round robin is one of the most player-friendly pickleball tournament formats. Every player or team in a group plays every other player or team in that same group.

How Round Robin Works

In a group of five teams, each team plays four matches, one against each rival. Results are recorded as wins and losses across the whole group.

The standings decide the outcome. The team with the most match wins finishes first, and the rest of the table follows in order.

Some round robins stand alone, with the group winner taking the event. Others feed into playoffs, where the top finishers advance to semifinals or a final.

Pros And Cons Of Round Robin

The biggest advantage is guaranteed play. You know roughly how many matches you will get before you even arrive.

Round robin also handles uneven skill levels gracefully. A weaker team still gets full value from the day instead of going home after one match.

The main drawback is time. A large group needs many matches, which demands more courts and a longer schedule.

Round robin can also produce dead matches late in the day, when neither side can change the final standings.

When To Use Round Robin

Round robin suits small fields, social events, and club tournaments where everyone wants plenty of court time. It also works well for beginners, who benefit from several matches rather than one pressure-filled contest.

Organizers often cap group sizes at four to six teams. Beyond that, the number of matches grows quickly and the day becomes hard to schedule.

Round Robin Tiebreakers In General Terms

Ties are common in round robin play, so every event needs a published tiebreaker order. The usual first step is the number of matches won.

If teams remain tied, head-to-head results are often used next. The winner of the match between the tied teams ranks higher.

Point differential is another common tiebreaker. It compares total points scored against total points conceded across the group.

Some events use head-to-head point differential instead, looking only at the games between the tied teams. Exact tiebreaker orders vary by event, so always check the published rules for your division.

Single Elimination

Single elimination is the simplest bracket format. Win and you advance. Lose once and your event is over.

A 16-team single elimination bracket needs four rounds to crown a champion. The field halves after every round until only the finalists remain.

The format is fast and easy to run. It needs fewer matches than any other bracket, which makes it ideal for large fields and tight schedules.

The downside is obvious. One bad match, one tough draw, or one slow start can end your tournament before it really begins.

Single elimination suits experienced players who value high stakes and a clear path to the title. It is less kind to beginners, who may travel a long way for a single match.

Some single elimination events add a consolation bracket, covered below, to soften this harshness and guarantee extra play.

Double Elimination

Double elimination gives every entrant a second chance. You are out only after your second loss, not your first.

The Winners And Losers Bracket Idea

Every team starts in the winners bracket. Win and you stay there. Lose once and you drop into the losers bracket, sometimes called the back draw.

Teams in the losers bracket keep playing each other. A second loss there ends their event, while survivors keep fighting toward the final.

The winners bracket champion and the losers bracket champion meet in the final. This structure rewards consistency while forgiving a single off day.

The Final And The Tiebreaker Match

Under USA Pickleball sanctioned rules for double elimination, the losers bracket winner plays the winners bracket winner for the championship.

If the losers bracket winner beats the winners bracket winner, a tiebreaker match to 15 points is played to decide gold and silver.

The loser of the losers bracket final receives the bronze medal. This keeps third place meaningful rather than decided by default.

Pros And Cons Of Double Elimination

The clear benefit is fairness. A champion usually has to be beaten twice, which reduces the damage of one unlucky draw.

The cost is time and complexity. Double elimination brackets need nearly twice as many matches as single elimination, plus careful scheduling.

It is a strong choice for medium-sized fields and serious events, where players expect a full test and organizers have the courts to run it.

Pool Play Into A Bracket

Pool play is a hybrid format. The field is split into groups, called pools, and each pool plays a round robin first.

The top finishers from each pool then advance into a knockout bracket. A common setup sends the top two teams from each pool into single elimination playoffs.

This format gives everyone guaranteed matches in the pool stage, then raises the stakes for the playoffs. It blends the social value of round robin with the drama of a bracket.

Pool play also handles large fields well. Pools run in parallel across courts, which keeps the schedule moving even with many entrants.

The main risk is a team that dominates its pool but loses one playoff match and goes home early. That is the trade-off for a format that rewards both consistency and clutch play.

Major professional events have used pool play for season finales, with small pools of four and the top two advancing to semifinals.

Consolation Brackets

A consolation bracket is a second competition for teams that lose early in the main draw. It runs alongside the main bracket rather than replacing it.

Under USA Pickleball sanctioned rules for single elimination with consolation, losers from all rounds enter the consolation bracket.

Those teams play for the bronze medal, and they are eliminated after a second loss. The main bracket finalists still play for gold and silver.

Consolation brackets are a kindness to players and a smart move for organizers. They keep courts busy, keep players at the venue, and make entry fees feel like better value.

When you compare events, check whether consolation play exists. An event with a consolation bracket can easily double your guaranteed matches.

Team Formats

Most pickleball events are built around singles or doubles pairs. Team formats change the unit of competition from a pair to a squad.

In a team event, clubs or drafted squads face each other across several matches. The team that wins the most matches in the tie wins the overall contest.

Team formats reward depth and strategy. A captain must decide lineups, manage player energy, and match strengths against the opposing team.

The best-known team concept is the coed format used by Major League Pickleball. A team match there is built from gender doubles and mixed doubles games, with a singles tiebreaker if the teams are tied.

Amateur team events often borrow this idea in simpler form. A club night might pit two four-player squads against each other across doubles and mixed matches.

Team formats suit social leagues and club rivalries. They turn individual results into a shared result, which many players find more fun than playing alone.

Scoring Variations Commonly Used In Tournaments

Tournament scoring varies by event, and the event listing should always state the scoring in advance. The variations below are common practice, not universal rules.

Games to 11 points are the most common single-game format. They are quick, familiar, and easy to fit into a busy schedule.

Games to 15 points appear often in pool play and consolation rounds. They give players a little more time to settle into a match.

Games to 21 points are used for longer feature matches or finals. They test fitness and patience as well as shot-making.

Almost all tournament games require a win by 2 points. A game tied at 10-10 continues until one side leads by two.

Best two games out of three to 11 is a common format for medal matches. It reduces the chance that one lucky game decides a title.

Some events use timed games or rally scoring to keep a schedule on track. If your event uses either, read the event notes carefully before your first match.

Tournament Formats Compared
One glance at how round robin, single elimination, double elimination, pool play, and consolation brackets compare on games guaranteed, time needed, and second chances.

How To Choose The Right Format

Choosing a format means matching the structure to your goals. There is no single best format, only the best fit for a given field.

Match The Format To Your Skill Level

Beginners should look for round robin or pool play events. Guaranteed matches build experience faster than a single high-pressure bracket match.

Intermediate players can enjoy any format, but double elimination offers a good balance of stakes and second chances. It punishes nobody for one slow start.

Advanced players often prefer single or double elimination brackets. They want a clear champion and a format that rewards peak performance under pressure.

Match The Format To Your Time Available

If you have only a morning, single elimination or a small round robin fits best. Both keep the schedule tight and predictable.

If you have a full day, double elimination and pool play become realistic. They need more rounds, more courts, and longer gaps between matches.

Always check the published schedule before entering. A format that looks fun on paper can still mean long waits if courts are scarce.

Match The Format To The Number Of Players

Small fields of four to eight teams suit round robin perfectly. Everyone plays everyone, and the day stays manageable.

Medium fields of eight to sixteen teams suit pool play or double elimination. Pools split the field neatly, and double elimination keeps everyone alive longer.

Large fields of thirty or more teams usually need single elimination or a pool stage. Without a knockout stage, the match count becomes unworkable.

Formats At A Glance

Format Games Guaranteed Time Needed Second Chances
Round robin All group opponents High for large groups Not applicable
Single elimination One match minimum Low None
Double elimination At least two matches High Yes, one extra loss
Pool play into bracket All pool opponents Medium to high Pool stage only
Single elimination with consolation Main draw plus consolation Medium Consolation bracket
Team format Depends on tie size Medium to high Team dependent

What To Check Before You Enter

A few minutes of checking before you register can save a wasted trip. Tournament listings usually answer every question below, but you have to look.

  • Format: confirm whether the event is round robin, elimination, pool play, or a hybrid.
  • Bracket and seeding: check how seeds are set and whether your division could be combined with another.
  • Match scoring: note games to 11, 15, or 21, win by 2, and whether medal matches differ.
  • Consolation play: find out whether early losers get extra matches or go home.
  • Schedule: check start times, expected finish times, and how weather delays are handled.
  • Entry rules: confirm age and skill divisions, partner requirements, and refund or withdrawal terms.
  • Courts and balls: note surface type, indoor or outdoor play, and the official ball if listed.

If this will be your first event, read our guide to your first pickleball tournament before you register. It covers packing, warm-ups, and first-match nerves in more detail.

Many players discover tournaments through casual sessions. If you have not tried one yet, see how pickleball open play works for a low-pressure way to meet players and practice match play.

For the official sanctioned format definitions, see the USA Pickleball tournament policies and the Major League Pickleball FAQ on team play.

Frequently Asked Questions

What Is The Best Pickleball Tournament Format For Beginners?

Round robin is usually best for beginners. It guarantees several matches, keeps the atmosphere social, and lets new players learn from different opponents without the fear of instant elimination.

How Many Matches Do You Get In A Round Robin?

You play every other team in your group once. In a group of five teams, that means four matches. Larger groups mean more matches, which is why organizers often cap group sizes.

What Is The Difference Between Single And Double Elimination?

Single elimination ends your event after one loss. Double elimination moves you to a losers bracket after one loss, and only a second loss ends your event.

How Does Pool Play Work In Pickleball?

The field is split into pools, each pool plays a round robin, and the top finishers advance into a knockout bracket. It combines guaranteed matches with a high-stakes finish.

What Happens If You Lose Early In A Tournament?

It depends on the format. In plain single elimination, you are out. In events with a consolation bracket, you move into a second competition for third place.

Do All Tournaments Use The Same Scoring?

No. Common formats include games to 11, 15, or 21 points, usually win by 2, and best two out of three for medal matches. Always check the event listing for the exact scoring.

shoaib
shoaib

Shoaib is the publisher of Pickleball Card. He oversees the site’s guides to pickleball rules, ratings, strategy and gear, all researched from primary sources — the USA Pickleball Rulebook, DUPR and manufacturer documentation — and updated as the game changes.

pickleballcard.com

Filed Under: About Pickleball

  • « Go to Previous Page
  • Page 1
  • Page 2
  • Page 3
  • Page 4
  • Interim pages omitted …
  • Page 19
  • Go to Next Page »

Latest Posts

  • Raw Carbon Fiber Pickleball Paddles Explained
  • Pickleball Court Surfaces Explained: Acrylic, Asphalt, Concrete, And More
  • How To Organize A Round Robin In Pickleball
  • What Is The PPA Tour? The Professional Pickleball Tour Explained
  • The Mental Game of Pickleball: Focus, Confidence and Composure
  • Let Serve in Pickleball: What Happens When the Serve Hits the Net
  • Overhead Smash in Pickleball: How to Hit It
  • Forehand Drive in Pickleball: Power and Consistency
  • Common Pickleball Injuries and How to Prevent Them
  • Pickleball Tournament Formats Explained
  • About
  • Privacy Policy
  • Terms And Conditions
  • Affiliate Disclosure

COPYRIGHT © 2026 · Pickleballcard.COM, ALL RIGHTS RESERVED.

PICKLEBALLCARD.COM IS A PARTICIPANT IN THE AMAZON SERVICES LLC ASSOCIATES PROGRAM, AN AFFILIATE ADVERTISING PROGRAM DESIGNED TO PROVIDE A MEANS FOR SITES TO EARN ADVERTISING FEES BY ADVERTISING AND LINKING TO AMAZON.COM. AMAZON, THE AMAZON LOGO, AMAZONSUPPLY, AND THE AMAZONSUPPLY LOGO ARE TRADEMARKS OF AMAZON.COM, INC. OR ITS AFFILIATES. AS AN AMAZON ASSOCIATE WE EARN AFFILIATE COMMISSIONS FROM QUALIFYING PURCHASES.