• Skip to primary navigation
  • Skip to main content
  • Skip to primary sidebar

Pickleballcard

All About Pickleball Gears

  • About Pickleball
    • How To Play Pickleball
    • Pickleball Rules
    • Pickleball Kitchen Rules
    • Serving Rules
    • Pickleball Ratings
    • Pickleball Tips
    • Pickleball History
  • Pickleball Shoes
    • Best Pickleball Shoes
    • Best Pickleball Shoes For Men
    • Best Pickleball Shoes For Women
  • Pickleball Paddles
    • Best Pickleball Paddles
    • Elongated Pickleball Paddles
    • Graphite Pickleball Paddles
    • Onix Pickleball Paddles
    • Pickleball Paddles for Women
    • Pickleball Paddles For Spin
  • Vs
    • Pickleball Vs Tennis
    • Paddle Tennis Vs Pickleball
    • Indoor Vs Outdoor Pickleball

Pickleball Poaching: When to Poach — and When It’s Selfish

October 23, 2026 by shoaib

Poaching is the most argued-about move in doubles pickleball. One player calls it smart, aggressive team play. The other three people on the court call it theft.

The truth is narrower than both camps admit. Poaching is a genuine weapon when the situation and the partnership support it, and a partnership-killer when they do not.

This guide draws the line precisely: what a poach actually is, the five situations where it wins points, the four where it costs you, the calls that keep partners safe, and the counter that punishes reckless poachers.

Key Takeaways

  • A poach crosses the centerline. It means taking a ball clearly on your partner’s side of the court — different from an Erne, which goes around the kitchen, and different from simply taking a middle ball.
  • Poach the middle with your forehand on weak or high balls. That is where the math favors the poacher: the strongest wing on the most attackable ball.
  • Planned poaches work; surprise poaches usually do not. Signals, calls, and pre-point agreements turn a risky interception into a team play.
  • In casual rec play, stealing your partner’s shots is widely considered selfish. Your partner came to hit balls and improve — the score does not matter enough to deny them that.
  • Commit to a winner or a forcing shot. Every poach leaves half the court open behind you, so a soft poach is worse than no poach at all.
  • “Mine” outranks everything. If your partner calls the ball, abort the poach immediately — even mid-step.

What Poaching Actually Is

A poach is when you leave your half of the court, cross the centerline, and hit a ball that was headed to your partner’s side.

It happens at the kitchen line most often, but it can happen anywhere. A poach is defined by whose ball it was, not by where you were standing when you hit it.

The word comes from tennis, where the net player crosses to intercept a return aimed at their partner. In pickleball it means the same thing: intercepting a ball on your partner’s side of the court.

Poaching is not an Erne. An Erne goes outside the sideline and around the kitchen to volley a ball beside the net post. A poach stays on the court and crosses the middle. Keep the two separate in your head.

It is also not simply taking a middle ball. Middle balls live in the shared zone between partners, and someone has to hit them. A poach takes a ball that was clearly your partner’s — past the midline, on their side.

That distinction is the whole debate. Taking a shared ball is teamwork. Taking your partner’s ball is a decision that needs a reason and, ideally, permission.

The Middle Is the Poacher’s Playground

Most poaches begin at the center of the court. A ball drifts toward the middle, one partner crosses a step or two, and the stronger wing takes it. The geometry is simple: the middle is the shortest path to offense for both teams.

This connects directly to middle-court ownership. The “respect the X” framework — which we break down fully in who should take the middle in pickleball — assigns middle balls by forehand strength and court position.

A poach extends that same logic one step further, across the centerline. The forehand-in-the-middle principle does not stop at an imaginary line; it just gets riskier past it, because the ball now belongs to someone else.

That is why communication matters so much more for poaches than for middle balls. Middle balls are contested by rule of thumb, and both players expect the contest. Poached balls belonged to your partner until you decided otherwise.

A forehand covering the middle is the most efficient poaching setup in the sport. It reaches farther, sets up earlier, and finishes harder than a backhand reaching across the body ever will.

When Poaching Is Smart

Poaching earns its reputation in five specific situations. Each one shares the same three traits: the poacher has a clear advantage on the ball, the interception has a high chance of winning or damaging the point, and the partner is prepared for it.

1. Your Forehand Owns the Middle

When a ball comes to the center and you hold a forehand on it, crossing one step to take it is usually the highest-percentage play available.

The forehand generates more pace and control than your partner’s backhand reaching for the same ball. This is the poach nobody at any level should argue with.

The condition is balance. A poach that leaves you lunging and off-balance turns a forehand advantage into a desperation swing. Cross early, set your feet, and hit from a stable base.

This is also the poach that scales down to every skill level. Even in casual rec play, a forehand taking a middle ball reads as teamwork, not theft — because everyone can see it was the better shot.

2. A Weak Ball or Pop-Up Begs to Be Punished

When an opponent pops a ball up near the middle of the court, the team that attacks it first usually wins the point. Hesitation hands the initiative back.

If that sitting ball is closer to your partner’s side but your angle, position, or readiness is better, poaching the put-away is smart — provided poaching is an understood part of your partnership.

The non-negotiable part is the finish. A poach must produce a winner or a forcing shot. A soft poach that comes back is worse than no poach at all, because it also leaves your half of the court empty.

Read the height honestly. A ball above net height is an invitation. A ball at your shoelaces is a trap — poaching low balls usually produces the weak reply you were trying to avoid.

3. Your Partner Is Pulled Wide and Exposed

When an opponent drags your partner far outside the sideline, the middle of the court and the open space behind you become the danger zones.

Sliding across to poach the next ball protects your partner and compresses the court the opponents can attack. This is coverage, not theft, and good partners do it instinctively.

The rotation only works if your partner recovers toward the middle as you cross instead of freezing wide. Agree on this movement before the match so nobody is surprised mid-rally.

This is the most useful poach in recreational play. It defends your team rather than padding your highlight reel, which is why even strict no-poaching partnerships usually allow it.

4. The Planned Third-Shot Poach

On your serve, the net player can plan to poach the opponent’s third shot. A hand signal behind the back before the serve — one finger for stay, two for poach — keeps the plan hidden from the opponents.

The sequence runs like this: the returner hits their return, your partner plays the third shot, and you cross to intercept it, usually with a forehand volley aimed at the open court or the returner’s feet.

The critical half of this play is not the poach — it is your partner’s job afterward. They must slide across and cover the court you abandoned.

Drill the rotation until it is automatic. A poach without the cover is just an open court donation.

Save this play for meaningful moments. A planned poach used twice a game stays surprising. Used every point, it becomes the pattern your opponents are waiting for.

5. Your Partner Invited You

Some partnerships run hot. Your partner says “take anything in the middle” or calls “yours” on a ball they cannot quite reach. That is a standing invitation to poach, and it changes everything.

An invitation turns a risky interception into a planned play. It removes the social cost completely, because your partner has already opted in to your aggression.

Invitations are earned, not assumed. Players who poach well, finish points, and cover afterward get invited to poach more. Players who poach badly get quietly benched by their own partner.

Notice the pattern across all five situations: the best poaches are the ones your partner saw coming. Anticipation is what separates a team play from a solo act.

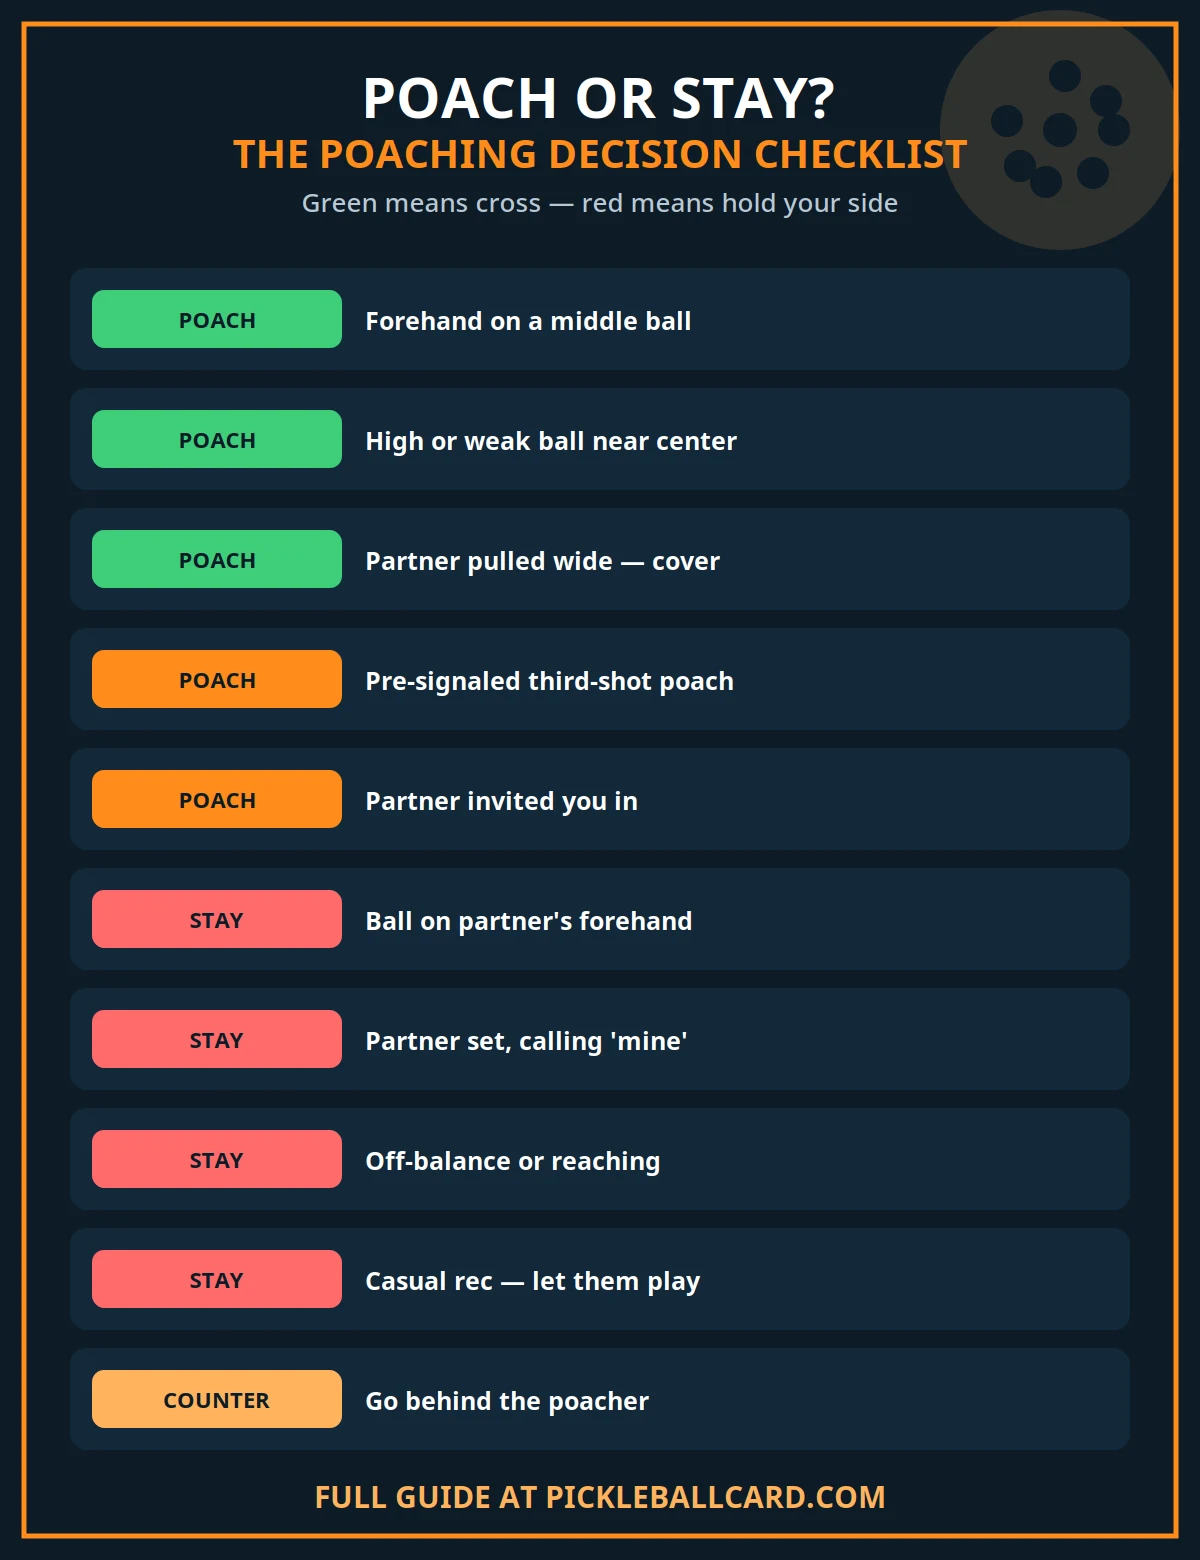
The Poach-vs-Stay Decision Table

Run every temptation through this table before your feet move. If the row says stay, it says stay.

Situation Verdict Why
Ball at the center, your forehand is on it POACH Highest-percentage shot on the court; reads as teamwork at every level
High or weak ball sitting near the middle POACH Attack it before the opponents recover — but commit to a forcing shot
Partner pulled wide off the court POACH / SLIDE Coverage, not theft — protect the middle and shrink the opponents’ targets
Pre-signaled poach on the third shot POACH Planned with your partner, who shifts to cover your side
Partner explicitly invited you (“take the middle”) POACH Consent removes the risk — the partnership already agreed
Ball clearly on your partner’s forehand side STAY Their forehand was already the best available shot; you add nothing
Partner is set, balanced, and calling “mine” STAY The call outranks the plan — abort immediately, even mid-step
You are off-balance, lunging, or reaching STAY A poach from a bad position produces the weak reply you wanted to prevent
Casual rec play with a weaker partner STAY Let them hit — development reps matter more than the point
You want the highlight, not the percentage STAY If the motive is the reel, the shot selection is already wrong
Pickleball poaching checklist

When Poaching Is Selfish

Every selfish poach fails the same test: it takes a ball your partner could have hit well, for reasons that serve the poacher more than the team. Four versions of it show up constantly.

1. You Abandon Your Side for a Hero Shot

Crossing three steps to smack a ball your partner was already set up to hit is not strategy. It is impatience with better marketing.

Every poach opens court behind you. If your interception is not a winner or a forcing shot, the opponents get that open half for free — and your partner gets to watch it happen.

Ask yourself before crossing: am I taking this ball because I am the better option, or because I am bored? Honest answers prevent most bad poaches.

The double damage is worth naming: when the hero poach misses — into the net or long — the team loses a point your partner might have won. You stole the shot and the outcome.

2. You Cut Off Your Partner’s Forehand

The worst poach in the game is reaching across to take a ball your partner was about to crush with their forehand.

You gain nothing, because their forehand was already the best shot available on that ball. All you have done is put both players on the same half of the court.

Forehands are territorial. They belong to the player standing on that side of the court unless a prior agreement says otherwise. Respect the wing.

This one also corrodes trust fastest. A partner who watches their best shot get stolen stops setting up for the next one — and your team gets worse, not better.

3. You Poach Everything in Casual Rec Play

In open play and casual rec games, your partner came to hit balls, get exercise, and improve. Poaching their shots to win points nobody will remember denies them exactly that.

This is the situation most players mean when they call poaching selfish. The score does not matter; the repetitions do. Every ball you take is a rep your partner does not get.

The coverage exception still applies: if your partner is pulled completely off the court, sliding across to protect the middle is good partnering, not poaching. Everyone recognizes the difference.

Calibrate to the room. Tournament play, league matches with defined roles, and rec games with peers who poach right back are different contexts with different norms. Read which one you are in.

4. You Never Discussed It With Your Partner

An unannounced poach is a surprise, and surprises at the kitchen line cause collisions, whiffed balls, and arguments that last longer than the rally.

The first time you poach with a new partner should never be mid-rally. Mention it during warm-up: “I like to poach middle balls with my forehand — are you okay with that?”

Ten seconds of agreement prevents ten minutes of tension. Partnerships run on consent, and poaching without it is the fastest way to spend yours.

Communication Systems That Make Poaching Work

Every good poaching team runs a communication system. The specific signals matter less than the consistency — pick a system and use it on every single point.

The Three Calls: “Mine,” “Yours,” “Switch”

“Mine” claims the ball. It should be loud, early, and final. When your partner calls “mine,” you abort your poach immediately — even if you are already mid-step.

“Yours” (or “you”) hands the ball off. Use it when a ball drifts toward you but your partner has the better play, or when you want them to know you are deliberately not crossing.

“Switch” announces a poach or a side change as it happens. Call it while you are moving, not after — your partner needs the warning in time to cover the side you vacated.

Short beats clever. Single-syllable calls survive the speed of the kitchen line, where rallies are decided in fractions of a second. Full sentences do not.

The Pre-Point Plan: Signals and the Ten-Second Chat

Before your serve, the net player can flash a hand signal behind the back: one finger for stay, two for poach. Keep the hand low and hidden so the opponents cannot read it.

Between points, spend ten seconds setting the plan out loud: “I’m poaching the third if it sits up,” or “you take the middle, I’ve got the line.” Quiet teams guess; talking teams know.

Signals work best with regular partners who have memorized the code. With a pickup partner, the ten-second chat does the same job with zero memorization required.

One more habit: confirm the plan was received. A nod, a “got it,” a tap of paddles — anything that closes the loop. An unconfirmed signal is just a gesture.

Pre-Point Communication Checklist

Run this checklist before the first serve of every match. It takes thirty seconds and prevents the misunderstandings that ruin partnerships.

  • We agreed who takes middle balls — forehand priority, no guessing.
  • Poaching is explicitly ON or OFF for this match.
  • Hand signals are set (stay vs. poach) — or we use the ten-second chat instead.
  • “Mine” always outranks any plan, and both players know it.
  • After a poach, the partner covers the open side — drilled, not hoped for.
  • In rec play, we poach only for coverage — never to steal a partner’s ball for a winner.
  • If the plan is not working, we adjust between games — no silent frustration.

The Counter: How to Punish a Reckless Poacher

Poaching is a bet. The poacher bets their interception ends the point. When it does not, half the court stands empty — and prepared opponents collect on that bet.

Go Behind the Poacher

When you see an opponent cross the centerline to poach, hit behind them into the space they abandoned. The angle is short, the court is wide open, and the poacher cannot recover in time.

You do not need pace for this shot. A soft, angled dink behind the crossing player wins the point more reliably than a hard drive hit straight at them.

You can even set the trap deliberately. Feed the poacher’s partner a tempting ball near the middle and wait for the cross — patient dinking builds exactly these invitations, then punishes the answer.

Make the poacher pay twice and the poaching usually stops. Nobody keeps crossing when every cross costs a point.

When Your Own Partner Poaches Without Warning

Do not fight them for the ball. Two paddles on one ball ends worse than one paddle on the wrong half. Pull back, cover the open court as best you can, and finish the point.

Talk after the point, not during it. “I had that one — call it next time” fixes the problem. A mid-rally argument guarantees you lose the point and the mood.

If it keeps happening, reset the agreement between games. Be specific about what you want: “no crossing past the centerline unless you call it first.” A partner who will not discuss it is telling you everything about the partnership.

Drills to Practice Poaching Timing

Poaching is timing and trust, not courage. These three drills build the read, the cross, and the recovery — in that order.

1. The Signal-and-Switch Drill

One player serves while the net partner signals poach or stay behind the back, then the pair plays out the third shot. The focus is the partner’s slide to cover the vacated side — not the poach itself.

Run it ten times per side, alternating signals. The poach is the easy half of this drill. The cover is the part that wins matches.

2. The Pop-Up Punish

A feeder pops balls up around the middle from the baseline. The net team alternates poaching with the forehand and finishing the point outright.

Score it strictly: only poaches that end the point or force a weak reply count. A soft poach that comes back is a failure — it teaches the finish-or-don’t-cross standard.

3. The Cover-and-Recover Rotation

One player is deliberately pulled wide by angled feeds. The partner slides across to cover the middle, poaching anything attackable, then both players recover to their home positions before the next feed.

This teaches the most useful poach in recreational play: the coverage poach that protects a partner, never the highlight poach that steals their ball.

Frequently Asked Questions

Is poaching legal in pickleball?

Yes — nothing in the rules forbids crossing the centerline, because the centerline is imaginary and has no faults attached to it.

The poacher must still obey the non-volley zone rules: USA Pickleball’s Official Rulebook (Section 9) prohibits volleying while any part of the body is touching the non-volley zone. That matters when a poach carries you diagonally across the kitchen.

What is the difference between poaching and an Erne?

A poach crosses the middle of the court to take a ball on your partner’s side. An Erne leaves the court entirely, going around the sideline past the kitchen to volley beside the net post.

They are different shots with different setups, risks, and rules to respect.

Should you poach in recreational play?

It depends on the context and your partner. Poaching for coverage — sliding across when your partner is pulled wide — is welcome everywhere.

Poaching to steal hittable balls from your partner in casual open play is widely considered selfish, because it costs them reps. When in doubt, ask your partner before the game, not after the poach.

What should I do if my partner poaches my shots every game?

First, never fight them for the ball mid-rally — pull back and cover. Then address it between games with a specific request, such as “call it before you cross the centerline.”

Most chronic poachers do not realize how often they do it. If the behavior continues after a direct conversation, the problem is the partnership, not the tactic.

What is the best call to stop a poach?

“Mine” — loud and early. It is the universal claim call in doubles, and it outranks any pre-point plan or signal. A trustworthy partner aborts the poach the instant they hear it, even mid-step. If yours does not, revisit the agreement off the court.

Does poaching work in mixed doubles?

Yes, with the same rules and one extra consideration: partnerships often have an agreed coverage pattern, such as the stronger net player taking more middle.

Poach inside that agreement and it is devastating. Poach outside it and the trust cost is higher, because mixed partnerships lean harder on defined roles. The ten-second chat before the match matters most here.

The Bottom Line

Poach with a plan, a call, and a partner who agreed. Poach the middle with your forehand, punish the pop-ups, cover the partner who gets pulled wide, and finish everything you start.

Skip the hero poaches, the stolen forehands, and the rec-game stat-padding. The best poachers in pickleball are the ones whose partners ask them to do it again.

shoaib
shoaib

Shoaib is the publisher of Pickleball Card. He oversees the site’s guides to pickleball rules, ratings, strategy and gear, all researched from primary sources — the USA Pickleball Rulebook, DUPR and manufacturer documentation — and updated as the game changes.
pickleballcard.com

Filed Under: Strategy & Training

What Is Stacking In Pickleball? Everything You Need To Know

October 23, 2026 by Jeena Noven Leave a Comment

If you have seen pros doing this thing and you wonder what is stacking in pickleball? Here is a guide with everything that you need to know.

Communication and positioning on the court in pickleball doubles are the most important factors that lead you to win. When you play pickleball at an advanced level, you need to learn these pickleball tricks and strategies to survive in the game. Stacking in pickleball is a positioning strategy in pickleball doubles. If you have seen pros doing this thing now, you want to learn what is stacking in pickleball.

What Is Stacking In Pickleball?

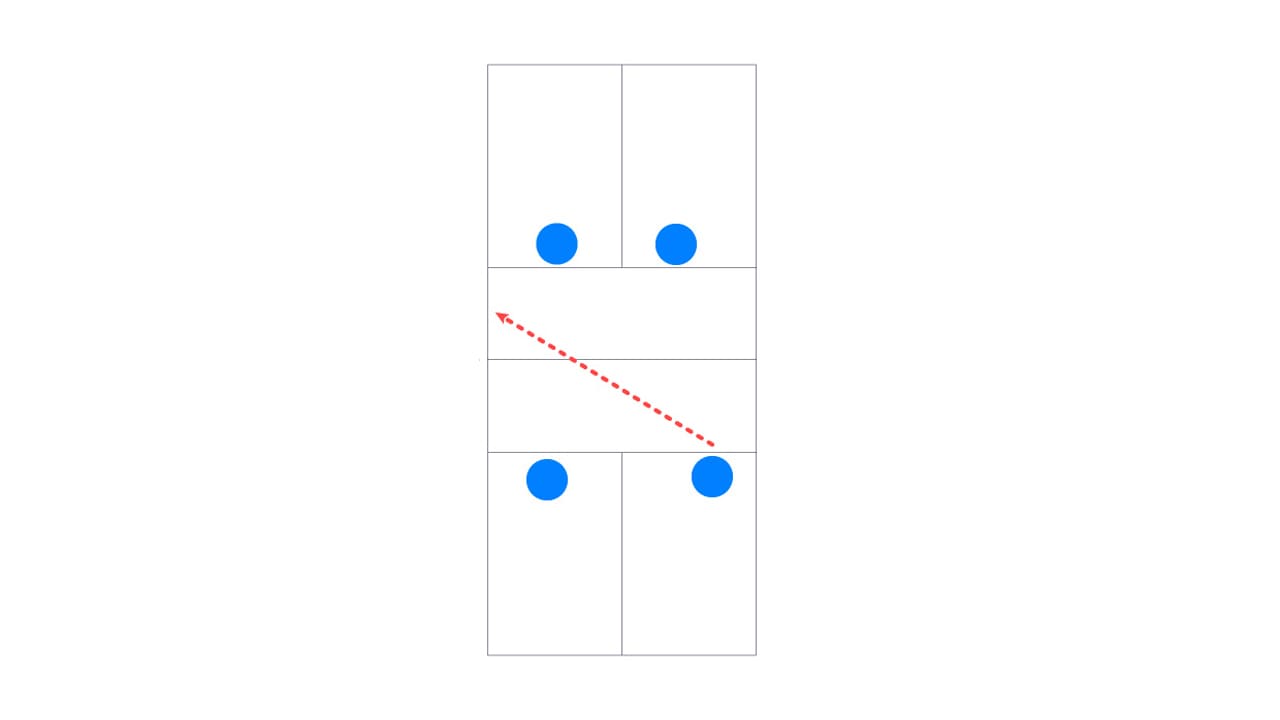
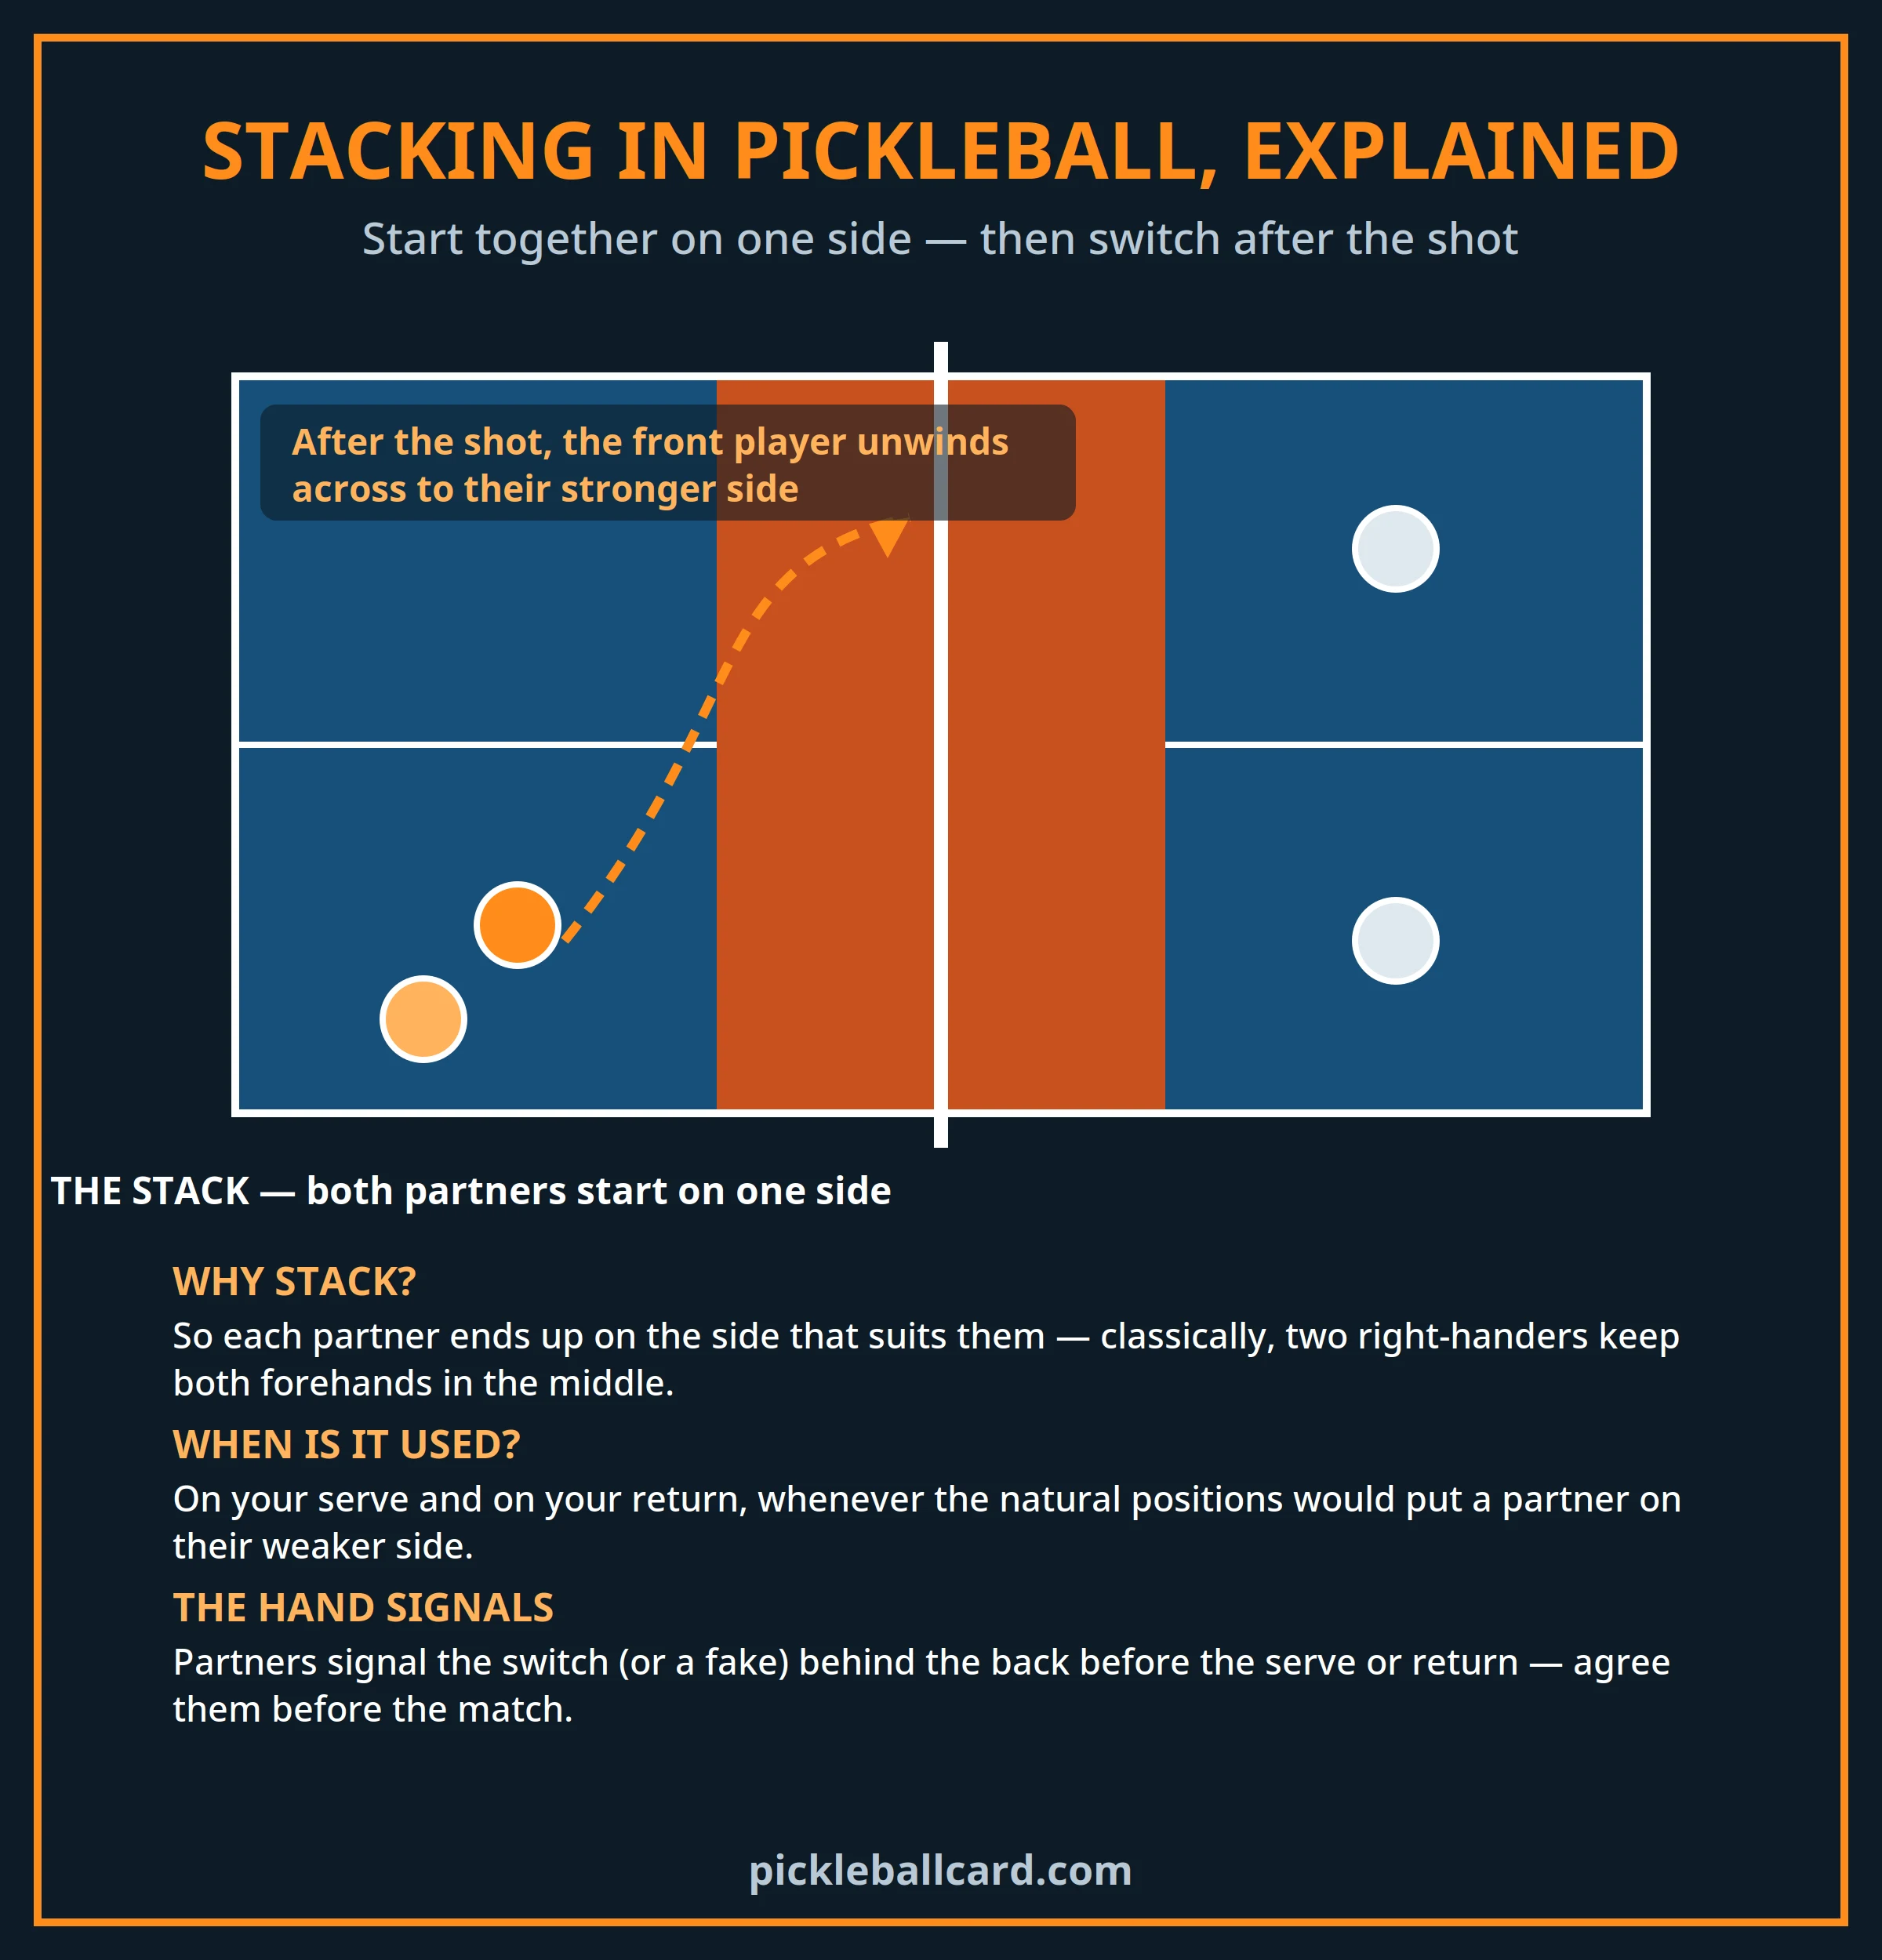
Pickleball stacking diagram showing both partners starting on one side of the court and switching after the shot
Stacking: start together on one side, then unwind to your stronger side.


Stacking in is a positioning strategy in pickleball doubles games. In stacking, both players position or stack themselves on the same side of the court before a return or serve. Once the pickle ball is hit, each player shifts to the desired position (as decided before). In this way, they can trick the opponent and also get better control and mobility in the game. Cristine McGrath, who is a pro pickle player, says stacking pickleball is the best way to get the game control.

What Is Stacking In Pickleball, Stacking Diagram, Diagram Of Pickleball Court
Pickleball Stacking Diagram

What Is The Advantage Of Stacking In Pickleball?

Stacking allows a team to maximize its strengths and weaknesses. Also, one team can plan to stack to target the weaknesses of the opponent teams.

For instance:

  • If a player has a strong forehead, they can maximize the strength through stacking. Stacking will allow the player with a powerful forehand to keep it in the middle to avail maximum forehand poaching chances.
  • Similarly, a team can cover the weakness through stacking. If a player is weak at backhands, stacking will let him avail the backhand shots as both players are stacked on the same side, and the one who is better with backhands will take charge.
  • Stacking improves the overall mobility and control of the game.

How To Stack In Pickleball?

  • Stacking is a little different than regular pickleball positioning. It has certain pickleball stacking rules that must be followed to score the legal point.
  • One side of the pickle court is divided by the centerline into two halves.: ad side(left side) and deuce side (right side).
  • In traditional pickle positioning, one player on each team stands on the ad while the other is on the deuce side. The position remains the same throughout a point. Once the point is scored the position of players of both teams is shuffled.
  • Stacking in pickleball strategy is totally different from the traditional position of the game. In stacking, both players stand on the same side before a serve or return. It can be a deuce side or an ad side.

How To Stack Before A Serve?

  • For even points stack on the deuce side (right) of the court.
  • For odd points, both players stack on the ad side (left) of the court.
  • The non-serving player stands out of the bounds, a little close to the baseline.
  • As soon as the service is hit, they begin to rotate to take up the desired positions for the third shot. The positions are already decided, and a little confusion and hesitation can make you lose the chance to serve.
  • Typically, the serving player hits the third shot, too.

How To Stack On Return?

  • For stacking on return, both players again start on the same side.
  • The returning player positions himself on the baseline while the non-returning player stands next to the kitchen line.
  • The non-returning player moves to the valley position near the kitchen, while the returning player slides over to the opposite side.
  • Once the serve is returned, they will rotate to go back to the traditional position.

When To Stack?

Does stacking work every time? You need to do stacking at the right time to get the maximum benefit. It could be your team’s strength that you want to maximize or an opponent’s weakness that you can spot and use against them.

When You Have A Dominant Forehand

If you have a strong forehand, you can stack in a way that you get the position where your foreheads are allowed near the centerline. Here, you will get to hit more forehand shots.

When One Player Has Weak Mobility

If any player in a team has weak mobility, the opponent will try to push him back by throwing extra lobs at him. So you can handle it by stacking in a way that the player with good mobility at the forehand stays close to the middle of the court for better control and strong returns.

People Also Ask

Why Do Players Stack In Pickleball?

Players stack in pickleball to maximize their strengths and improve the mobility and control of their game. Also, they may stack to target the weakness of the opponent’s team.

What Are Examples Of Stacking?

An example of stacking is when both players of the team stack themselves either on the deuce or ad side of the court before a serve or return. They stack on the same side of the court to either maximize the strength or overcome the weakness of any player on the team.

When Do You Switch Sides In Pickleball?

If a point is scored, the servers switch sides. If you were in the right-hand court before serving, then you will initiate the next serve from the left-hand court. The first served is initiated from the server at the right side of the court according to pickleball single and double rules.

Is Stacking Legal In Pickleball?

Yes, pickleball stacking is perfectly legal. For each point, a pickleball must serve from a specific serving point, and the receiving player must return it from a specific court.According to the official pickleball rules book, formations such as stacking are legal — but the correct server and receiver, decided by the score, must always play the ball; the wrong player playing it is a fault.

What Is Half Stacking In Pickleball?

Half stacking in pickleball is a strategic positioning technique used by doubles teams. If a team only stacks on the serve, it is called half stacking or partial stacking. If a team stacks both on serve and return of serve, it is called full stacking in pickleball.

Stacking Changes Where You Stand — Never Who Must Play the Ball

Stacking changes where you stand, never who must serve or receive. The score still dictates the correct server and receiver for every point, and the wrong player playing either ball is a fault — no formation excuses it. Good stacking teams therefore agree their plan before the point: who serves, who receives, and who slides where once the ball is live. Many pairs use hand signals behind the back to call the switch, so the move happens without hesitation — or a shouted instruction opponents can read.

When Stacking Hurts More Than It Helps

Stacking is a tool, not a default. It pays when one partner owns a clearly stronger forehand and both players know the choreography cold.

It backfires when the weaker partner keeps getting stranded mid-switch, gifting the open court. It also backfires when opponents spot the pattern and aim every return at the crossing player.

Occasional stacking, used only on serve or only against one opponent’s return, often captures most of the gain with half the confusion. Full-time stacking is a tournament commitment, not a casual habit.

If your pair is still miscommunicating on ordinary switches, fix the basics first in our strategy guides, then layer stacking on top.

Final Words

I’m hopeful that this guide will help you understand what is stacking in pickleball and how it works. Though the rules of stacking aren’t very difficult, it takes a lot of practice on the court to learn how to stack in pickleball. If your communication skills aren’t good, you may end up losing some points when you try stacking instead of traditional positioning.


Other Related Posts:
  • How To Score Pickleball?
  • Best Pickleball Shoes
  • Pickleball Terminology
  • Pickleball Court Vs Tennis Court Dimensions
  • What Is An Erne In Pickleball?


Jeena Noven, Pickleballcard Author
Jeena Noven

Jeena Noven is one of Pickleball Card’s main writers for rules, ratings and everyday play. She focuses on the questions players actually argue about on court — scoring, faults, ratings and match situations — and checks each answer against the current USA Pickleball rulebook before it goes live. Her guides are written for real club players: clear first, technical when it matters, and updated when the rules change.

Filed Under: Strategy & Training

Pickleball Singles Strategy: Serve Deep, Track Forward, Force the Error

October 18, 2026 by shoaib

Singles pickleball looks like doubles played alone. It is not. It is a different game wearing the same court.

One player covers everything, every rally is a footrace and a chess problem at once, and the shots that win doubles points routinely lose singles points.

This guide organises singles as one connected system: serve, return, approach, life at the kitchen line, and defending the pass when your opponent gets there first.

Key Takeaways

  • Depth wins singles. Serve deep and return deep; short balls are invitations your opponent will accept.
  • The T is your home serve. Serving toward the middle cuts return angles and shortens your own recovery run.
  • Track your shot forward. The first player established at the kitchen line controls most rallies.
  • Come in behind quality only. Approach behind deep, low balls that push your opponent back — never behind a floater.
  • Play against momentum. A moving opponent is beaten by the ball behind them more often than by open space.
  • Force the error, do not chase the winner. In a full-court game, consistent pressure outscores highlight shots.

The Short Answer

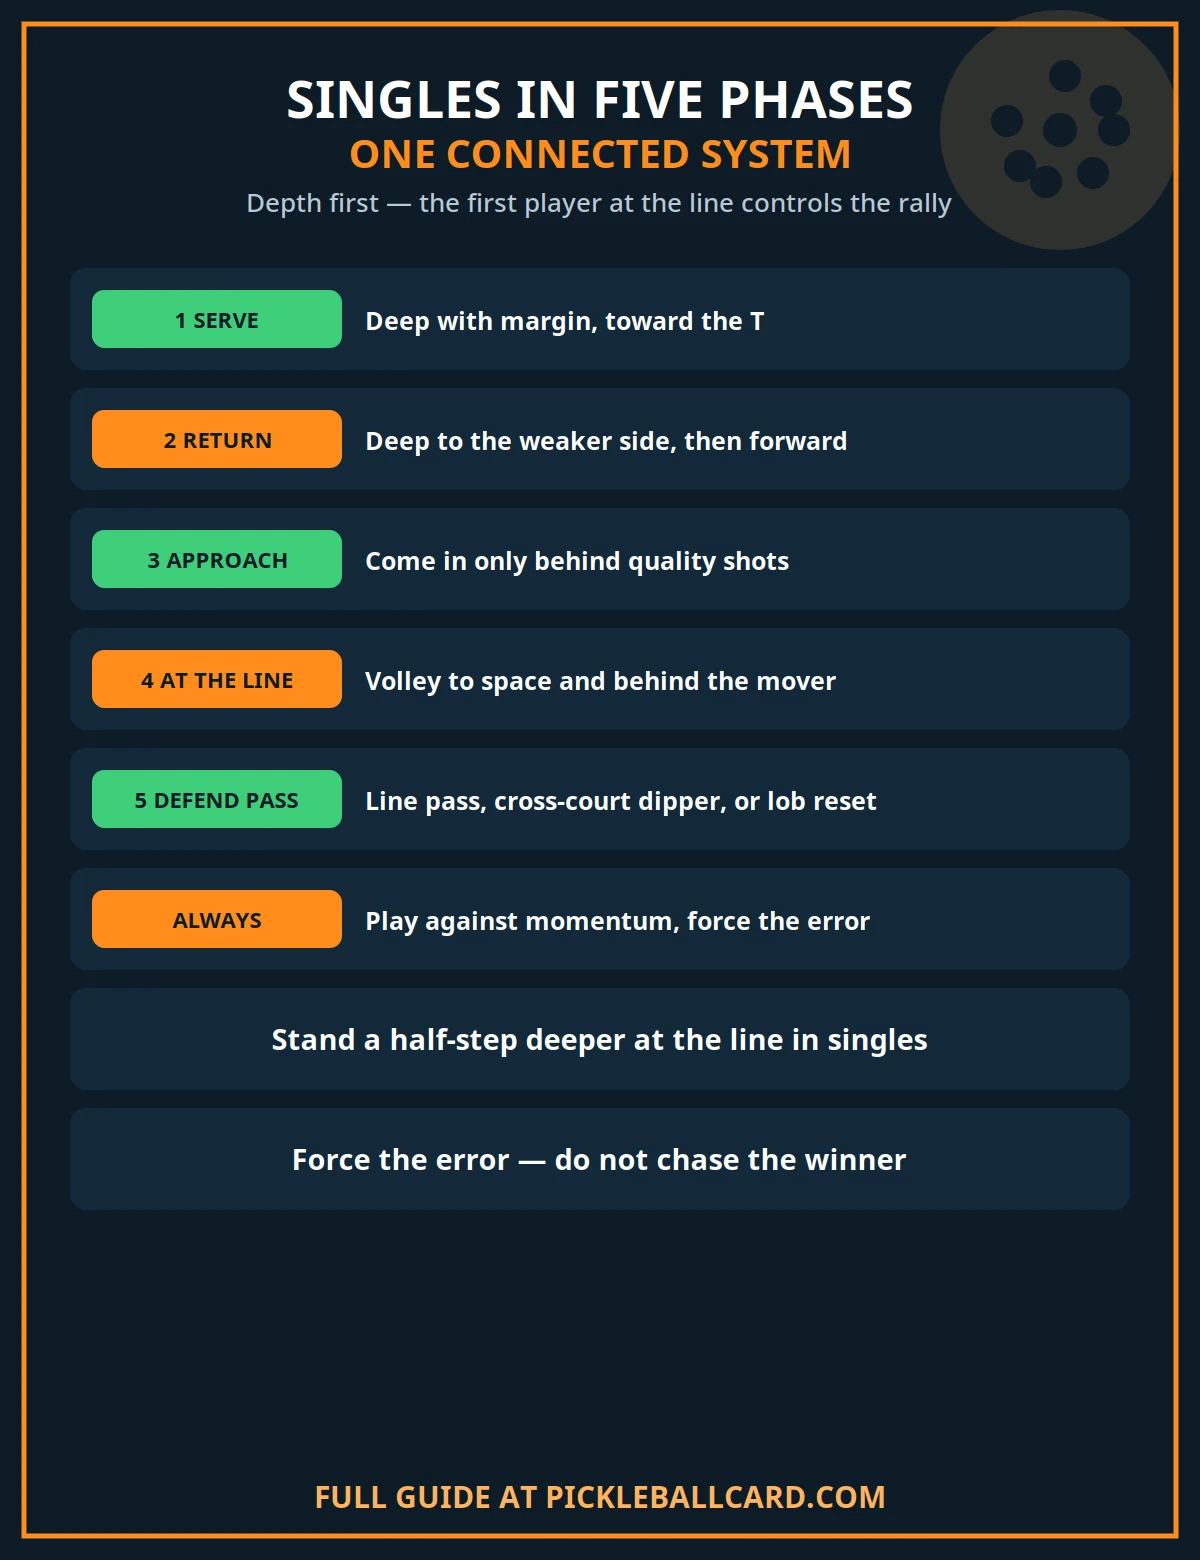
Singles is won by depth and court position, not by winners. Serve deep, mostly toward the T, and return deep to your opponent’s weaker side.

Then follow your own shot forward. The player who reaches the kitchen line first, behind a ball that deserves it, dictates where the next ball goes.

USA Pickleball’s singles guidance makes the same core points: deep serves with margin, the T serve, deep returns, playing against momentum, tracking forward, and letting the opponent make the mistake.

What follows turns those points into a phase-by-phase system you can run through during a match, one rally at a time.

How Singles Differs Strategically From Doubles

The rules barely change. The same court, the same non-volley zone and the same two-bounce rule apply, with one server instead of two.

The full rules are covered in our guide to pickleball singles rules. This article assumes them and stays with strategy.

What changes is coverage. In doubles, a partner owns half your problems. In singles, the sideline you ignore is the sideline the ball finds.

That single fact reshapes everything: depth matters more, patience matters more, recovery position matters more, and low-percentage winners matter far less.

If you are still choosing between formats, our comparison of singles and doubles pickleball covers the differences in rules, fitness and feel.

Phase One: The Serve

Deep, With Margin

A deep serve pushes your opponent behind the baseline and makes a strong return physically harder to produce.

Aim for the back third of the service box, not the back line itself. Margin matters because a missed serve in singles is a point handed over with no rally at all.

Height helps depth. A serve with a comfortable arc clears the net safely and still lands deep, while a flat, skimming serve faults too often to build a game on.

The T as Your Home Serve

Serve toward the T — the junction of the centre line and the non-volley zone’s opposite service box — as your default location.

A T serve cuts the returner’s angles. They cannot open the court wide without hitting a much sharper angle, and most returns come back through the middle, close to you.

It also shortens your recovery. After a T serve you are already near where the rally will develop, instead of stranded out wide.

The Occasional Wide Serve

The wide serve is a change-up, not a home. Used sometimes, it drags the returner off court and opens the middle for your next ball.

Used often, it opens angles against you and lengthens your run back. Serve wide to remind, serve to the T to live.

Phase Two: The Return

The return is your first approach shot, and in singles it may be your most important one. Treat it as the start of your advance, not a defensive reply.

Deep, to the Weaker Side

Return deep, ideally to your opponent’s weaker side — for most players, the backhand corner.

Depth does two jobs at once. It pushes the server back for their third shot, and it buys you the seconds you need to move forward.

A short return does the opposite. It invites the server to step in, drive or drop on their terms, and leave you covering the whole court from the baseline.

The depth principles are shared with doubles. Our guide to pickleball return of serve tips covers stance, height and handling pace in full.

Then Forward, Immediately

Do not admire the return. The steps you take in the first second after contact decide where you play the next ball from.

Move forward behind your return, split-step as the server swings, and be ready to keep coming if your return has done its job.

Returning and staying back is the most common singles error at club level. It concedes the kitchen line — and usually the rally — before the third shot lands.

Phase Three: The Approach Decision

This is where most club singles points are actually decided: not at the line, not at the baseline, but in the choice of whether to come in.

Come In Behind Quality

Approach behind balls your opponent cannot attack: deep balls at their feet, low balls that push them backward, balls that move them off balance.

Behind those shots, your opponent must hit up, from behind the baseline, while you close the net. That is the exchange singles strategy is built to create.

Track the ball’s flight as you move. Following your shot in means your position mirrors its quality, step for step.

Stay Back Behind Anything Weak

A short or floating approach shot is not an approach shot. Following it in simply moves you closer to the passing shot it invites.

Behind a weak ball, hold or retreat, re-balance near the baseline’s centre, and rebuild the rally with your next deep ball.

Discipline here feels passive and wins matches. The points you save by refusing bad approaches outnumber the points any extra rush would steal.

Your shot Decision Why
Deep, low, opponent moving backward Come in fully They must hit up; you own the line
Deep but sitting up, opponent set Come in cautiously, split-step early Expect a firm pass attempt at your feet
Mid-court, neutral ball Advance halfway, stay balanced Take space without selling out to the pass
Short or floating Stay back and rebuild Approaching behind it concedes the pass
You are stretched or off balance Recover to centre first Position beats speed when you are beaten
Pickleball singles strategy in five phases diagram showing deep serve to the T, deep return, approach decision, play at the kitchen line and defending the pass

Phase Four: At the Kitchen Line

Arriving is not the end of the system. What you do at the line decides whether the long approach was worth it.

Volley to Space — and Behind the Mover

Your first volley target is the open court your opponent has just left. Your second, often better target is directly behind a still-moving opponent.

A player sprinting wide cannot reverse instantly. The ball placed back into the space they came from wins without needing pace or a line-hugging angle.

Keep volleys low and deep rather than spectacular. A deep volley at the baseline keeps your opponent pinned while you hold the position they want.

Stand a Half-Step Deeper Than Doubles Habit

Doubles players hug the kitchen line. In singles, a half-step deeper buys reaction time against the pass and the lob, and costs almost nothing on volleys.

From that half-step you can still step in to volley low balls. What you gain is the extra fraction of a second that passing shots are designed to steal.

Expect the Lob

A pinned opponent’s escape is often upward. A deep lob over a net player is a legitimate singles reset, especially against a player camped tight to the line.

Your half-step depth helps, but the movement still matters: turn, do not backpedal, and decide early between overhead and letting it bounce.

Our guide to how to defend the lob in pickleball teaches that full movement system, and it transfers directly to singles.

Phase Five: Defending the Pass From the Baseline

Sometimes your opponent reaches the line first. Your game then becomes passing shots and patience, played from behind the baseline.

The Two Passing Shots

Down the line is the shorter, faster pass. It suits a ball you meet early and in balance, and it punishes a net player leaning toward the middle.

The cross-court dipper is the safer, cleverer pass. Topspin or a soft, angled ball drops below net height as it crosses, forcing the volleyer to hit up from their feet.

Choose by the volleyer’s position, not by preference. A line pass into a player waiting on that line is a donation; the dipper was there instead.

The Lob as a Reset

When you are stretched wide or pushed deep, the lob buys back the rally. Hit it high and deep, recover to centre, and make the net player prove the overhead.

Used sparingly, it also changes your opponent’s positioning. A player who respects your lob stands deeper, and a deeper net player volleys less sharply at your feet.

Used constantly, it becomes a feeding drill for their overhead. The lob is a reset button, not a game plan.

Playing Against Momentum

Open space is visible. Momentum is decisive, and most club players never look for it.

Watch your opponent’s hips and direction of travel as you choose a target. A player moving strongly one way is weakest in the space directly behind that movement.

Against a set, balanced opponent, open space is the right target. Against a committed mover, the wrong-footing ball wins more often and needs less precision.

This is why deep balls to a corner work twice in singles. First they move the opponent, then the reply behind them ends the rally the move created.

Rally Patience and Shot Tolerance

Singles rewards the player who can hit one more good ball. Not one more spectacular ball — one more deep, low, unglamorous ball.

Build points in layers: depth first, position second, angle third, winner last and only when the rally has already been won twice over.

Manage your errors across the whole match, not the rally. Track which shot is leaking points — often the rushed approach or the low-percentage pass — and simplify that one choice.

Between points, reset deliberately. Singles rallies are sprints; the walk back, the breath and the next serve target are part of the system, not downtime.

Fitness supports all of this as repeat effort, not general cardio. Short rallies, full recoveries and honest shot tolerance are what the strategy actually demands from your legs.

Common Singles Mistakes

Mistake Cost Fix
Serving short Returner steps in and owns the rally Aim for the back third, with arc and margin
Returning, then staying back Kitchen line conceded before the third shot Move forward in the first second after contact
Camping on the baseline Every drop and angle plays against you Track quality shots forward, phase by phase
Following a weak approach in Passing shot passes a stranded player Stay back behind short or floating balls
Going for winners from defence Errors end rallies you were still in Pass, dip or lob — then rebuild
Hugging the kitchen line Lobs and passes steal your reaction time Hold a half-step deeper in singles

A Simple Singles Practice Session

Strategy only survives if practice rehearses decisions, not just strokes. This short session trains the phases in order, in about forty minutes.

  1. Deep serve and return game. Play points where serve and return must land in the back third to count. Ten minutes builds the depth habit under score pressure.
  2. Approach-or-stay calls. A feeder plays mixed third shots while you call approach or stay before moving. The call trains the decision, which is the skill that decides points.
  3. First-to-the-line points. Play rallies where the first player established at the kitchen line scores double for winning the point. The incentive rewires passive baseline habits quickly.
  4. Passing-shot rotations. One player holds the line while the other alternates down-the-line passes and cross-court dippers. Five of each, then swap roles.
  5. Wrong-footing rallies. Finish with live points where a winner hit behind a moving opponent counts double. Momentum reading becomes instinct instead of theory.

Finish every session with ordinary games to fifteen. Practice incentives are scaffolding; the real score is where the new habits must learn to live.

Frequently Asked Questions

Are the kitchen rules different in singles?

No. The non-volley zone works exactly as in doubles: no volleying with a foot in the zone or on its line, and momentum carrying you in after a volley is still a fault.

Should I always come to the net in singles?

No. Come in behind quality — deep, low balls that push your opponent back. Behind short or floating shots, staying back and rebuilding wins more points than rushing in.

Where should I stand to receive serve in singles?

Just behind the baseline, near the middle of your service box, favouring your weaker side slightly if an opponent targets it. Depth matters more than the exact spot.

Is singles good practice for doubles?

Yes. Singles builds deep returns, approach judgement, passing shots and honest footwork — all of which transfer. It will not teach partner communication or stacking, which remain doubles skills.

What is skinny singles?

It is a half-court practice format played in one diagonal corridor. It is useful training, and it deserves its own guide rather than a section here.

How do I beat a faster opponent in singles?

Slow the geometry, not just the ball. Serve and return deep, play behind their momentum, extend rallies with depth, and make speed run the longest possible distances.

The Bottom Line

Pickleball singles strategy is a system, not a tip list: serve deep to the T, return deep to the weaker side, and track your shot forward.

Come in only behind balls that earn it, hold a half-step deeper at the line, volley behind the mover, and defend the pass with the dipper, the line ball or the resetting lob.

Above all, let depth and patience do the scoring. The opponent who must hit one more ball, from one step further back, is the opponent who eventually misses.

Sources: USA Pickleball, Pickleball Singles Strategy Tips and Official Rules (non-volley zone and singles scoring). Coaching content in this article is original; no competitor content is linked or reproduced.

shoaib
shoaib

Shoaib is the publisher of Pickleball Card. He oversees the site’s guides to pickleball rules, ratings, strategy and gear, all researched from primary sources — the USA Pickleball Rulebook, DUPR and manufacturer documentation — and updated as the game changes.

pickleballcard.com

Filed Under: Strategy & Training

Third Shot Drop vs Drive: How to Choose the Right Shot Every Time

October 18, 2026 by shoaib

Most third-shot advice forces a false choice. One camp says always drop. The other says drive everything and trust your hands.

Neither camp is reading the return. The return has already made most of the decision for you, if you know what to look for.

This guide gives you that read. It covers the four things to check at contact, a decision table you can memorise, the hybrid shot between drop and drive, and the fifth-shot plan that follows a drive.

Key Takeaways

  • The return decides, not a preset plan. Depth, height, pace and opponent position tell you whether to drop, drive or play the hybrid.
  • Deep or low return, opponents set: drop. A drive from deep gives set volleyers time and height to punish.
  • Short, sitting-up return, opponent moving: drive. Attack the player in motion before the pair is set at the line.
  • Balance overrides bounce location. A ball you reach off balance is a drop ball, wherever it bounced.
  • Drive the third, drop the fifth is a real plan. A firm third often earns a weaker fourth that is far easier to drop.
  • Never pre-decide during the serve. Choosing before the return is hit is the most common third-shot mistake at club level.

The Short Answer

Read four things as the return comes back: how deep it is, how high it sits at contact, how much pace it carries, and whether both opponents are already set at the kitchen line.

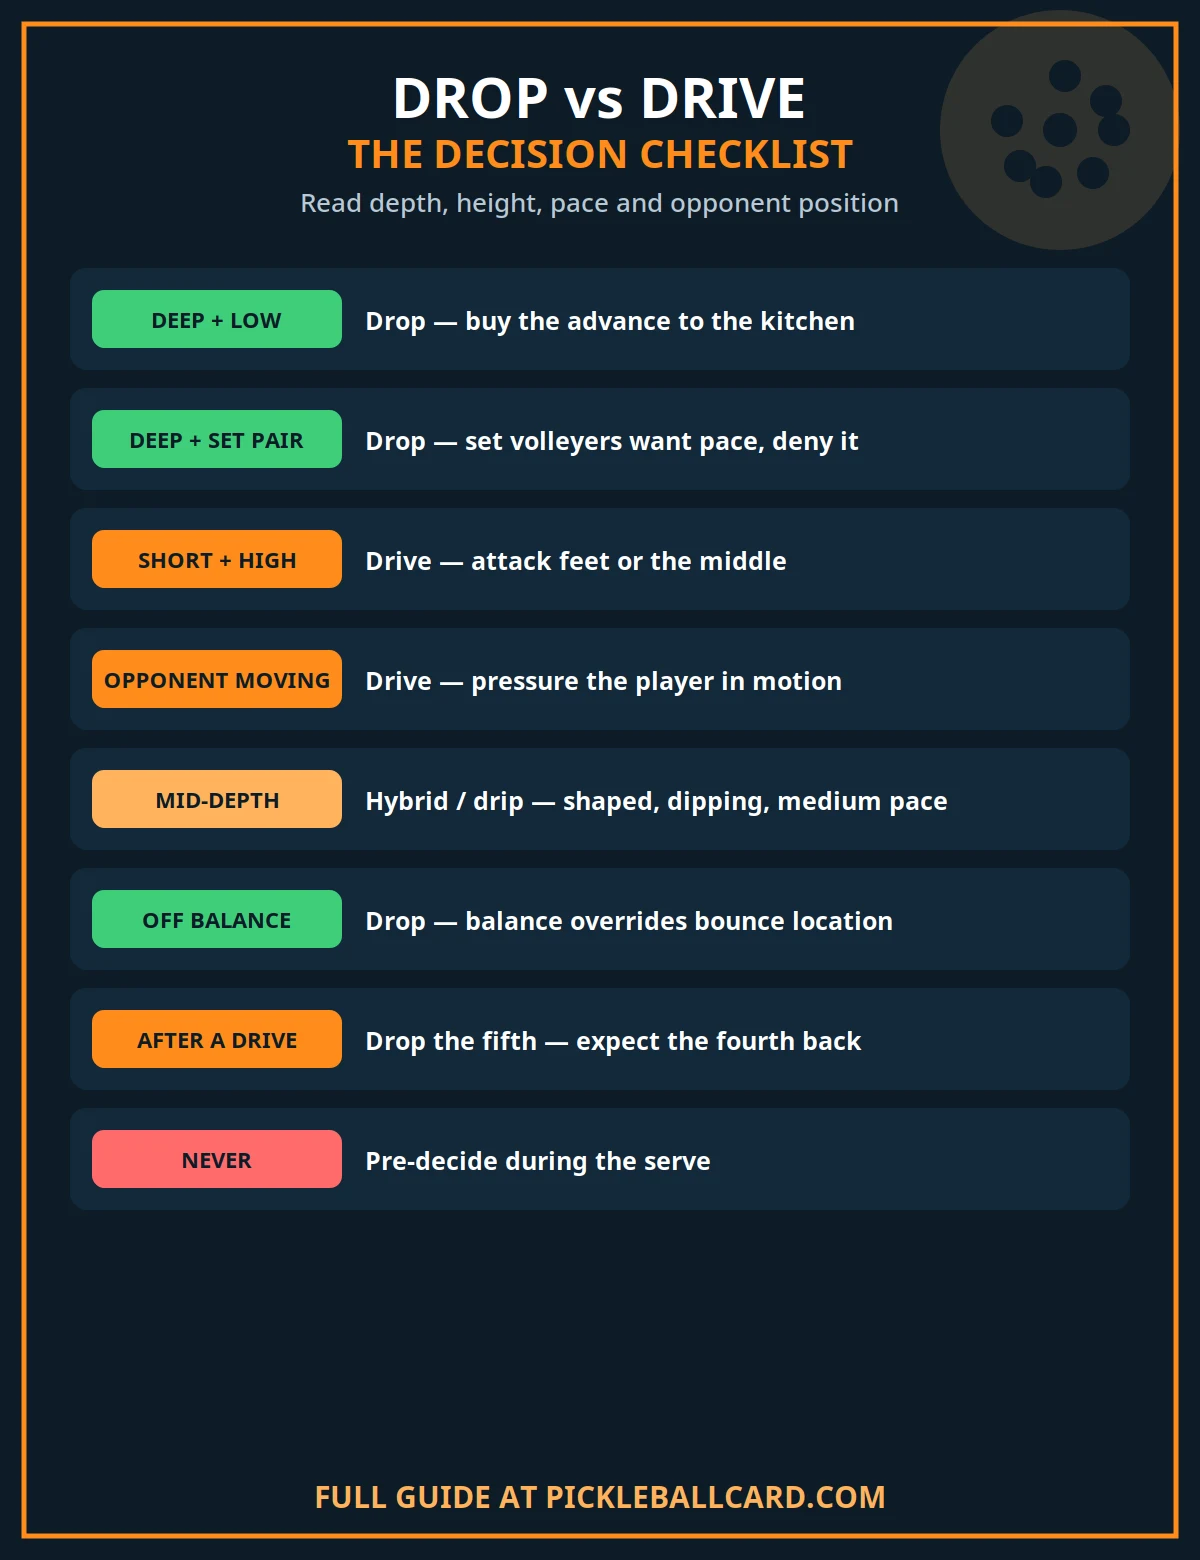
Deep, low or fast returns against a set pair point to the drop. Short, high returns, or an opponent still moving forward, point to the drive.

USA Pickleball states a compact version of the same rule in its skill guidance: drop low balls, drive high balls, and follow your shot in. That rule is the starting point here, not the whole system.

The sections below turn that one line into a complete decision you can make in the half-second you actually have.

What Each Shot Is Actually For

Players choose better when they stop thinking about technique and start thinking about jobs. The drop and the drive do different jobs.

What the Drop Buys You

The drop buys you the advance. A soft ball arcing into the kitchen cannot be volleyed down at your feet.

While it travels and bounces, you and your partner move forward together. A good drop is how the serving team earns the kitchen line without sprinting through danger.

The drop is therefore the neutralising shot. It answers a strong return by taking the rally back to even terms.

What the Drive Buys You

The drive buys you a weaker fourth shot. It rarely wins the point outright against players already set at the line.

Its real value is pressure. A firm drive at a moving opponent, at feet, or through the middle forces a rushed block that often sits up or floats short.

That weaker fourth is then your chance. You step in and drop the fifth shot against a pair that is no longer comfortably set.

Why Mechanics Are Not Covered Here

This article is the decision article. Stroke mechanics for the drop itself are covered in full in our guide to the third shot drop.

Read that guide for grip, arc and contact point. Come back here for the harder skill: choosing correctly, return after return, under pressure.

The Decision Table: Read the Return

Read on the return Best choice Why
Deep, near the baseline, and you are moving backward Drop A drive from deep gives set opponents time, height and an easy volley
Low or skidding, below net height at contact Drop You cannot get on top of it; driving produces a rising, attackable ball
Short, in the transition zone, sitting up at or above net height Drive You are forward and balanced, with a target to attack
One opponent late to the line, or a pair still unwinding a stack Drive Pressure the player in motion before the pair is set
Heavy pace straight at you, feet not yet set Drop or hybrid Absorb and soften; do not swing back at a ball you cannot control
Mid-depth and ambiguous, no clear signal either way Your stronger shot, or the hybrid Balance and contact height override bounce location alone
Third shot drop vs drive decision checklist showing deep and low returns mean drop, short and high returns mean drive, and mid-depth returns mean the hybrid shot

Notice what the table does not do. It never asks what you planned during the serve, and it never asks which shot you prefer.

Preference still matters on the truly ambiguous ball. On every other ball, the return has outvoted your preference before you swing.

Read One: Depth

Depth is the first and loudest signal. A return landing within a step or two of your baseline pushes you deep and steals your forward momentum.

From there, a drive must travel the full court. Set opponents at the kitchen have time to track it, set their feet and volley it back at yours.

A drop from deep travels the same distance softly. It asks the opponents to wait, bend and hit up, which is exactly what you want.

Short returns reverse the logic. A return bouncing in the transition zone brings you forward, shortens the court, and puts an opponent in your sights while they are still moving.

That is the drive ball. Passing it up to attempt a delicate drop usually wastes the one clear attacking chance the rally offered.

Read Two: Height at Contact

Height decides what your paddle can physically do. A ball below net height at contact cannot be driven downward.

Every drive from below the net must start by going up. Opponents at the line live for that rising ball.

Below net height, the honest options are the drop and the hybrid. Both accept the ball’s height instead of fighting it.

Above net height, with time to set, the drive becomes real. You can hit through the ball, keep it low over the net and aim at feet or the middle.

This is the sense behind the coaching phrase about driving high balls. It describes contact height, not bounce height and not ambition.

Read Three: Pace

A hard, flat return shortens your preparation whether it is deep or mid-court. Swinging a full drive back at it compounds the problem.

Against pace, soften first. A drop or hybrid with a shorter motion absorbs speed and restores your balance for the next ball.

A slow, floating return gives you the opposite gift: time. Time lets you step in, choose a target and drive with your feet underneath you.

Pace also tells you about the returner. A player who drives returns hard usually expects a hard reply and is ready for it.

Denying that expected pace, with a calm drop into the kitchen, often draws the error the drive would never have forced.

Read Four: Opponent Position

Look up before you look down. Where the opponents are matters as much as where the ball is.

Both opponents set at the kitchen line, paddles up and balanced, is the strongest possible case for the drop. There is no gap to drive into.

One opponent still travelling forward is the strongest case for the drive. Hit at the moving player, or into the space their movement has opened.

A pair unwinding a stack is a special version of the same read. For a few seconds their middle and sidelines are unsettled and their communication is busy.

Driving the middle in that moment creates hesitation. Our guide to who should take the middle in pickleball explains why unsettled pairs concede that space.

When to Drop: The Full Case

  • The return is deep and you are near or behind the baseline. Your priority is neutralising, not attacking.
  • The ball is low at contact. You cannot drive a ball upward and expect it to survive the kitchen line.
  • Both opponents are set. Set volleyers want pace; the drop denies them the ball they are waiting for.
  • You are off balance or moving backward. The drop is the only shot your body position can honestly support.
  • Your drive has been read all match. Changing to the drop breaks a pattern set opponents have started timing.
  • Wind is pushing drives long. A soft shot with margin is the safer tool when pace keeps sailing.

A good drop still needs a follow-through of a different kind: your feet. Dropping and then standing at the baseline to admire it wastes the shot completely.

Move in behind every drop you trust. Split-step if the opponents play it early, and keep advancing if it lands low and forces them to hit up.

When to Drive: The Full Case

  • The return is short and sits up. You are forward, balanced and hitting down toward feet.
  • An opponent is still moving up. Attack the mover before their feet and paddle are set.
  • The pair is unwinding a stack. The middle is briefly nobody’s clear responsibility.
  • Your forehand is loaded and balanced. A set forehand drive is a different weapon from a stretched backhand swipe.
  • Opponents are camping on your drop. If every drop is being taken out of the air early, pace changes their timing.
  • You have a clear fifth-shot plan. The drive is chosen because you want the fourth shot it will produce.

Drive targets matter more than drive speed. Feet are first, the middle is second, and a body at the transition line is third.

Drives aimed at a set player’s paddle, at shoulder height, are gifts. That player simply blocks, and the rally you tried to speed up speeds up against you.

For what that block looks like from the other side, see how to beat bangers in pickleball — and drive in a way that does not feed it.

The Third Option: The Hybrid or Drip Shot

Many returns are neither clean drop balls nor clean drive balls. They land mid-depth, sit at about net height, and punish a binary decision.

The hybrid answers them. It is a shaped, medium-pace ball, usually with topspin, that dips down toward the opponents’ feet or the kitchen edge.

Hit harder than a drop, it still arrives low. Hit softer than a drive, it still pushes opponents back off the line they wanted to hold.

Use the hybrid when the return is mid-depth, when you are moving forward but not fully set, or when a full drive has started sailing long.

Think of it as buying drive pressure at drop risk. For developing players, it is often the highest-percentage third shot they own.

Drive the Third, Drop the Fifth: The Two-Shot Plan

The most misunderstood idea in third-shot strategy is that a drive is a failed drop. Played deliberately, it is the first half of a two-shot plan.

Drive the third firmly at a mover or the middle. Most returns of that drive — the fourth shots — come back shorter, higher or slower than the original return.

Now drop the fifth. You are closer to the net, the ball is easier, and the opponents have just been pushed out of their set positions.

The plan fails only when the third-shot driver expects to win the point immediately and stops moving. Expect the fourth, step in behind your drive, and be ready.

Playing the Fourth Shot You Get Back

If the fourth comes back soft and short, drop it and advance. The plan has worked exactly as drawn.

If the fourth is blocked hard and low at your feet in transition, do not force another drive. That ball is a reset.

Our guide to the pickleball reset shot covers that exact situation: absorb it, drop it into the kitchen, and keep your advance alive.

If the fourth sits up high, you may drive again or counter. Two drives in a row are justified by the ball, not by momentum or frustration.

After the Shot: Do Not Get Marooned

The decision does not end at contact. Where you go next decides whether a correct choice actually wins anything.

Behind a good drop, advance together. Move while the ball travels, split-step before the opponent contacts it, and take the line the drop earns.

Behind a drive, advance with caution. Step in ready to play a fifth, but do not sprint into the block that is coming back.

Behind a poor shot of either kind, hold and defend. Advancing behind a floaty drop or a weak drive simply shortens the distance on the smash it invites.

The transition zone punishes indecision more than it punishes either shot. Pick your line, move with your partner, and be balanced before the next contact.

Common Third-Shot Mistakes

Mistake What happens Fix
Pre-deciding during the serve You drive deep returns and drop short ones — exactly backwards Decide only after the return bounces
Driving from deep, off the back foot Rising ball, easy volley, point ends at your feet Deep plus off balance always means drop
Dropping every ball by habit Set opponents step in and take drops out of the air Drive short, high returns to keep volleyers honest
Aiming drives at a set paddle Simple block comes back faster than your drive Target feet and the middle instead
No plan for the fifth shot You admire the drive while the block passes you Step in expecting the fourth shot
Dropping, then standing still The advance the drop bought is never taken Move in behind every drop you trust

A Simple Drill: Feed and Call

Practise the read, not just the shots. Stand at the baseline as the serving player while a partner feeds returns of mixed depth and height.

Before you swing, call your choice out loud: drop, drive or hybrid. The call forces the read to happen before the stroke, which is the whole skill.

Play each ball out as a fifth shot where possible. A correct call followed by a normal error still counts as a win in this drill.

Ten minutes of feed and call teaches more third-shot judgement than an hour of dropping fed balls you already knew were drops.

Frequently Asked Questions

Should beginners just always drop the third shot?

No, although the drop deserves the most practice time. Beginners should learn the drop first, then add the drive for short, high returns that are clearly attackable.

What if my drop is unreliable under pressure?

Use the hybrid more often while you build the drop in practice. A shaped, medium-pace ball at the feet is far safer than a full drive from deep.

Is driving at the body acceptable in pickleball?

A firm drive at feet, hips or the middle is normal competitive play. Deliberately head-hunting a set opponent is poor practice and, in recreational play, poor etiquette.

What does driving high balls actually mean?

It means contact height. A ball you meet above net height, with your feet set, can be driven flat and low. A low ball must be lifted, so drop it instead.

How often should I drive the third shot?

There is no correct quota. Let the returns you actually receive set the mix, match by match. A set percentage chosen before the match is pre-deciding by another name.

What is the drip or hybrid shot?

It is a medium-pace, shaped ball between a drop and a drive, usually with topspin that makes it dip. It suits mid-depth returns that are neither clean drops nor clean drives.

The Bottom Line

Third shot drop vs drive is not a loyalty test. It is a reading test you take on every single rally.

Check depth, height, pace and opponent position. Drop the deep and low balls against set opponents, drive the short and high balls at movers, and use the hybrid between them.

Then play the shot after the shot: advance behind a good drop, and drop the fifth behind a good drive. That complete system, not either shot alone, is what reaches the kitchen.

Sources: USA Pickleball, Skill Level Three guidance (third-shot rule: drop low balls, drive high balls, follow your shot in) and Official Rules. Coaching content in this article is original; no competitor content is linked or reproduced.

shoaib
shoaib

Shoaib is the publisher of Pickleball Card. He oversees the site’s guides to pickleball rules, ratings, strategy and gear, all researched from primary sources — the USA Pickleball Rulebook, DUPR and manufacturer documentation — and updated as the game changes.
pickleballcard.com

Filed Under: Strategy & Training

Pickleball Reset Shot

October 17, 2026 by shoaib

Every pickleball player knows the feeling. You are halfway to the kitchen line, the ball arrives hard and low at your feet, you swing hopefully — and watch it sail into the net or float up to be smashed.

That halfway place is the transition zone, and the shot that survives it is the reset: a soft, controlled reply that drops into the kitchen, neutralises an attack, and lets you advance safely.

This guide teaches the reset properly — what it is, when to use it instead of driving or dropping, the exact mechanics, how to move through the transition zone, and the drills that make it reliable under pressure.

Key Takeaways

  • A reset is a soft shot from a hard situation. It takes pace off an attacking ball and drops it unattackably into the kitchen.
  • Ball height decides. Below net height in the transition zone, reset. Above net height with your feet set, you may attack instead.
  • Push, do not swing. A short, stable push with a slightly open paddle face replaces any backswing. Big swings cause most reset errors.
  • Get low and stay still at contact. Bent knees, weight balanced, contact in front of your body. Lunging resets rarely land softly.
  • Split-step before the opponent hits. Arriving balanced in the transition zone matters more than arriving fast.
  • The reset buys your advance. A good reset is not the end of the move — it is what earns you the kitchen line, one step at a time.

What Is a Reset Shot?

A reset is a defensive soft shot, usually hit from mid-court or the transition zone, that absorbs the pace of an opponent’s attacking ball and drops softly into the non-volley zone.

Its purpose is to restart the rally on neutral terms. Before the reset, your opponents are attacking and you are scrambling. After a good reset, the ball is bouncing low in their kitchen and they must hit up.

A player who can hit up on the ball cannot attack you. That single exchange — their hard ball for your soft, low one — is how rallies that looked lost turn back into ordinary dink rallies at the line.

What Is the Transition Zone?

The transition zone is the area between the baseline and the non-volley zone line — roughly the middle third of your half of the court. Coaches often call it no-man’s land, which tells only half the story.

It is dangerous ground, because balls arrive there at your feet while opponents at the kitchen hit down at you. But it is also unavoidable ground: every trip from the baseline to the kitchen passes through it.

The goal is therefore not to avoid the transition zone or sprint through it blindly. The goal is to pass through it under control, ready to reset any ball that arrives before you reach the line.

That control connects the reset to its closest relative, the drop. If you already know the third shot drop, you know the target and touch — the reset applies the same softness while you are moving and under attack.

When to Reset — and When Not To

Situation Best choice Why
Hard ball at your feet, below net height, mid-court Reset Attacking a low ball from here produces nets and pop-ups
You are off balance, stretched, or moving backwards Reset (or a high defensive lob if very deep) Softness restores the rally; hero shots end it
Ball sits up above net height and your feet are set Attack or drive A high ball in transition is an opportunity, not a threat
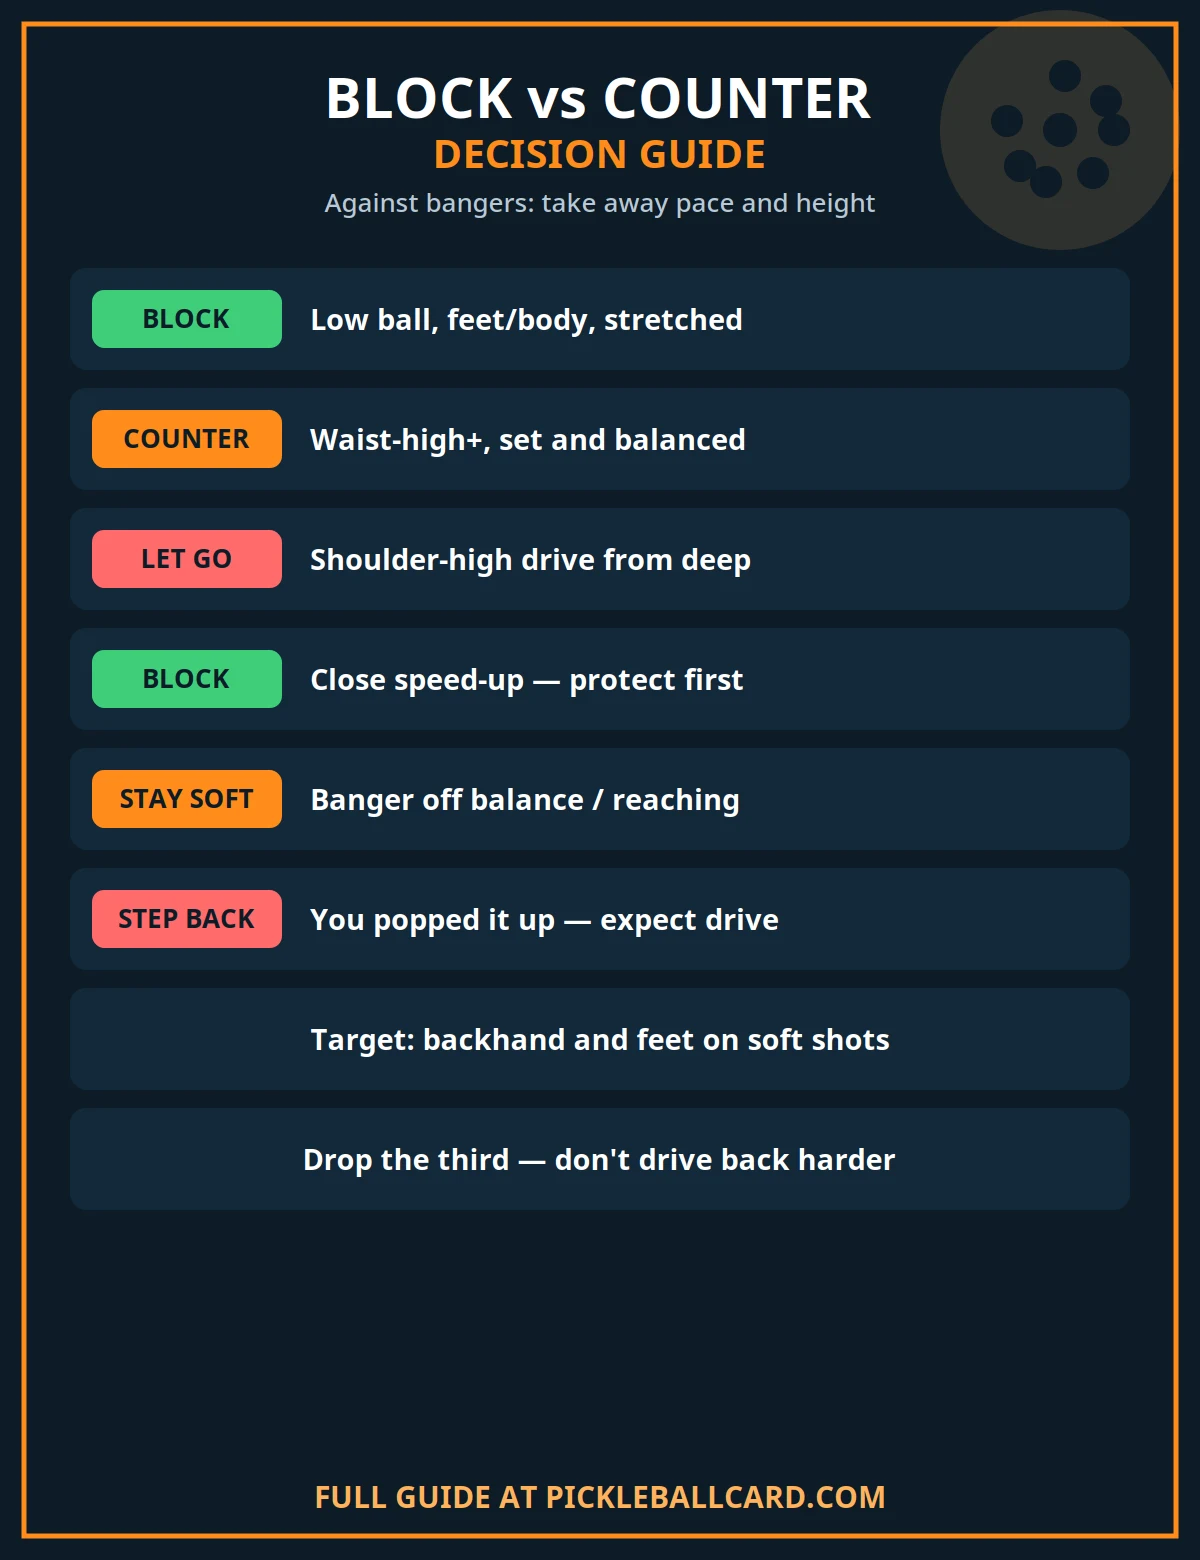
You are already at the kitchen and the ball is driven at you Block or counter, not a transition reset Same soft hands, different position and target — see the bangers section below
Ball is slow, high-bouncing and you are balanced at the baseline Drop or drive as a normal third/fifth shot You have time to choose a full shot; a reset undersells the position

The Height Rule

Make height your first filter, before tactics or ambition. A ball below the top of the net, arriving with pace while you are mid-court, is a reset ball in almost every case.

A ball above net height is different only if your feet are set underneath it. A high ball taken while lunging is still a defensive ball — treat it as one and you will stop donating points.

Pickleball reset shot sequence diagram showing the split-step, low ready position, soft push contact and advance to the kitchen line

How to Hit a Reset: Step by Step

Step 1: Split-Step as Your Opponent Swings

Stop moving forward just before your opponent contacts the ball, with a small balanced hop onto both feet. This split-step is what turns a running player into a ready one.

From the split-step you can move in any direction, stay low, and present a stable paddle. Without it, most resets are attempted while falling forward — and fall into the net with their owner.

Step 2: Get Low, Paddle in Front

Bend your knees, keep your chest up, and hold the paddle in front of your body at roughly waist-to-chest height, face slightly open. Your non-paddle side should stay balanced, not reaching.

The reset is played from your legs and posture far more than from your arm. If your legs are straight and your paddle is down by your knee, the technique has failed before the ball arrives.

Step 3: Let the Ball Come to Your Contact Point

Contact the ball in front of your body, around the front of your lead foot’s line — never beside your hip or behind you. Move your feet in small steps so the ball arrives at that point.

Reaching and lunging stretch your contact point sideways and destroy the soft angle you need. Two small steps beat one big stretch on almost every reset you will ever hit.

Step 4: Push, Absorb, and Lift Just Enough

Use a short push rather than a swing. Let the paddle absorb the incoming pace — a relaxed but stable grip, minimal backswing, and a gentle lift through contact to clear the net.

The paddle face, slightly open, does the softening for you. Think of catching the ball on the strings and placing it over, rather than striking it back at your opponents.

Your target is the kitchen in front of the opponent who is least ready to bend — usually the player who just attacked, now recovering, or the middle between two partners.

Step 5: Recover and Advance Behind Your Own Shot

Watch your reset land. If it drops low into the kitchen, advance — in balance, split-stepping again if another ball comes before you arrive at the line.

If your reset sits up, hold your ground and prepare to reset again. Advancing behind a bad reset simply moves you closer to the smash it invites. The shot earns the steps; take only the steps it earns.

Forehand and Backhand Resets

Most players reset more reliably on one side, and opponents will find the weaker one quickly. Both sides use the same principles, with small differences.

  • Forehand reset: the more natural side for most players. Keep the elbow relaxed and slightly away from the body, and resist the urge to roll the wrist for extra lift.
  • Backhand reset: often steadier with two hands at club level, which stabilises the face against pace. One hand works if the grip stays relaxed and the push stays short.
  • Balls at your body: step aside to create a forehand or backhand rather than jamming the paddle into your chest. A small sideways step is the hidden skill in body-ball defence.

The same soft-hand principles defend you at the kitchen line against hard hitters. For the full game plan built around them, see how to beat bangers in pickleball.

Moving Through the Transition Zone: The Fifth-Shot Mindset

Think of your advance as a sequence, not a sprint. A typical pattern for the serving team is: third shot, move in, split-step, reset if needed, move in again, and arrive at the kitchen.

The fifth shot — the ball after your third — is very often a reset, because good opponents drive or roll it at the advancing team. Expecting that ball, instead of resenting it, changes your whole transition.

  • Advance in stages. Move when your team’s shot is good; stop and split-step when the opponent is about to hit.
  • Stay connected with your partner. Advance together, a step apart in timing at most. A lone advancer opens diagonal gaps that no reset can cover.
  • Expect the ball at your feet. Good opponents aim there deliberately. A paddle already low and in front is the answer prepared in advance.
  • Be patient with one more reset. Needing two resets to arrive is normal against strong opponents. Needing zero is a bonus, not a plan.

Once you arrive, the rally becomes the soft game at the line. Our guide to pickleball dinking strategies picks up exactly where the reset leaves off.

Reset vs Drop vs Block vs Counter

Shot Where Incoming ball Goal
Reset Transition zone, moving Hard or low, attacking Absorb pace, drop into kitchen, advance
Drop Baseline or deep, set Manageable, time to choose Soft arc into kitchen to move forward
Block Kitchen line, set Drive at you Short push back low, keep opponents back
Counter Kitchen line, set Speed-up that sits up Short punch back with pace at feet or body

The family resemblance is real: all four reward a stable face, a short motion, and contact in front. The differences are position, incoming pace, and how much pace you return.

Confusing them causes classic errors — countering from mid-court, which pops balls up, and resetting balls at the kitchen that should be countered, which gives attackers another free swing.

Drills That Build a Reliable Reset

  1. Feet-reset cooperative drill. One player at the kitchen drives controlled balls at a partner in the transition zone, who resets into the kitchen. Ten balls, then swap. Build pace only as resets keep landing softly.
  2. Advance-and-reset ladder. Start at the baseline. Hit a drop, advance two steps, reset a fed ball, advance again, and finish at the line. Repeat the ladder for five minutes to groove staged movement.
  3. Two-reset survival. Attackers may drive twice at the advancing player, who must reset both before any counter is allowed. This builds the patience that real transition rallies demand.
  4. Backhand-only resets. Feed only to the backhand for sets of ten. The weaker side improves fastest when it cannot be avoided — and opponents will not avoid it in matches.
  5. Live fifth-shot games. Play points where the serving team must hit a third shot and then play out the rally, scoring double if they reach the kitchen without error. The reset becomes a habit inside real decisions.

Common Reset Mistakes

  • Swinging. A backswing adds pace you are trying to remove. Push instead.
  • Running through the shot. Contact while sprinting forward sends the ball down into the net. Split-step, reset, then move.
  • Standing tall. Straight legs raise your contact and flatten the arc. Get low before the ball arrives, not as it passes.
  • Gripping too tightly. A locked grip rebounds pace straight back up. Relax the hand and let the face absorb the ball.
  • Aiming too fine. Resets aimed at the sideline or the net tape miss in both directions. Aim for the big middle of the kitchen.
  • Attacking low balls out of frustration. After three good resets, players often donate the fourth by driving a ball at their shoelaces. The height rule has no frustration exception.
  • Watching instead of recovering. A reset you admire is a smash you receive. Recover first, appreciate later.

Frequently Asked Questions

What is a reset shot in pickleball?

A reset is a soft, controlled shot, usually hit from the transition zone, that absorbs the pace of an attacking ball and drops into the kitchen. It neutralises an attack and lets the hitter advance toward the non-volley zone line.

What is the transition zone in pickleball?

It is the mid-court area between the baseline and the non-volley zone line. Players pass through it on their way to the kitchen, and it is where hard balls at the feet most often force reset shots.

Should I reset or attack a ball in the transition zone?

Use height and balance. Below net height, or any time you are off balance, reset. Above net height with your feet set underneath you, attacking is reasonable — and often correct.

Why do my resets keep going into the net?

Usually because contact is too low, too close to the body, or made while still running forward. Split-step earlier, get lower with your legs, keep the paddle face slightly open, and add a gentle lift through contact.

Why do my resets pop up to be smashed?

Pop-ups come from a tight grip, a flat or closing paddle face under pace, or swinging at the ball. Relax the grip, keep the face slightly open and stable, and replace the swing with a short push that absorbs pace.

Is a reset the same as a third shot drop?

They share a target and a soft touch, but they are not the same shot. A drop is usually hit from deep court with time to choose it; a reset is hit under attack, often while moving, specifically to neutralise an opponent’s pace.

The Bottom Line

The reset shot is how good players survive the transition zone: split-step, get low, push softly with a stable, slightly open face, drop the ball into the kitchen, and advance only behind shots that earn it.

It will not make highlight reels, and it will quietly win you rallies every single session — the drives at your feet that used to end points become the balls that get you to the kitchen.

Learn to love the boring shot. In the transition zone, boring is what winning looks like, one soft landing at a time.

Sources: USA Pickleball, Official Rules (non-volley zone definitions). Coaching content in this article is original; no competitor content is linked or reproduced.

shoaib
shoaib

Shoaib is the publisher of Pickleball Card. He oversees the site’s guides to pickleball rules, ratings, strategy and gear, all researched from primary sources — the USA Pickleball Rulebook, DUPR and manufacturer documentation — and updated as the game changes.
pickleballcard.com

Filed Under: Strategy & Training

Pickleball Return of Serve Tips: Depth, Placement and the Sprint to the Line

October 16, 2026 by shoaib

The return of serve is the most under-coached shot in pickleball, and it might be the most important one you hit. It is the only shot where the rules hand you a built-in advantage: the serving team must let your return bounce before they can play it, and they start the rally back while you are allowed to move forward. Used well, a deep, unhurried return pushes the servers back, buys you the time to take the kitchen line, and decides who controls the rally before the third shot is even hit. Used badly — short, rushed, or followed by standing still — it hands that entire advantage back. This guide covers the whole return as one job: where to stand, where to aim, how high to hit it, how to handle pace and spin, and what to do in the two seconds after contact.

Key Takeaways

  • Deep beats clever. Aim for the last few feet of the court, ideally toward the backhand or the middle — depth is what buys you time.
  • Height is your friend on this one shot. Because of the two-bounce rule the servers must let it bounce, so a higher, slower return that lands deep is safer and more effective than a low skimmer that lands short.
  • Stand behind the baseline and move forward through the ball. Never be caught backing up or standing on the line when a deep serve arrives at your feet.
  • Return and run. The shot is only half the job — getting to the kitchen line before the third shot is the other half.
  • Do not hunt winners. Big swings on returns produce errors on a shot that only needs to be safe, deep and boring to be excellent.
  • Target with a purpose: the weaker backhand, the player who struggles moving backwards, or the middle to create hesitation.

Why the Return Matters More Than the Serve

In most racket sports the server holds the clear advantage. Pickleball flips much of that logic. The serve must bounce, your return must also bounce before the serving team can play it — the double bounce rule — and crucially, nothing stops you from advancing after you hit your return. The serving team, by contrast, must stay back long enough to let the return bounce and hit a third shot from wherever your return puts them.

That creates the central race of every rally: the returning team sprinting forward to claim the non-volley zone line, the serving team trying to hit a third shot good enough to stop them. A deep return tilts that race heavily in your favour. It forces the third shot to be hit from deep, often by a player moving backwards or standing still, and it stretches the time between your return and their contact — time you spend arriving at the line, set and balanced. A short return reverses everything: the third shot is hit moving forward, from mid-court, at a returning team that is still scrambling. When coaches call the return the most important shot in pickleball, this geometry is what they mean.

Step 1: Where to Stand

Stand one to two feet behind the baseline as your default. That buffer does two things: it gives you room to handle a deep serve without being jammed at your feet, and it means your natural movement for almost every serve is forward, into the ball — which adds control and starts your journey toward the kitchen in the same motion. Standing on the baseline, by contrast, guarantees that any well-hit deep serve forces you to back up, and a player backing up hits weaker, higher-risk returns while losing the race forward.

Adjust within that default rather than abandoning it. Against a player with a genuinely short or soft serve, shade half a step closer so a dinked serve does not drop in front of you. Against the biggest servers, take one extra step back and accept that you will hit the return while moving forward from deeper — depth of return matters more than where you started. In doubles, communicate with your partner about who takes a serve pushed through the middle, especially if one of you is stacking or has just switched sides; middle serves cause the same hesitation as middle balls later in the rally.

Finally, be moving before contact, not after you see where the serve goes. Split-step or stay on light feet as the server swings, so your first step is a reaction rather than a recovery. Flat-footed returners mishit serves they are perfectly capable of handling.

Step 2: Where to Aim — Depth First, Then Target

The Deep Zone

Your primary target is the last three to four feet of the court, just inside the baseline. Picture a deep band across the back of the service court and put your returns in it. Returns landing near the service line or in mid-court are the single most common return error at club level: they look safe because they went over and in, but they invite the serving team forward and turn your built-in advantage into theirs.

Return lands… What happens next Verdict
In the deep band, near the baseline Third shot hit from deep, often off the back foot; you reach the kitchen line set and early Excellent — this is the goal
Mid-court, around the service line extended Third shot hit on the move forward; race to the line is even Playable, but you gave away your edge
Short, inside the service boxes area Serving team steps in and drives or drops at a still-moving returner Poor — the classic return mistake
Deep but wide into the sideline / long Either a fault or an angled third-shot opportunity for the servers Over-ambitious — depth through the middle is safer

Choosing a Target Inside the Deep Zone

  • To the backhand. Most players drive and drop less well from the backhand, and a deep return there often produces a weaker or more predictable third shot. If one opponent’s backhand is clearly the weakest shot on the court, live there.
  • Through the middle. A deep return down the centre reduces the angle available for the third shot and can create a moment of hesitation between partners about who takes it. It is also the largest target — the right choice when you are under pressure, stretched, or facing heavy pace.
  • At the weaker mover / the player who stays back. Some players hit fine third shots standing still but struggle hitting them while backpedalling. Deep returns at their feet as they retreat are worth more than outright pace.
  • Away from the strongest third-shot hitter. If one server has a punishing drive, returning deep to their partner is not cowardice; it is match management. Just vary it enough that you do not become predictable.

What not to chase: the sidelines. A return that clips the line looks brilliant and misses often, and even when it lands it opens angles. The margins of the deep middle and deep backhand are large enough to win rallies. Use them.

Step 3: How to Hit It — Loft, Pace and Contact

Use More Height Than Feels Right

Here is the return’s best-kept secret: it is the one groundstroke where a high ball cannot be punished the way it would be later in the rally, because the serving team is required to let it bounce. A return that crosses the net with comfortable clearance and arcs deep gives you the largest margin for error, the most reliable depth, and the most time to advance. Players who try to skim every return low over the tape introduce net errors and short landings for no benefit — low only matters once volleys are legal for your opponents, and on the return, they are not. Aim to clear the net by a generous margin and let the arc do the work of depth. Review the serving side of this exchange in our guide to serving rules in pickleball and you will see why the rules protect a lofted return completely.

Swing Smaller Than You Want To

A compact, controlled swing — think of a firm groundstroke at seven out of ten effort — produces deep returns far more reliably than a full swing. The return is not a winner-hunting shot: the serving team is deep, the court behind them is small, and a ball hit hard from behind your own baseline has very little room to land in. Overswinging mostly manufactures two errors, netted balls from trying to add pace to a low serve and balls sailing long from a deep serve you tried to crush. Let depth, not speed, be your weapon.

Contact in Front, Weight Moving Forward

Meet the ball in front of your body with your weight transferring toward the target. Contact beside or behind you — the natural result of being jammed by a deep serve or of backing up — produces defensive slices that float short. This is the mechanical reason for standing behind the baseline and stepping in: it makes in-front contact the default rather than the rescue.

Pickleball return of serve checklist: stand behind the baseline, aim deep, loft the return, and run to the kitchen line
The return-of-serve checklist: depth, height, and the sprint to the line.

Step 4: Return and Run — The Two Seconds After Contact

More returns are wasted after the shot than during it. The pattern at club level is depressingly familiar: a player hits a genuinely good deep return, admires it for half a second while standing near the baseline, and then has to sprint through the transition zone as the third shot is already travelling toward their feet — the worst place on the court to receive it.

Treat the return and the run as a single movement. As you swing, your momentum should already be carrying you forward; the moment contact is made, continue toward the kitchen line, ideally arriving before or as the opponent hits their third shot, and split-step as they contact it so you are balanced for a drive at your feet or a drop you must move in for. If your return was deep, you will usually win this race comfortably — which is the entire point of hitting it deep. If your return sat up short, keep coming anyway but expect a drive and get your paddle low and in front; standing back after a short return compounds the error by conceding the line as well.

In doubles, move up with your partner. One player at the line and one stranded at the baseline creates a diagonal gap that good third-shot hitters aim into automatically, and puts the advanced player under unfair pressure. Glance across as you advance, match your partner’s pace, and arrive as a wall.

Handling Difficult Serves

Against Power Serves

Shorten everything: grip, backswing and swing. Use the serve’s own pace — a compact block-stroke with a firm wrist and an open-enough face to loft the ball deep will often return a hard serve deeper than your own full swing would. Stand that extra step back to give yourself time, aim for the big target through the deep middle, and do not try to match their power. The power server’s plan depends on rushed, short returns; a calm, deep, boring return is its antidote.

Against Spin Serves

Watch the ball all the way onto your paddle and expect the bounce to behave unusually — to kick sideways, stay low, or check. Give yourself margin: aim higher over the net and deeper in the target band than usual, because trying to finesse a spinning ball low is how returns dribble into the net. Move your feet so the ball is in your comfortable contact zone rather than reaching for it, and favour your more reliable side if the server is targeting a weakness — stepping around a backhand to take a spinning serve on your forehand is legitimate if you can do it without being caught out of position.

Against Short or Soft Serves

The trap is over-eagerness. Move in early, let the ball bounce as it must, and resist slapping at it on the run — a rushed swipe at a short serve produces either a net error or a popped-up return the serving team can attack. Take the extra half-step, set, and hit the same deep target. A soft serve is an invitation to advance, not to show off.

The Return in Singles

The principles survive the move to singles — depth first, move forward through contact, do not hunt winners — but the geometry sharpens. With the whole court to cover alone, placement matters more: deep returns to the backhand corner and deep returns that move the server wide gain value, because the server’s third shot must then be hit on the move with open court behind them. You will also advance more selectively than in doubles: charging the line after every return in singles exposes you to passing shots in a way doubles does not. Many strong singles players return deep, take a few steps in to a ready position around mid-court, and advance fully only when the return has genuinely pushed the server back. Adapt the race to the format; do not abandon depth in either.

A Simple Practice Routine

  1. Deep-band targets (10 minutes). Place a towel or target in the deep band on each side. A partner serves normally; you score a point only for returns landing in the band, regardless of what happens next. This retrains your sense of “good” from over and in to deep.
  2. Return-and-arrive (10 minutes). Same drill, with a second condition: you must be at the kitchen line, split-stepped, before your partner’s third-shot contact. Have them call “late” whenever you are caught in the transition zone. The call makes the invisible error audible.
  3. Pressure ladder (5 minutes). Ten returns: you need eight in the deep band to complete the ladder, restarting the count after two consecutive misses. Practising the return under even mild consequence is what makes it survive match nerves.

Good returns are built with the same deliberate practice you would give the third shot drop — and they pay off faster, because unlike the third shot, you get to hit one in every single rally you receive.

Common Return Mistakes

  • Standing on the baseline. Deep serves jam you at your feet and force you backwards. Start behind the line and move in.
  • Hitting short. The most damaging common error: it erases the two-bounce advantage and invites the serving team forward.
  • Skimming the net for style. Low returns risk the tape and land short; the rules protect a lofted return, so take the free margin.
  • Swinging for a winner. There is almost no winner available against a deep serving team; there are many errors available to you.
  • Watching your return instead of running. The shot and the advance are one job. Arrive late and even a good return loses its value.
  • Advancing at a different pace from your partner. A split formation is a target. Move up together, arrive together.

Frequently Asked Questions

How deep should a pickleball return of serve be?

Aim for the final three to four feet of the court, just inside the baseline. That depth forces the third shot to be hit from deep, often by a player moving backwards, and buys you the time to reach the kitchen line. Returns landing around the service line have given most of that advantage away.

Should I hit my return hard or soft?

Neither extreme. A controlled, lofted return hit with a compact swing at moderate effort is the most reliable route to depth. Hard returns from behind the baseline sail long or find the net; dinked, overly soft returns land short. Depth comes from arc and contact in front, not from effort.

Is it okay for my return to go high?

Yes — on this shot, height is protected by the rules. The serving team must let your return bounce before playing it, so they cannot volley a high return the way they could later in the rally. Clearing the net comfortably and letting the ball arc deep is sound strategy, not a mistake, as long as the ball still lands in the deep band rather than floating short.

Where should I stand to return a very hard serve?

One or two extra steps behind your normal position, which itself should already be a step or two behind the baseline. The extra room lets you move forward into the ball instead of being jammed, and a shortened, blocking swing can redirect the server’s pace deep. Then advance immediately — starting deeper makes winning the race to the line slightly harder, which is another reason your return must be deep.

Who takes a serve hit down the middle in doubles?

Agree it before the match. A common default is the player whose forehand faces the middle, but teams using diagonal-responsibility systems assign it by the serve’s path. Either system works; silence does not. Call “mine” early on any serve that could belong to either of you.

What is the biggest difference between a beginner and an advanced return?

Not power or spin — it is what happens after contact. Beginners hit the return and stay near the baseline to watch it; advanced players treat the return as the start of a sprint, arriving at the kitchen line before the third shot and forcing the serving team to hit a perfect drop to dislodge them. Depth enables that sprint, which is why advanced returns are consistently deep rather than occasionally spectacular.

The Bottom Line

A great pickleball return is not flashy. Stand a step or two behind the baseline, move forward into the ball, and hit a lofted, controlled return into the deep band — to the backhand, through the middle, or at the feet of the weaker mover. Then, without pausing to admire it, run: arrive at the kitchen line with your partner, split-stepped, before the third shot is hit. Do that rally after rally and you will feel the whole geometry of pickleball tilt: serving teams hitting third shots from their shoelaces while backing up, your team starting every rally from the strongest position on the court. Depth, height and the run — get those three right and the second shot becomes the quiet foundation of your entire game.

Sources: USA Pickleball, Official Rules of Pickleball hub (two-bounce rule and serving rules). Strategy in this article is original coaching guidance; no competitor content is linked or reproduced.

shoaib
shoaib

Shoaib is the publisher of Pickleball Card. He oversees the site’s guides to pickleball rules, ratings, strategy and gear, all researched from primary sources — the USA Pickleball Rulebook, DUPR and manufacturer documentation — and updated as the game changes.
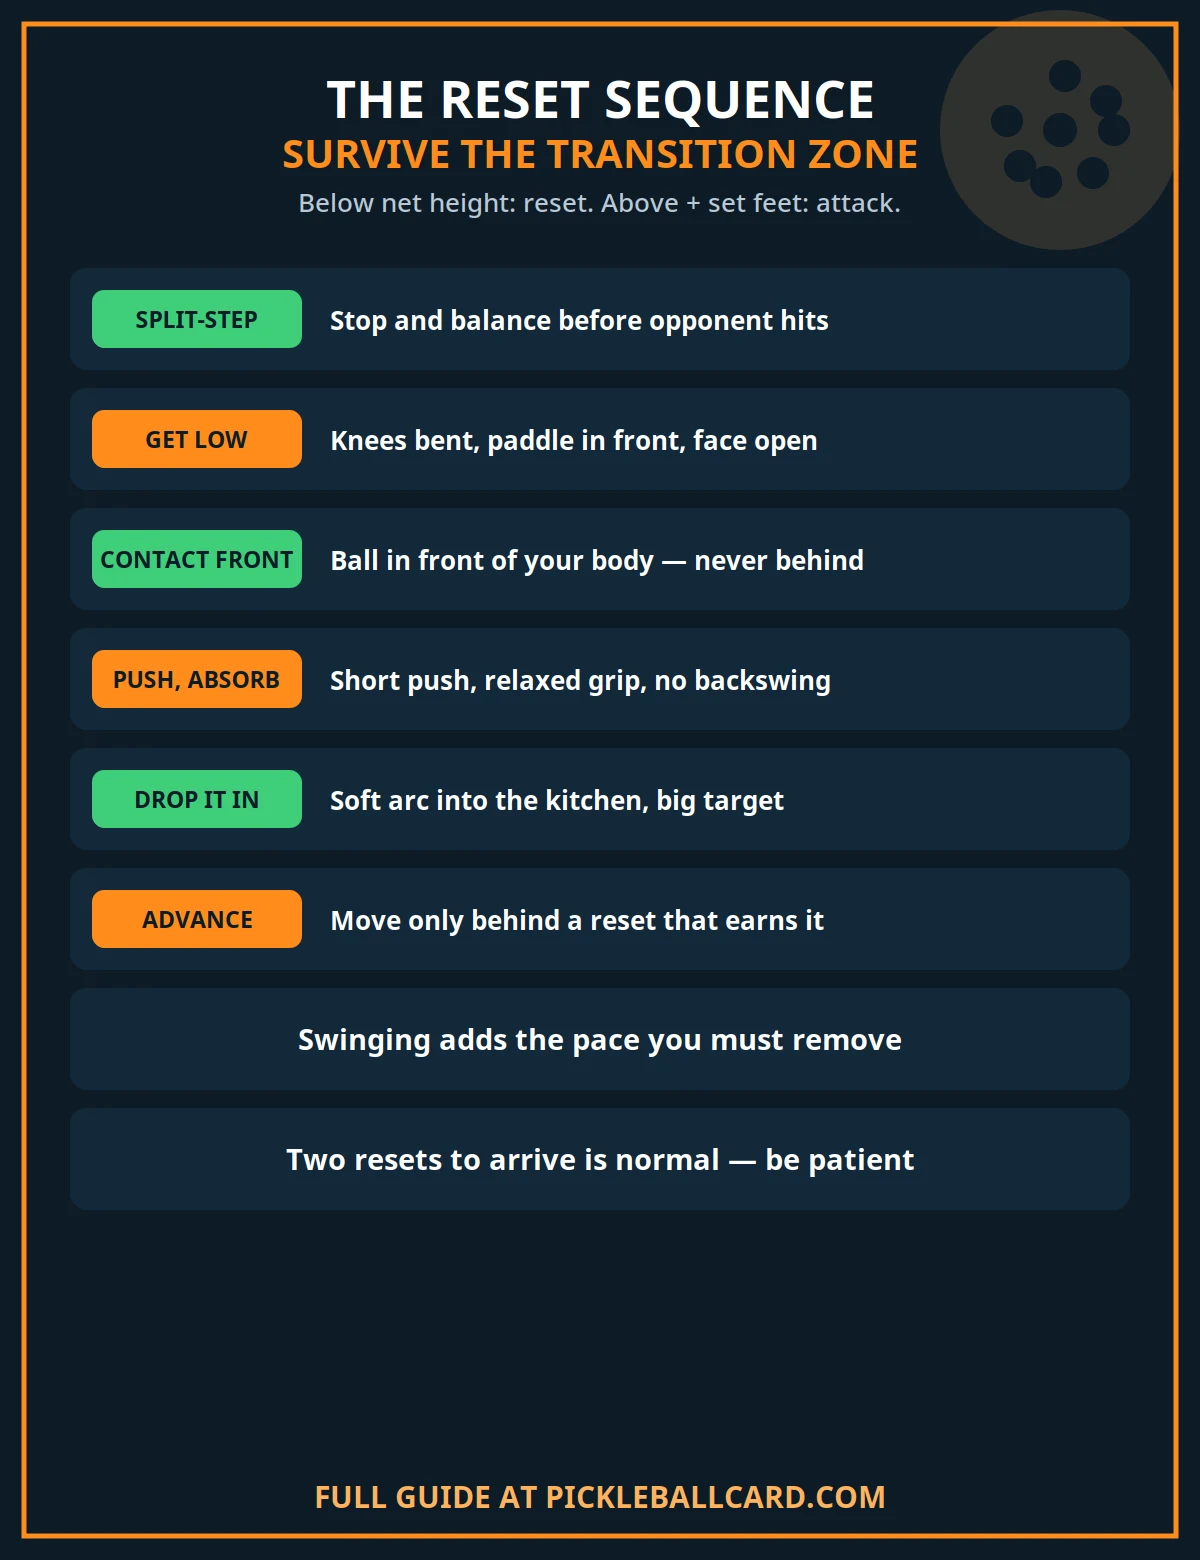
pickleballcard.com

Filed Under: Strategy & Training

Who Should Take the Middle in Pickleball? Respect the X, Explained

October 16, 2026 by shoaib

Most middle balls in doubles are not lost on technique. They are lost in the half-second when both partners think the other one has it — or both go for it and clash paddles. The fix is not a faster reaction. It is a shared system agreed before the rally starts. The most useful system for most teams is called Respect the X: instead of automatically giving every middle ball to the forehand, you give it to the player on the diagonal the ball is travelling along. This guide explains how the X works, when the old forehand rule still helps, when to break the X on purpose, and how to practise it until middle balls stop being an argument and start being routine.

Key Takeaways

  • Respect the X beats “forehand always takes the middle” as a default, because it follows the ball’s path instead of a fixed half-court split.
  • The cross-court player is connected to the middle. If the ball is travelling along your diagonal, it is yours — even on your backhand.
  • The line-side player protects the line first. Their first job is the down-the-line ball, not lunging across for the middle.
  • Fast balls are decided by the paddle already in the path; slow balls give you time to call, compare balance, and choose the better contact.
  • Agree the system before the match and call early. “Mine,” “yours” and “switch” — said early — prevent most middle errors.
  • Break the X only with a purpose: a planned poach, a high ball you can attack, or a partner pulled wide and out of position.

The Middle Problem: Why Good Players Still Miss These Balls

Picture the court from above. You and your partner stand side by side at the kitchen line. Your opponents are opposite you. Any ball hit between you has two plausible owners, which is exactly why it causes trouble. Add three facts of doubles — the ball is fast, the middle is the lowest part of the net at 34 inches in the centre versus 36 inches at the sidelines, and both of you have been told different rules growing up — and hesitation is almost guaranteed.

The traditional answer taught to beginners is simple: the forehand takes the middle. In a standard right-handed pairing that means the left-side player, whose forehand faces the centre, takes balls down the middle. That rule is easy to remember and it is not useless — which is why it survives. Its problems only appear when you look at where the ball is actually coming from and what happens to the court after the forehand player lunges for it.

What “Forehand Takes the Middle” Gets Wrong

Consider the most common rally pattern in pickleball. Your partner, on the right side, hits a cross-court dink or a return toward the opponent diagonally opposite them. That opponent replies toward the middle of your court. The ball is therefore travelling diagonally — from their left side toward your right side — and it is moving into your right-side partner’s body. For your right-side partner it is a comfortable ball arriving on a predictable line. For you, on the left, it is a ball moving away from you that you must reach across your partner to reach.

If the forehand rule wins that argument, three things go wrong at once. First, you are reaching and often off balance, so your contact is weaker and less controlled than your partner’s would have been. Second, by crossing over you leave the entire side of the court you came from open — if your stretched shot sits up, the opponents have an empty court to hit into. Third, you have effectively pinned your partner behind your shot: they cannot move forward or cover the next ball cleanly because you have taken their space as well as their ball. None of this means a forehand can never take a middle ball. It means forehand-first is the wrong default.

Our comparison of forehand vs backhand in pickleball makes the related point: a well-struck backhand hit in balance is a better shot than a forehand hit while lunging. Position and balance beat the name of the stroke.

Respect the X: The System in Plain Language

Draw two diagonal lines across the full court, corner to corner. That is your X. Each line connects a player to the opponent diagonally opposite them. Respect the X says: a ball travelling along your diagonal line is your responsibility, wherever it crosses the middle. A ball travelling along your partner’s diagonal is theirs.

In practice that produces a clear division that moves with the rally:

  • If the opponents hit from their right side across toward your right side, your right-side player is on that diagonal for the middle ball, and your left-side player holds position and protects against the next shot.
  • If the opponents hit from their left side across toward your left side, the roles reverse: your left-side player takes the middle ball on that diagonal.
  • The player who is directly in front of the ball — the line-side player — keeps first responsibility for the straight down-the-line shot on their side. They are not asked to abandon the line to chase the middle.

Notice what this system does not do. It is not an official rule. The USA Pickleball Official Rules govern legal play — faults, the non-volley zone, serving and scoring — they do not assign ownership of a middle ball. Respect the X is a partnership agreement, a first answer you both trust so neither of you has to invent a decision at full speed.

Why the Diagonal Player Has the Better Ball

The diagonal player has three quiet advantages. The ball is travelling toward them, so they can meet it in front rather than reaching sideways. Their feet and court stay intact — taking the ball does not drag them out of position. And their partner remains free: free to stay at the line, free to cover the line ball, and free to move forward if the middle ball floats high. Good doubles is less about who hits a spectacular shot and more about which team still has its shape after the shot. The X preserves shape.

The X at Different Heights of the Rally

The X is most often taught for the third shot — the serving team’s third ball after the return — because that is where the forehand-lunge error is most expensive. But the same geometry helps everywhere: on returns that are pushed through the middle, on cross-court dink rallies where one player suddenly redirects through the centre, and on defence when you are both back and a drive comes between you. Wherever two players could both claim a ball, ask first: which diagonal is it travelling on?

Respect the X diagram: the diagonal lines that decide who takes the middle ball in pickleball doubles
Respect the X: the two diagonals that assign every middle ball before the rally starts.

The Decision Table: Who Takes It?

Situation Who takes it Why
Ball travelling cross-court along your diagonal into the middle You — even on your backhand It is coming into your body; you are balanced and your partner stays in position
Ball travelling along your partner’s diagonal into the middle Your partner Reaching across means lunging, opening your side, and pinning your partner
Straight ball down your sideline The line-side player Protecting the line is that player’s first job under the X
Slow, floating middle ball, both players set Whoever calls first and can hit down — often the forehand With time, shot quality beats geometry; communicate and commit
Fast speed-up straight through the middle at the kitchen The paddle already in the path There is no time to reassign; pre-set paddles and a prior agreement decide it
Your partner is pulled wide or is off balance / recovering You cover the middle The X assumes both players are in position; a displaced partner changes the picture
High middle ball you have agreed to poach The poacher, with a pre-arranged signal A planned break of the X, not a spontaneous lunge — see below

When to Break the X — On Purpose

Respecting the X is a default, not a cage. Strong teams break it deliberately in a few recognisable situations, and the difference between a good break and a bad lunge is that the good one is planned, signalled, or obvious to both players.

The Planned Poach

If you have read that an opponent always dinks cross-court and then floats the next ball through the middle, stepping across to intercept it can win the point outright. That is poaching, and it works when your partner knows it might happen and is ready to switch behind you to cover the court you left. Use a quiet pre-point agreement or a hand signal behind your back, commit fully once you go, and accept that occasionally the opponent will hit behind you. A half-hearted poach — crossing late, without your partner switching — is just the forehand-lunge error with a better name. Teams that use stacking in pickleball plan these movements in advance for the same reason: positioning systems only work when both players share them.

The Partner Who Is Out of the Play

If your partner has been pulled wide by an angled dink, is scrambling back from a lob, or has just hit a ball while falling backwards, the diagonal picture no longer describes reality. Cover the middle, call “mine” loudly, and let your partner recover to the line rather than demanding they also honour a system that assumes they are standing where they are not.

The Ball That Is Simply Yours

Some balls allow no debate: a ball hit directly at your chest, a sitter that lands on your side of the centre line at your feet, a ball your partner clearly cannot reach. Take it, call it, and do not let a diagram talk you out of a ball in front of your nose. The X settles the ambiguous balls. It was never meant to create new ambiguity about obvious ones.

Left-Handed Partners and Stacking: Adjusting the Picture

When one partner is left-handed, a standard pairing can put two forehands in the middle — or two backhands — depending on which sides you choose. Many lefty-righty teams deliberately arrange themselves so both forehands face the centre when they can, which makes middle balls simpler: the forehand-in-the-middle advantage and the X often point to the same player. When they do not, the X should still lead on travelling balls, with the double-forehand arrangement treated as the tie-breaker on slow, floating balls where either player could hit down.

Stacking changes starting positions but not the principle. While a stacked team is unfolding into its preferred sides, middle responsibility can be genuinely unclear for a rally or two. Agree it explicitly before you stack: during the transition rally, name who owns the middle on each diagonal, and revisit it once you are set. Most stacking errors are not movement errors; they are two players applying different middle rules in the same rally.

Communication: The Calls That Make the X Work

No positional system survives silence. Build three calls into every game until they are automatic:

  • “Mine” — early, loud, before the ball crosses the net if possible. A late “mine” is commentary, not communication.
  • “Yours” — just as valuable. It frees your partner from doubt and lets them set their feet instead of hesitating.
  • “Switch” — when you have crossed or poached and your partner must cover the side you left.

Add a ten-second pre-match agreement, even in recreational play with a new partner: “Let’s respect the X on middle balls — diagonal takes it — forehand only on floaters. Sound good?” That one sentence prevents the two most common post-point conversations in doubles: “I thought that was yours” and “You took my forehand.” If a ball does drop between you, do not litigate it mid-match. Note the pattern, restate the agreement between games, and move on. Our guide to pickleball dinking strategies shows why this matters most in long cross-court exchanges: the team that stays patient and organised in those rallies is usually the team that has removed decisions like this from the rally entirely.

How to Practise Respect the X

You do not need a coach or a full court session to install this. Three simple progressions work:

  1. Diagonal third shots. One player feeds returns cross-court toward the middle while the receiving pair practises letting the diagonal player take the third shot — backhand included — and the partner practises staying home. Ten balls each diagonal, then swap. This directly rehearses the exact rally where the forehand lunge does most damage, and pairs naturally with work on the third shot drop itself.
  2. Cross-court dink plus redirect. Dink cross-court cooperatively. Every fifth ball, one player redirects through the middle. The defending pair scores a point for a correct, called take — regardless of whether the shot wins — and loses a point for a silent hesitation or a paddle clash.
  3. Call-only games. Play a game to 11 where every middle ball must be called before contact. No call, lost point — even if you win the rally. Two games of this rewires calling faster than any lecture, because the cost of silence becomes immediate and memorable.

Common Mistakes With Middle Balls

  • Treating “forehand takes the middle” as a law. It is a beginner shortcut. As rallies get faster and opponents learn to push balls along the diagonals, it produces lunges, open court and pinned partners.
  • Guarding a fixed half. Standing as if an invisible wall splits the court means neither player follows the ball’s path — the exact problem the X was designed to solve.
  • Both players going, or neither. Usually a communication failure, not a skill failure. Decide the system beforehand and call during the rally.
  • Breaking the X without telling your partner. A surprise poach leaves the same hole as a lunge. Planned and signalled, it is a weapon; spontaneous, it is a leak.
  • Arguing the last ball instead of agreeing the next one. Middle balls you have already missed teach you nothing unless they change the agreement for the rest of the match.
  • Forgetting the line. In chasing the middle, the line-side player abandons the down-the-line ball — the one shot that was unambiguously theirs.

Frequently Asked Questions

Is Respect the X an official rule?

No. It is a doubles strategy and partnership convention, not part of the USA Pickleball rulebook. The rulebook governs whether play is legal; it does not tell partners which of them should hit a legal ball. That decision is yours to agree as a team.

So should the forehand ever take the middle?

Yes — on slow, floating balls where both players are set and the forehand player can step in and hit down, on balls that are clearly on the forehand player’s side of the centre, and in lefty-righty pairings arranged with two forehands in the middle. The point is not that the forehand is banned from the middle; it is that forehand-first should not override the ball’s diagonal path on travelling balls.

What about balls hit straight at the middle from straight ahead?

If the ball is not clearly travelling along either diagonal — a drive hit straight through the centre from the middle of the opposite court — use your tie-breakers in order: whoever called first, whoever’s paddle is already in the path, and, if there is time, the player who can hit the stronger shot from balance, which is often the forehand. Agree that order before the match so the rally does not have to host the debate.

Does Respect the X apply in the transition zone and on defence?

Yes. The geometry does not change because you are further back; if anything it matters more on defence, where a lunge leaves even more court open. The same diagonal responsibility applies to drives and third shots you are defending from mid-court or the baseline, adjusted only when a partner is pulled out of position.

How do I introduce this to a recreational partner without sounding bossy?

Frame it as a question and a trial, not a correction: “Want to try the X for this game — diagonal takes the middle? It stops us both hesitating.” Most players are relieved to have any clear system, because the alternative — guessing — is what causes the awkward points. If they prefer forehand-first, play their system for that game rather than mixing two systems in one match.

What if my backhand is much weaker than my partner’s forehand?

Then this system is asking something real of you, and the honest answer is twofold. In the short term, agree a modified version with regular partners if you must — but in the longer term, a backhand that opponents can exploit on diagonal balls will be targeted whether you use the X or not. The diagonal backhand you need here is not a power shot; it is a controlled dink, drop or block hit in balance. That is a very learnable shot, and learning it removes the weakness instead of organising your whole partnership around hiding it.

The Bottom Line

Who should take the middle in pickleball? On most balls, the player on the diagonal the ball is travelling along — even if that means a backhand, and even if their partner has a forehand waiting. That is Respect the X, and it works because it follows the ball instead of a slogan: the diagonal player meets the ball coming into their body, in balance, without abandoning their side of the court or pinning their partner. Keep the forehand for floaters you can attack, break the X only for planned poaches and emergency cover, protect your line first if you are the line-side player, and call every middle ball early. Agree it before the first serve, and the seam between you and your partner — the place opponents love to attack — becomes one of the most organised parts of your game.

Sources: USA Pickleball, Official Rules of Pickleball hub (net dimensions and legal play). Strategy in this article is original coaching guidance; no competitor content is linked or reproduced.

shoaib
shoaib

Shoaib is the publisher of Pickleball Card. He oversees the site’s guides to pickleball rules, ratings, strategy and gear, all researched from primary sources — the USA Pickleball Rulebook, DUPR and manufacturer documentation — and updated as the game changes.
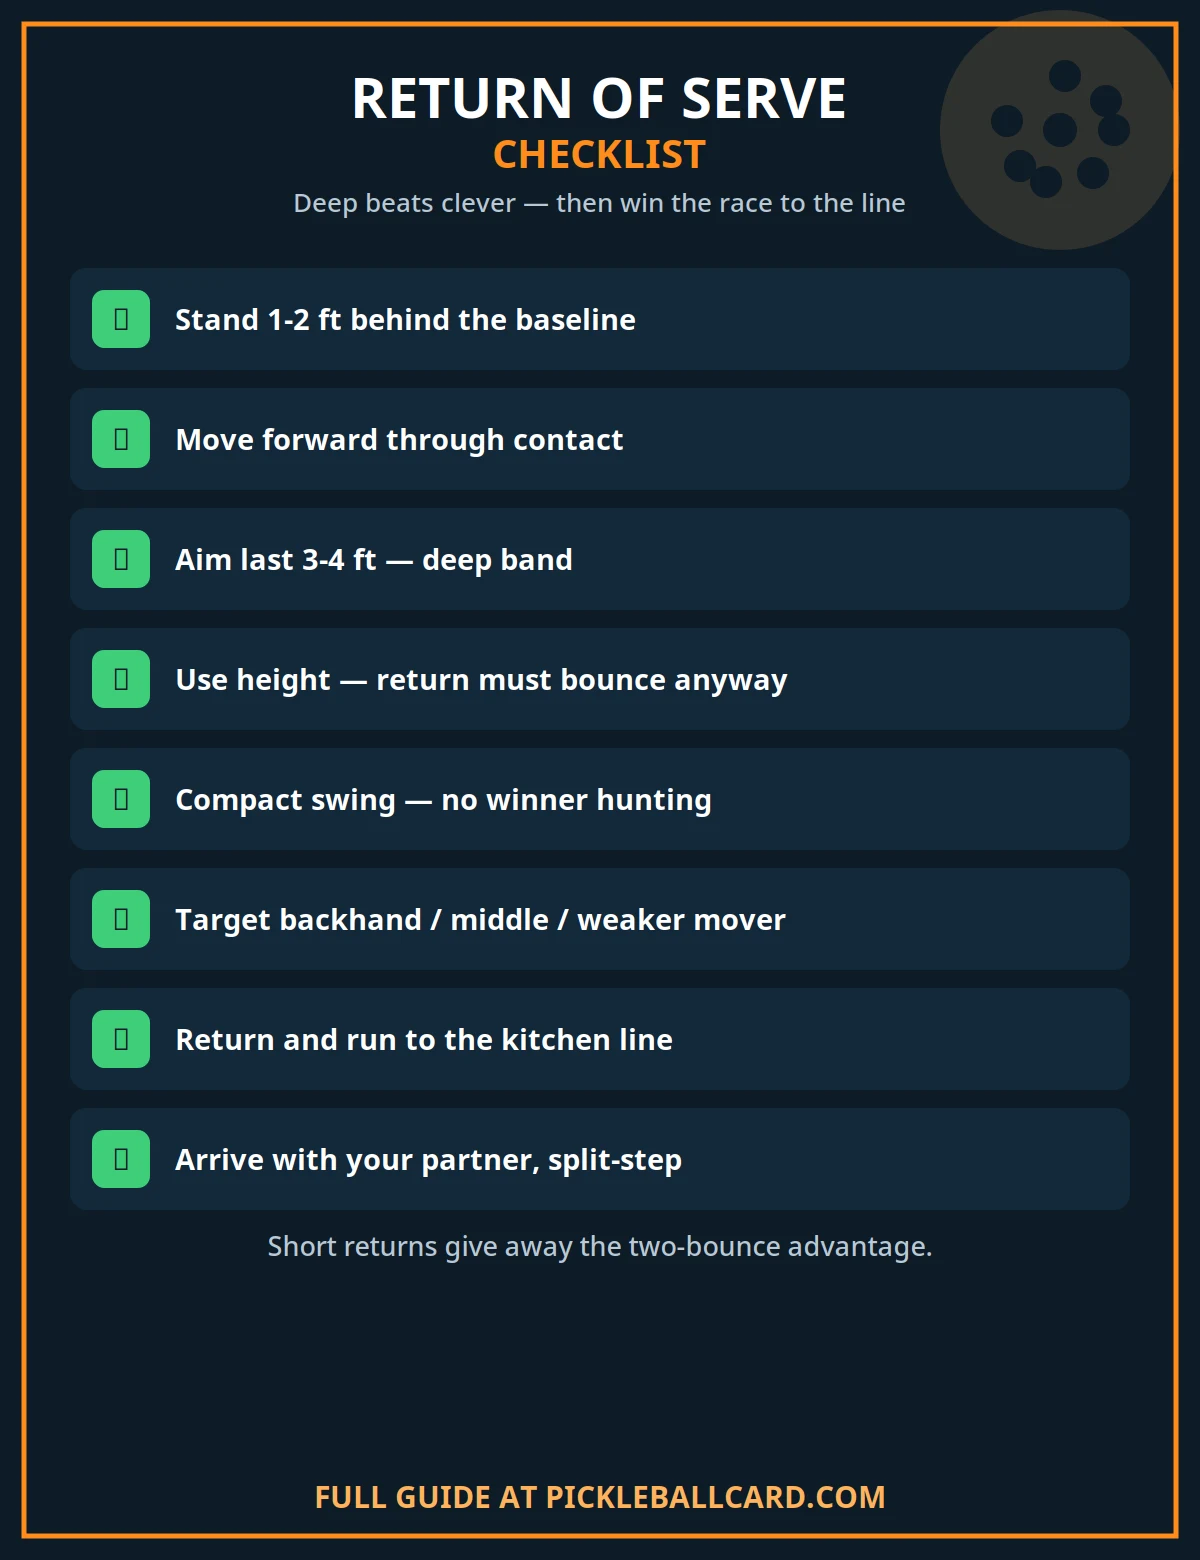
pickleballcard.com

Filed Under: Strategy & Training

How to Beat Bangers in Pickleball: The Complete Anti-Banger Game Plan

October 15, 2026 by shoaib

Bangers win when you feed them pace and height. Beat them by taking both away: keep your returns deep, drop your third shot instead of driving back, block hard balls softly so they land in the kitchen, let out-balls go, and aim your soft game at their backhand and their feet. A banger who has to hit up, off balance, or from below net height stops being dangerous. This guide walks the whole rally — return, third shot, transition zone and kitchen — as one anti-banger game plan, with a block-vs-counter decision table for the moment a drive is coming straight at you.

Key Takeaways

  • Bangers need pace and height. Every strategy in this guide removes one or both.
  • Return deep, ideally to the backhand, and get to the kitchen line before they can drive at your feet.
  • Drop the third shot; do not drive back harder. Driving into a banger feeds the exact game they want.
  • Block softly, counter selectively. Absorb hard balls into the kitchen; counter only balls you can hit down or from a set position.
  • Let out-balls go. A hard drive at shoulder height from behind the baseline is often a free point — swinging at it gives it back.
  • Target the backhand and the feet. Soft balls low to the weaker side force bangers to hit up, and hitting up is how rallies turn.

Why Bangers Win — And Why They Stop Winning

A banger is a player whose default answer is power: hard serves, driving third shots, and speed-ups at the kitchen, hit with a full swing and little interest in dinking. That style looks — and feels — dominant against players who panic, back off the line, pop balls up, or try to out-drive them. Every one of those reactions gives the banger more of what they need.

Power has conditions. A drive is dangerous when the ball sits up, when the banger is balanced and moving forward, and when you are caught mid-court or retreating. The same player is ordinary when the ball is below net height, at their feet, on their backhand, or when they are reaching and off balance — because from there a hard swing produces either a net ball or a ball that sails long. You do not need to become a better banger. You need to keep manufacturing those second situations, rally after rally. USA Pickleball’s own coaching material on the speed-up makes the same core point from the attacker’s side: attacking works when the ball and balance allow it. Your job is to make sure they rarely do.

Step 1: The Return — Deep, and to the Backhand

Your return of serve is the first anti-banger shot of the rally, and its job is time, not a winner. Hit it deep — ideally within a few feet of the baseline — because a banger who has to hit their third shot from deep, moving backwards or standing still, cannot step into a drive the way they can from mid-court. A short return against a banger is an invitation.

Aim the deep return at the backhand side where you can. Most bangers have a forehand drive they trust and a backhand they protect; a deep return to the backhand often produces a weaker third shot, a reluctant drop, or a drive hit from a worse position. Then use the time your deep return bought: move forward immediately and get set at the kitchen line with your partner. The worst place to meet a drive is halfway — the transition zone is where drives catch your feet. Arrive early, or the return’s good work is wasted.

Step 2: The Third Shot — Drop It, Don’t Drive Back

When your team serves and the banger is waiting to drive your third shot, the instinct to drive back harder is understandable — and wrong as a default. Driving at a set banger at the kitchen line gives them a fast ball at a comfortable height to block, counter or volley, and the rally speeds up on their terms. Worse, your drive is hit from deep, so you are still far from the kitchen when their reply comes back.

The drop is the answer because it reverses the geometry. A third shot that arcs and falls into the kitchen forces the banger to let it bounce, move forward, and hit up from below net height — with you advancing behind your drop toward the line. Even a mediocre drop that sits a little high is usually better than a drive, because it at least changes the rally from their game to a neutral one. Our full guide to the third shot drop covers the mechanics and trajectory in detail.

When a Drive Is Actually Right

Dropping is the default, not a law. Drive your third shot when the return is short and high and you can step in and hit down the middle or at a target; when the banger is off balance, retreating or caught out of position; or when a player has just shown they cannot handle pace and your team is ready to follow the drive in and contest the next ball — the drive-and-crash pattern. The test is simple: are you driving because the ball and their position invite it, or because you are annoyed? Only the first reason counts.

Step 3: The Transition Zone — Reset, Don’t Swing

If a drive catches you between the baseline and the kitchen, your job is survival with softness: the reset. Split-step as they contact the ball so you are balanced, get your paddle low and in front, loosen your grip, and absorb the pace — angle the ball down into the kitchen or at least low over the net in front of you. Do not take a full swing from mid-court against pace; you are adding speed you cannot control from the worst position on the court.

Think of the reset as buying one more shot. A reset that lands in the kitchen, even softly and without ambition, forces the banger to hit the next ball up — and lets you take two more steps toward the line. Two resets in a rally is not failure; against a banger, it is the plan working. Keep your paddle face slightly open, let the ball come to you, and resist the highlight-reel counter from your shoelaces.

Step 4: At the Kitchen — Block vs Counter

Once both teams are at the line, the banger will try to end the soft game with drives and speed-ups through the middle and at your body. This is where points are actually decided, and it is a decision, not a reflex. Use the table, then the detail below it.

Situation Best answer Why
Hard ball below net height, at your feet or body, you are stretched or moving Block / reset — soft hands, drop it into the kitchen You cannot attack a low ball without lifting it; a soft block makes them hit up next
Hard ball at waist height or above, you are set, balanced and at the line Counter — short punch volley, target feet or backhand Height plus balance is the one combination where your counter can go down
Ball at shoulder / head height, hit hard from the baseline or mid-court Let it go Drives that high from that deep sail long far more often than they dip in
Ball at shoulder height, hit from close at the kitchen line Duck / block down — do not assume out Close-range speed-ups can dip; protect first, judge second
Banger off balance, reaching, or hitting on the run Keep it low and soft — dink to backhand / feet Their next hard swing from that position produces errors for free
You popped the ball up and they are winding up Step back one step, paddle low, expect the drive A half-step of space turns a body shot into a blockable ball
Block vs counter decision guide for beating bangers in pickleball: when to block softly, when to counter, and when to let the ball go
Block or counter? The anti-banger decision guide — read the ball’s height and your balance, then choose.

How to Block Softly

A good block is almost no swing at all. Paddle up and in front of your body before they hit — not as they hit. Loosen your grip so the paddle absorbs pace instead of trampolining it back high. Angle the face slightly down toward the kitchen on their side, meet the ball in front of you, and let their pace do the work. The ball should leave your paddle slower than it arrived and fall short. If your blocks keep popping up, the cause is almost always a tight grip or a small swing you do not realise you are taking. Practise it directly: have a partner drive at you from mid-court at seven-out-of-ten pace while you aim every block into the kitchen, and only raise their pace when your blocks stay low.

How to Counter Without Feeding Them

Counter when the ball is high enough and you are set: a compact punch or roll volley, aimed down at their feet, through the middle, or at the backhand hip — never a full swing from the line. A counter hit upward from below net height is just a faster pop-up, and bangers punish those. If in doubt, block. The rally you keep alive with a block is worth more than the counter you miss trying to end it.

Step 5: Let It Go — The Free Points Bangers Give Away

The most profitable anti-banger skill costs no energy at all: leaving out-balls. Hard-hit balls carry a simple physics problem for the hitter — from deep, a drive hit hard and flat at your shoulder height usually cannot both clear the net and land in. Yet players swing at those balls constantly, either volleying them back into play or deflecting them with the paddle, and turn a free point into a lost rally.

Build the read deliberately. Judge height first: a ball arriving at shoulder height or above that was hit from behind the baseline is leaving until proven otherwise — step aside or duck and watch it. Judge pace second: the harder and flatter it was hit from deep, the less it can dip. Judge position third — the exception in the table above: close-range attacks at the line can dip, so do not gift-wrap those. In doubles, call “leave” or “out” early and loudly for your partner; half of all balls swung at were swung at by the partner who never got the call. In our etiquette guide we note the same discipline from the other side — see pickleball etiquette and the unwritten rules for why clear, early calls are part of good doubles play.

Targets: Where Your Soft Game Should Go

  • The backhand. Dink and drop persistently to the backhand side. Most bangers protect it, move around it, and eventually pop one up trying to run around it — or drive a backhand they do not own.
  • The feet. A ball dropping at a banger’s feet in the transition zone or at the line can only be hit up or half-volleyed weakly. Feet beat corners against power players.
  • The middle, on counters. A counter through the middle creates the classic doubles hesitation between partners — who takes it — and bangers who are both winding up are worst at deciding.
  • The weaker mover, not just the weaker hitter. In doubles, direct soft balls at the partner who is slower to get to the line or worse on the backhand, and keep them in the soft rally longest.

One boundary matters in recreational play: targeting a player’s weaker side is normal strategy, but repeatedly slamming at a beginner’s body in a social game is not — that is a sportsmanship line, not a tactic. Adjust the aggression to the setting; in competitive and rated play, play your full strategy without apology.

Build the Soft Game That Makes This Work

None of the above survives contact with a rally unless your dinking can hold up for ten shots at a time. Bangers do not only lose to tactics; they lose patience, and patience only breaks if your soft balls stay unattackable while theirs are being waited on. Work on the patterns in our guide to pickleball dinking strategies — cross-court dinks that pull a banger wide and open their backhand, and dinks that stay below net height even when you are stretched. Practise in this order: cooperative dinking with height discipline, then blocks against driven balls, then resets from the transition zone, then full games where your team scores a bonus point every time an opponent’s drive sails long because you left it. That last drill rewires the out-ball reflex faster than any lecture.

Common Mistakes Against Bangers

  • Driving back harder. You are volunteering to play their game, from worse positions, with less practice at it than them.
  • Backing off the kitchen line. Retreating gives drives more room to land and turns blockable balls into balls at your feet. Hold the line; step back only for a genuine overhead threat, then recover.
  • Popping up blocks. Tight grip, small swing, paddle late — fix the block before you blame the banger.
  • Swinging at out-balls. Every shoulder-high drive you volley back from deep defence is a point you chose to replay on their terms.
  • Feeding the forehand. Returns, drops and dinks drifting helpfully to the forehand side are an engraved invitation. Keep a target — backhand, feet — on every soft shot.
  • One soft shot, then panic. A single drop does not beat a banger; a sequence does. Expect to reset twice and dink six times. That is not losing slowly — that is the strategy.

Frequently Asked Questions

Is driving back at a banger ever the right play?

Yes — when the ball and their position invite it: a short, high return you can step into, a banger off balance or retreating, or a drive-and-crash third shot your team is set to follow in. What loses is driving as a reflex, from deep, at a set opponent, because you are frustrated. Choose the drive; never let the banger choose it for you.

What if both opponents are bangers?

The plan does not change; it matters more. Return deep to the weaker backhand, drop thirds, and be even more disciplined about leaving out-balls — two bangers produce twice as many. In the soft game, keep the ball with the partner whose backhand and dinking are weaker, and expect longer rallies: your edge is patience, and it compounds.

What paddle is best for blocking drives?

This is a strategy problem before it is a gear problem, and no paddle fixes a tight grip or a swinging block. In general, control-oriented paddles with a softer feel make absorbing pace easier than stiff power paddles, but technique — loose hands, paddle early and in front, almost no swing — accounts for far more. Fix the block first; shop second, if at all.

How do I practise resets and blocks?

Use a simple progression with a partner: they drive from mid-court at moderate pace while you block every ball into the kitchen from the line; then they drive while you start in the transition zone and reset, then step in; then play games starting every rally with a drive at the receiving team. Ten focused minutes of this twice a week changes your results against bangers faster than general open play does.

Does this work in singles?

The principles transfer — deep returns, low balls, backhand and feet targets, leaving out-balls — but the geometry differs: in singles there is more court to cover, passing shots and drives are more valuable, and you will drive more often yourself because there is no partner at the net to set up. The kitchen and non-volley zone rules themselves are identical in singles and doubles; what changes is shot selection, not the rules. Use the soft game in singles to move a banger, not only to neutralise one.

The Bottom Line

You beat bangers by refusing their game and insisting on yours. Return deep to the backhand and take the line. Drop the third shot instead of driving back. Reset from mid-court with soft hands instead of swinging. At the kitchen, block low balls, counter only from height and balance, and let shoulder-high drives from deep fly long while you watch. Do that for a whole match — patiently, boringly, six soft shots at a time if needed — and the banger’s biggest weapon becomes their biggest source of errors. Power needs pace and height. Starve it of both, and the game slows down to the one you came to play.

Sources: USA Pickleball, What is a Speedup? training guidance, and the Official Rules of Pickleball hub. Strategy in this article is original coaching guidance; no competitor content is linked or reproduced.

shoaib
shoaib

Shoaib is the publisher of Pickleball Card. He oversees the site’s guides to pickleball rules, ratings, strategy and gear, all researched from primary sources — the USA Pickleball Rulebook, DUPR and manufacturer documentation — and updated as the game changes.
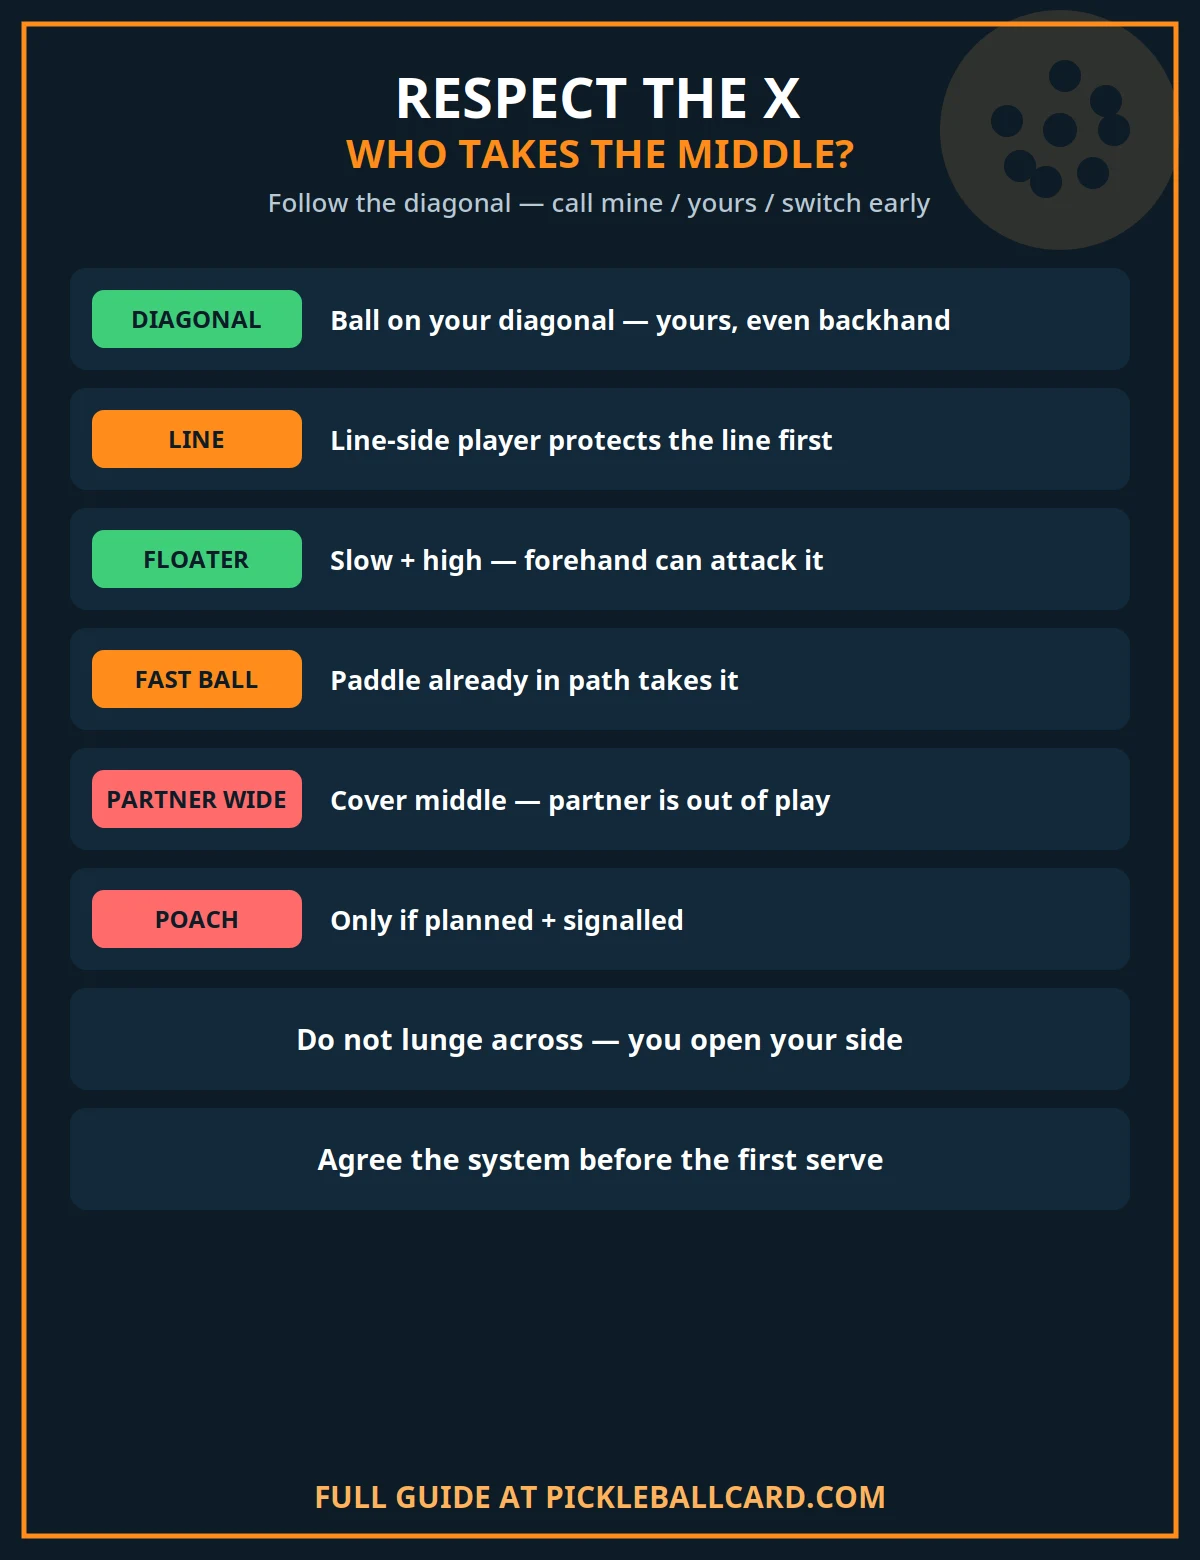
pickleballcard.com

Filed Under: Strategy & Training

How To Practice Pickleball Alone?

September 30, 2026 by Jeena Noven

How to practice Pickleball alone when there is nobody there to clap for you or witness your progress? Sometimes, you might not even feel the motivation to pick up your pickleball paddle other than when you go out to play with your friends or teammates. However, it is not the actual game that matters but the amount of hours you spend learning it.

Practice Pickleball Alone

So, keeping that in mind, I am about to compose an in-depth information guide on why these practicing drills are so important and how you can benefit from them. Other than that, I will also suggest some drills by name and write up steps to perform those drills correctly so that you can maximize your practice sessions. So, I suggest that you keep reading down below to get the complete knowledge.

How To Practice Pickleball Alone

Why Practice Pickleball Alone?

This is one of the most common questions that I usually get multiple times from my students. Young players think it is boring to practice alone when there is nobody there to clap for them. However, practicing any sport solo is what makes a good player the best.

It is this solo practice that helps regulate the muscles and body neurons to adapt to the sudden body changes that happen during the game. It also helps the muscles learn voluntary and involuntary movements that are required of the body while playing a sport.

So, in short, if you want to know why practicing Pickleball alone is important, I would say it is to help you become the best player possible. The more hours you dedicate to this sport, the more your body will learn to adapt to it, and the faster your reflexes will start working.

The Impact On Neurons

You might already have heard that practicing solo helps regulate the brain to release hormones and activate neurons. These neurons start sending signals to each other faster when you keep practicing for extended hours. Hence, your brain-to-muscle coordination will improve, and you will become better and better with each solo practice session.

Other than that, the brain also releases happy hormones when you practice solo Pickleball. This hormone motivates you to practice harder and more consistently. And soon, you will find yourself looking forward to your solo practice sessions.

These solo practice sessions will also hone your reflexes and make you quicker and faster. Hence, this will keep your field opponent on edge since every time you have a match with someone, your skills will have improved slightly due to solo practice, so they will not be able to gauge your speed or reflexes. This will keep you one step ahead of your opponent, too.

What Equipment Do I Need To Do Solo Drills In Pickleball Drills?

Now that you have developed that you need to do solo pickleball drills, you must know which kind of equipment you need for it. The answer may vary depending on which kind of solo training you prefer. For instance, if you want to practice your serve, then all you will need is a pickleball paddle and a net.

Other times, people want to practice their overall game and muscle coordination. For this, you could either practice against a wall using a paddle or get yourself a pickleball machine.

Solo Drills For Beginners

1. Static Drop Feed

The Static Drop Feed is hands down one of the best Pickleball practices that will help you improve your overall game. In this practice, you are required to drop the ball onto the ground in front of your feet and let it bounce back at least once before hitting it with the pickleball paddle. This technique helps you practice three things simultaneously: serve, rally, and groundstroke.

Now, for those of you who don’t know what each of these terms means, a serve is when a player first swings a ball toward the opponent. A groundstroke is when you let the ball bounce against the ground at least once before hitting it with the paddle. And a rally means continuous back-and-forth gameplay before one of the players misses the ball and the other makes a score.

Steps To Follow
  • First of all, you need to drop the ball on the ground in front of your feet and let it bounce against the ground once.
  • When the ball is mid-air after the first bounce, hit it with the center of the pickleball paddle. All the while, focus on your posture and form and try to maintain it throughout.
  • Now, keep repeating this action to improve your muscle coordination and hone your reflexes. You may want to use a set of balls for this game so that you won’t have to go fetch the ball every time you make the hit.

2. Topspin Drive

Another drill that you should practice pickleball by yourself to master is the Topspin drive. In this drill, you will learn to serve the ball low so that it stays nearest to the net and has just enough force to simply topple over the net. This will make it harder for the opponent to take the serve on time, and they could easily end up missing the shot.

Furthermore, if the opponent ends up taking the shot, he would still be pushed behind the baseline, thereby putting him in a difficult position to keep up with the rally. So, it will tip the scales in your favor, and you will end up sacking the game.

However, there is something that you should know about this drill beforehand. And that is that you can not practice it against a wall. Rather, you will need a net for it. So, if you do not have access to a pickleball court nearby, then you must purchase a portable net for yourself.

Steps To Follow
  • To start off, drop the ball on the ground in front of your feet and let it bounce against the ground once.
  • When the ball is mid-air after the first bounce, hit it with the center of the pickleball paddle with a loose wrist. Try to focus on maintaining your posture and body form.
  • You should use only enough force to get the ball to bounce over the net. The height should neither be too high nor too low. If you keep practicing this technique, you will soon become a master at it!
  • Keep a set of balls for this game so that you won’t have to go fetch the ball every time you make the hit. Other than that, you could also ask someone to stand nearby and fetch you the ball every time. Whatever suits you best.

3. Rolling Shot

The Rolling Shot drill is for those players who want to improve their rally game. When two good players start playing Pickleball, there comes a time when the rally is prolonged because each player is good enough to hit the ball in time and drill out toward the opponent, who, in turn, does the same. So, to keep up this rally, you will have to master the Rolling Shot drill.

However, you must know that to practice this drill properly, you will have to go to a pickleball court. If that is not physically possible for you, then you will have to recreate a court using measuring tapes and a portable pickleball net.

In this case, I suggest you take extra care with the proportion of the court and use exact measurements because otherwise, you will just be practicing perfecting your game on the wrong court. So, when you play on an actual court, your skills will be a misfit for the new proportions of the court, and all your practice will go to waste.

Steps To Follow
  • First of all, you need to drop the ball in front of your feet and let it bounce against the ground once.
  • When the ball is mid-air after the first bounce, loosen up your wrist and your grip over the paddle and hit the ball with the middle of your racket. Make sure that your hit is slack and has only enough force to get the ball over the net and land squarely in the kitchen area.

4. Serve And Split Step

It is important to practice where your feet land once you take the serve because otherwise, you may end up losing the ball when it ricochets back at you. So, what you have to do is make the serve and then land on the balls of both your feet to stabilize your body for the next shot.

If you don’t do this and instead run towards the ball when it is thrown back at you then it will be harder for you to take the shot. Your body would not have the momentum to react properly and on a timely basis, and hence, you might end up missing the shot.

So, the Serve and Split Step drill will ensure that you make an efficient serve, stabilize your position, and then take the next shot effectively so that the game continues smoothly for you. The more you practice this shrill, the more visible difference you will see in your game.

Steps To Follow
  • First of all, hold the ball in your non-dominant hand and drop it directly at the center of the paddle to make the serve.
  • Once the ball is served, land on the balls of your feet to regain momentum and stabilize your entire body.
  • Take a fake swing with your arm to mimic hitting back the ball as if it is being ricocheted back at you by the opponent. Then, hop on both your feet again and repeat the process until you reach the kitchen line.

5. Shadow Swing

Shadow swinging means swinging a pickleball paddle without hitting the ball. It is performed to get comfort with hitting pickleball balls. It is helpful training to use a paddle before the play.

Steps To Follow
  • Hold the paddle firmly
  • Start swinging the paddle from low to high
  • Repeat the drill

Frequently Asked Questions

Is It Important To Practice Pickleball Alone?

Yes, it is essential that you practice Pickleball alone and not just in the courts when you play the actual game. Practicing alone will help you improve your muscle coordination and quicken up your reflexes. Hence, you will become more efficient and effective in the field.

How Can I Practice Pickleball Alone At Home?

You can practice Pickleball alone in the backyard of your home through various drills. Some drills merely require a wall, and some require a proper court. For the drills that need to be performed on the court, you may recreate a court using a tape line and portable net.

How Do I Become Better At Pickleball?

You can become better at Pickleball simply by practicing in your alone time. There are various fun drills that you can do that will help you gain more muscle coordination and hone your reflexes. Besides, if there is a shot that you are not so good at, practicing it repeatedly will help you master it in no time at all.

A Simple 20-Minute Solo Session

Solo practice works when it has a shape. Try this structure against a wall or practice backboard. Five minutes: dink rally against a taped line at net height — soft shots, both wings, counting consecutive contacts and trying to beat your record. Five minutes: volley blocks against the wall from just outside an imaginary kitchen, keeping the paddle up and the swing tiny. Five minutes: serves to targets — place three objects in the deep corners of a court (or mark zones on the wall) and rotate targets every serve, tracking how many land deep. Final five minutes: footwork shadows — split-step, two steps forward, recover — because most solo errors are really positioning errors. Short, focused and repeatable beats an occasional marathon; three of these sessions a week will show up in your matches within a month.

The Bottom Line

So, it is safe to say that you should practice playing Pickleball in your free time. This will help you hone your reflexes and improve your muscle movement and coordination. Hence, every time you step into the pickleball court, your skills are much more enhanced, and it will take your opponent by surprise.

There are multiple ways in which you can practice Pickleball. For instance, you could use the Static Drop Feed, Topspin Drive, Rolling Shot, Serve and Split Step, and Shadow Swing. All these drills will help you become a formidable Pickleball player on the field. So, I suggest you take these practice drills regularly.


Other Related Posts:
  • 3rd Shot Drop
  • Backyard Pickleball Court
  • Best Pickleball Shoes
  • Best Pickleball Paddles Under 100
  • Is Pickleball An Olympic Sport?


Jeena Noven, Pickleballcard Author
Jeena Noven

Jeena Noven is one of Pickleball Card’s main writers for rules, ratings and everyday play. She focuses on the questions players actually argue about on court — scoring, faults, ratings and match situations — and checks each answer against the current USA Pickleball rulebook before it goes live. Her guides are written for real club players: clear first, technical when it matters, and updated when the rules change.

Filed Under: Strategy & Training

How To Build A Pickleball Practice Wall | Pickleball Wall Drills

September 20, 2026 by Jeena Noven

The guide discusses the pickleball practice wall and tells about how you can practice pickleball on a wall, and its pros and cons.

Like every other sport, practicing pickleball is essential to mastering the game. But there are times when you do not have access to a pickleball court for practicing the game. Well in such a case you just don’t need to worry because the best thing about the game is that you can practice the game even without physically visiting the pickleball court.

Yes, you can practice pickleball on a wall as practicing the pickleball shots against a wall not only helps in improving the speed and footwork of the player but also helps in maximizing the accuracy, precision, and reaction time, and provides the overall control of the ball. Here in this guide, we will particularly discuss the pickleball practice wall, why practicing pickleball is important, how you can make a pickleball practice wall on your own and what are the pros and cons of practicing pickleball.

Pickleball Practice Wall

We are going to discuss everything about the pickleball practice wall so you can get to know about the information related to practicing pickleball on a wall. Let us without wasting any more time shed light on the detailed analysis of the pickleball practice wall.

Pickleball Practice Wall

Here in this guide, we are going to cover the details about the pickleball practice wall, why practicing is important, how you can make a DIY practice wall, and other relevant information. Let us first look at the importance of practicing and then we will look at the top pickleball wall drills and the step-by-step procedure to make a practice pickleball wall on your own.

Why Is Practicing Important?

Practicing pickleball not only makes a player perfect in the game but also makes you learn different techniques and increases your pickleball skill level. You can easily practice pickleball on the wall if you do not have the availability of the opponent player.

Practicing pickleball on the wall also increases your control over the ball and also gives you numerous other benefits. It makes it easier for you to learn new techniques. You can practice new techniques and improvise the gaming techniques by making them more sharp, smart, and flawless.

Moreover, your shots will become much better with continuous practice and you will enjoy a great time with yourself while playing your favorite game, pickleball. This is because practicing against a ball does not require a partner and you can play the game all independently.

Well, this is a great exercise to improve your strokes and work on your shots to improve them. Practicing pickleball on the wall is great for warm-up before a game too. Moreover, pickleball practicing with a wall increases your footwork which helps in the game to deliver a good response against the ball.

How To Make A Pickleball Practice Wall?

If you are looking to practice pickleball on your wall and want to make your DIY pickleball practice wall, this section of the article is for you. Pickleball practice wall-making at home is quite a simple method.

1. Selecting The Right Wall

The first and foremost important thing when creating a DIY pickleball wall is to focus on the selection of the right wall. The wall you should choose should be flat and sturdy and should also provide you with the required area for your practice. For this purpose, the garage and backyard walls are considered ideal.

2. Proper Cleaning The Wall

After selecting the wall, you have to make sure that the wall is clean. It should not have any dust, dirt, or debris particles. This is because a clean wall provides you with a good, smooth, and uninterrupted experience of practicing pickleball.

3. Mark The Target Area

You can use tape or chalk to mark target areas for your pickleball practice. What you have to do is mark a line in the horizontal direction at a non-volley zone height and make sure to keep it straight. Keep in mind to mark a small target for better and more focused practicing experience.

4. Set Up The Net Line

If possible, place a net line on the wall exactly equal to the height of the original net. This will assist you in hitting the shots over the net. With this, you will be able to control your hands and foot movement properly while playing pickleball and will also be able to control your shot selection.

5. Add Padding

You can use the foam or padding on the wall to reduce the sound of noise and the impact of hitting. For this purpose, you can use padding material and foam tiles that are readily available in local hardware stores.

6. Ensure Safety

Whatever place you have chosen for your practice, first confirm that there is nothing harmful. The area of practice should be completely safe. If you notice something harmful is there that can harm you then remove that first, as leaving it as it is can cause you trouble.

Pros And Cons Of Practicing Against A Wall

Advantages

1. Affordable

Practicing pickleball on your own against a wall is free of cost. In this method, you only need a ball, a racket, and a paddle.

2. You Don’t Need Partner

Practicing pickleball against a wall is convenient and much easier because you can train at any time and all alone. You don’t need to wait for a partner to start practicing.

3. Reflexes And Reactions

Practicing pickleball against a wall is the best way to work on your reaction time and your reflexes. When the ball rebounds from the wall while practicing pickleball against a wall, it helps you develop skills for managing the fast shots in a fast-paced game.

4. Consistency

Pickleball wall practice allows you to perform repetitive shots that are useful for increasing muscle memory and also help you in playing a longer game.

5. Control

It helps you to improve your pickleball technique for your game. Practicing pickleball against a wall gives you better control over particular aspects of the game including swing, grip, and footwork.

Disadvantages

1. Lack Of Genuine Game Conditions

Wall practice doesn’t work like a real game. Like an opponent hitting shots in the real game, wall practicing doesn’t give you that similarity. Moreover, the wall practicing also lacks spin variations and tactical gameplay, unlike games where you have opponents against you.

2. Space Limitations

If you do wall practice, you have limited wall area and surrounding space which does not perfectly replace the real court dimensions. This puts restrictions on your practice.

3. Limited Feedback

It is impossible to get feedback on your game strategy or technique with wall practicing. This makes the wall practicing less challenging and the player takes the game easy. Consistent practicing without any feedback restricts the player from growing.

4. Limited Scope

When you practice on the wall you work on selective shots and strategies. Strategies like volleying or serving can’t be replicated while practicing on a wall.

5. Overuse Injuries

You are more prone to overuse injuries when doing wall practicing for pickleball. This is because you perform repetitive shots consistently and in case they are wrong they can harm you and can cause serious injuries.

Benefits Of Pickleball Wall Practices Or Drills

Technique

This is a great way to increase your stamina and improve your techniques, and when you practice alone, you get a great opportunity to focus on yourself.

Control

When you hit the ball on the wall It always comes back to you and this makes it quite difficult to control your shots. This is because the wall never misses the shot. This continuous practice on the wall makes it easier for the player to control the ball and continue the game for longer. In this way, you can learn how to control the ball in a little space while practicing against a wall.

Consistency

Practicing against the wall is the best way to improve your consistency level as the game goes on and never stops because the wall never misses the shot and it always comes back to you.

Hand Speed ​​And Reaction Time

When the ball hits the wall and comes towards you, it comes back at a high speed. You get very little time to return the shot. This ultimately makes it good for you to increase your hand speed, and coordination and improve your reaction time.

How To Practice Against The Pickleball Wall?

Here is the detailed description and some effective tips regarding wall practice that are beneficial for you and you will increase your skills and your game style by following them. So without wasting any time let us move ahead with the tips below. We will discuss,

  • Proper Planning
  • Mark the net
  • Vary your pace
  • Footwork

Proper Planning

Always keep in mind that whenever you start your game, make your plan before that. You can make a plan to practice pickleball by finalizing how many shots you have to hit in a certain period or by focusing mainly on playing a particular shot again and again to get perfection.

Foot Work

Keep moving your feet continuously like you do in a real match. Do not stand in one place, this is very important and will help you a lot.

Mark The Net

If you are using a common wall for practice, then first make a mark on it equal to the height of the net. This will help you to practice and you will have a visual of the real net in front of you. Apart from this, you can also take the help of tape for taping for baseline and service lines so that you can have a correct idea of ​​the distance.

Vary Pace Of Shots

Use variation in your shots. Don’t play at the same speed and show some aggression while hitting. You can shift your shots speed from fast paced to slow paced and from slow paced to fast paced.

Pickleball Wall Drills

Pickleball wall drills are a fast and easy way to improve yourself at pickleball when you don’t have a partner. You can easily vary the speed and angle and practice different shots, including serve, dinks, third shot drop, forehand, and backhand. Your goal for doing wall drills alone is to improve your skill level, confidence on the court, and ball-hitting techniques. These drills also help you to build consistency, ball placement, and body stamina, which is essential to becoming a pro at pickleball.

1. Practice Your Serve

Practicing your serve against a wall is a great way to improve your pickleball serve. Stand a few feet away from the wall, hold your paddle with the proper grip, and then practice hitting the ball with the same amount of force that you actually do on the court. By practicing regularly against the wall, you can improve your pickleball serve consistency and accuracy.

2. Practice Your Dink

The pickleball dink shot is a soft and controlled shot used when you are close to the net. For dink drills against the wall, draw two lines: one is an imaginary kitchen line 7 feet away from the wall, and the other is a net line at the center of the wall. Now, by standing behind the kitchen line, try hitting the ball above the net line at the wall. Repeat the same process for backhand dink shots after you feel confident with forehand dink shots.

3. Practice Your Volley

Practicing pickleball volleying against the wall helps to build your confidence, shot placement, and hitting techniques. Practice forehand and backhand volleys in the same pattern as the dink drills. Stand behind the non-volley zone line and keep the ball low and controlled. Do practice volleys at different angles and with various speeds to build your accuracy and control.

4. Practice Your Target Shots

Doing specific target drills helps improve shot placement and accuracy. You can use a small target on the wall or between the kitchen line and the practice wall, like a circle drawn with chalk or a line with tape. You can also divide the wall into different zones and try hitting them at various angles. These target drills help you improve your accuracy and speed when you are playing on the court.

5. Practice Your Groundstrokes

To practice groundstrokes, you can consistently hit the ball above the net line and then do the same with a backhand shot. You can also practice by mixing both by 3x forehands and then 3x backhands.

6. Practice Your Drop Shot

The drop shot is the most important in pickleball, helping you regain control of the game. You can also practice shot drop by using a shoe box placed above the net line on the practice wall. Standing 6-8 feet from the wall, try to drop shot the ball directly into the box. This will help you perform a well-placed drop shot on the pickleball court.

Frequently Asked Questions

What Is The Best Material For A Pickleball Wall?

Plywood is the best material for making a pickleball wall. For making a perfect size of pickleball wall you need two sheets with a size of 5 feet by 5 feet. This will give you a 5-foot high wall which is 26 inches high depending on the height of the net and is great for practice.

How Can I Practice Pickleball At Home?

You can practice pickleball at home by using a wall. To make it perfect, you have to draw a line of 34 inches in height which is the standard height of the net used in pickleball. After this, you have to draw a line of 7 feet in length and now you have to draw a net properly to practice the game and become the best player.

What Are The Skills Needed To Play Pickleball?

Any player who wants to achieve success in pickleball should focus on these three skills as these are very important for him. Whoever learns these three skills can have a complete grip on the game. The skills include hand-eye coordination, footwork, and agility.

Is Pickleball A Sport Or A Game?

Pickle is a mixture of tennis, ping pong, and badminton. Pickleball is a sport, played using a paddle and white ball with holes.

Turn Wall Drills Into a Session: Count Streaks, Not Minutes

A wall session improves you fastest when it has a score. Pick two or three drills from this guide and work each one in a five-minute block, counting your longest streak of clean contacts instead of watching the clock. Set a target — twenty controlled dinks against the tape line, say — and only step farther from the wall, or speed the ball up, once you can hit that target twice in a row. Finish while your form is still tidy. It is the same streak-counting structure behind effective pickleball drills, and it turns casual solo practice into measurable progress.

Final Thoughts

Hopefully, you have gone through this article that tells you about the detailed analysis of the pickleball practice wall and how you can practice pickleball on a wall on your own. The guide also tells you about the detailed step-by-step procedure on how to create your own pickleball wall. Make sure to pay attention so you do not miss anything important and can practice the game to get perfection within no time.


Other Related Posts:
  • Pickleball Machine Drills
  • Best Pickleball Shoes
  • Cost Of Building A Pickleball Court
  • Rally Scoring In Pickleball


Jeena Noven, Pickleballcard Author
Jeena Noven

Jeena Noven is one of Pickleball Card’s main writers for rules, ratings and everyday play. She focuses on the questions players actually argue about on court — scoring, faults, ratings and match situations — and checks each answer against the current USA Pickleball rulebook before it goes live. Her guides are written for real club players: clear first, technical when it matters, and updated when the rules change.

Filed Under: Strategy & Training

Pickleball Machine Drills To Improve Your Game

September 15, 2026 by Jeena Noven

Explore how we can use a pickleball practice machine for training and learn methods to drill beginner, intermediate, and advanced-level shots.

Beginners frequently complain that they cannot find pickleball practice partners but now the training has become easy as one can use the pickleball practice machine. It is a tireless couch that helps you train and improve muscle memory for pickleball. Practice is the only way to transform from a beginner to an advanced player, but practice partners are not available 24/7.

On the other hand, you can use the practicing machine that can help you increase the level of your game and make you an efficient pickleball player. Being a pickleball coach, I can understand the problems most pickleball players face but pickleball machine drills can pave the way to success. Come with me to explore techniques, strategies, and drills to improve your level in pickleball with the help of a training machine.

Why Do You Need A Pickleball Machine?

There are various reasons why you need to purchase and use a pickleball machine. Firstly, it is a tireless coach that can help you practice whether it is midnight or early in the morning.

You can use the machine to practice anytime based on your routine. The majority of people complain that they do not play pickleball because they cannot invest additional time in the beginning to learn the game.

But you do not need to spare hours from your busy routine as you can use pickleball practice machines to learn basic tactics. Secondly, it can reduce the cost of hiring a coach and joining a club. Couches charge hundreds of bucks monthly to train beginners as well as they give limited time but if you have a pickleball practice machine, you do not need to manage the budget as well as you can use it for hours.

Thirdly, you can change the settings of your machine according to your level. Let’s say, you are a beginner who started playing pickleball for the first time; therefore, you are hesitating to use the paddle in the group of advanced pickleball players or the presence of your coach. But if you have a machine, you can practice in the back of your house, train yourself alone in the beginning, and change the difficulty level to increase the intensity, speed, and height of the ball.

How To Use Pickleball Machine For Drill?

Practice machine makes life easy by eliminating the need for a practice partner. The purpose of the machine is to improve the level of the player by allowing him to practice for hours. We can use the machine as a beginner as well as intermediate and advanced players can use it.

How Does Practice Machine Work? The machine is designed in a way that feeds the ball to throw it towards the player. It fires the ball at a certain speed, and trajectory, and with a consistent rhythm. There are further types of practice machines such as oscillating and programmable machines which we can use for various purposes.

Pickleball Machine Drills For Beginners

As I have mentioned above, all levels of players can use the machine for practice. Some experts object to beginners using a practice machine because they think that at the start of a game learning, we should play with human partners rather than machines. They say that machines have limited strategies and maneuvering plans while others claim that machines are good for learning the basics of pickleball.

It is true that machines have limited strategies and cannot maneuver like humans but still, we can use machines to learn pickleball. Beginners can learn basics such as forehand drills, backhand, and groundstrokes or dink shots. Let’s explore how to use machines to learn beginner-level techniques.

Forehand Drive

Forehand is a fundamental shot in pickleball often used at the beginning of the game just like tennis. Practicing forehand is the most important part of a beginner’s quest to learn pickleball. You can use a pickleball practice machine to drill the forehand dive, all you need is to set the machine next to the net in front of you.

Do not set the machine at the end of the court, always set it in the middle of the baseline for effective results. Once you are done with the placement, change the feeding setting at two-second intervals so you can effortlessly play the ball one after another. In my opinion, a two-second interval is ideal for beginners but if you still find it difficult to play then increase the interval duration.

Pickleball Forehand Drive

Grip the paddle with balanced force and slightly bend your knees then prepare yourself to hit the ball. Your focus plays an important role in the game; therefore, be attentive as the machine starts firing the ball. First start learning to hit the ball with the sweet spot of the paddle in a particular direction then change direction and start playing spinning shots.

Backhand Drive

Another shot that can transform you from a beginner to an advanced player is the backhand drive, one of the most played shots in pickleball. In the beginning, it is very difficult to play the backhand shot but one can improve by persistently practicing. Backhand is a dink volley shot that can spin the ball at high speed and is hard to catch for an opponent.

To learn backhand you need to place the machine in the middle of the baseline and set it at the two-second interval. Backhand is difficult to play for beginners but if you successfully learn it, you can use it not only for volley but in the middle of the game. You need to prepare yourself after setting the place and interval duration.

Pickleball Backhand Drive

Grip the paddle with both hands like holding a tennis racket, your dominant hand should be lower and tight while the second one is on the top of the bevel to control the paddle’s movement. Bend the knees slightly and hit the ball with maximum strength so that it goes high in the air on the opponent’s side. Practice hitting the ball without spinning and once you have learned the basics then use spinning.

Dink Shot

The above two are used in the middle but widely played at the beginning of the game. However, a shot that can be used in the middle or at the end of the match is a dinking shot which will not only make you a winner but also enable you to identify the weaknesses of the opponent. We can use a pickleball machine to learn the dink shots.

Set the machine in the middle of the baseline and change the ball fire speed to moderate. Start with the moderate-speed fire and then increase the speed when you think that you can handle the moderate-speed coming balls.

Intervals are also important to practice the dink shot so change the duration to 4 or 6 seconds in the beginning then shorten the intervals over time. Another factor you should notice while adjusting the settings is changing the elevation to low.

Grip the paddle softly, bend down your knees, and keep your focus on the ball. Hit the ball with minimum power so that it crosses your kitchen area and lands right after the net of your opponent. Keep the ball’s speed and height slow as well as target the cross-court side to conquer the kitchen area of your opponent.

Pickleball Machine Drills For Intermediate

Intermediate players can also get benefits by using the pickleball practice machine. Mostly, intermediate players are familiar with the forehand, backhand drives, and dink shots but they face a tough time playing the defensive and offensive lobs. Additionally, they can use a practice machine to drill the angle shots, now come with me to learn intermediate machine drills.

Lobs

Lobs are the high shots we can play to take the ball to the opponent’s side and land it in the middle of the baseline. Lobs are very useful if you play them smartly. There are two types of jobs you can learn with the help of a pickleball practicing machine: the offensive and defensive lob.

Offensive Lob

A heightened and deep delivery in cross-court direction targeting the end of the court to take the ball above the opponent’s head. Place the machine on the baseline on the other side of the net and change elevation to high, speed to fast, and duration to 3-second intervals. Use your paddle in a way that hits the ball up in the air at the maximum trajectory and in a cross-court direction then land it deep in your opponent’s area.

Defensive Lob

The purpose of an offensive lob is to make it difficult for the opponent to play the game while a defensive lob is played when we are losing control over the game. Follow the same instructions I mentioned in the Offensive Lob section, and hold the paddle softly. Hit the ball in an upward direction but with less force compared to the offensive lob and take the ball to the end of the baseline of your opponent’s area.

Angle Shots

Angle shots are as significant as the volley, dink, and lobs. Intermediate pickleball players focus on controlling the speed and the height of the ball but very few of them are familiar with the fact that angle plays a more pivotal role compared to speed and height. There is a list of the angle shots but all require similar practice.

  • Cross Court Shot: Set the machine in the middle of the line and change speed to moderate then practice hitting the ball in your opposite or diagonal direction.
  • Straight Line Shot: Set the machine in the middle of the baseline and increase the speed of the ball to high then practice hitting the ball straight in a line with moderate speed and desired elevation.
  • Drop Shot: Set the machine in the middle of the baseline and increase speed, decrease the height of the ball then practice landing the ball right after the kitchen area of your opponent while maintaining moderate force.

Pickleball Machine Drills For Advanced Players

Advanced players efficiently play all kinds of shots, lobs, and dives in various directions, maintaining speed, height, and angle. But they should practice deceptive shots, spin, and strategic dives. They can use a pickleball practice machine to drill these shots.

Deceptive Shots

We can turn any shot into a deceptive one by changing the body’s posture, position, and gripping style to hold the paddle. A deceptive shot is used to trick the opponent by portraying to him that you are about to miss the shot but unexpectedly hit the ball with proper strategy.

Learning deceptive shots is a long-term process in which you need to master position, posture, gripping, and strategy-making. Most professional and advanced players plan the entire game, identifying the weaknesses of the opponent and then launching deceptive shots based on the opponent’s downside.

Not all kinds of deceptive shots are useful as some players are good at detecting the deceptive and a normal shot while others require time to process the return so launch a shot based on all these conditions. You can practice by placing the machine in the middle of the baseline and adjusting the speed, elevation, and angles.

Your pickleball skills play a significant role in launching a deceptive shot but the expressions and body posture is more important. It is the body language that indirectly conveys to us the type of shot our opponent intends to play and if he can fake his body language, we cannot assess the incoming shot. Therefore work on your body language rather than polishing skills.

What Kind Of Machine Should You Use?

When it comes to the practice machine, we have two major choices: The Lobster pickleball machine and the Spinshot pickleball machine. Each is useful in its way but used for various purposes.

The Lobster machine drills are for the players interested in consistency and control. More precisely, these machines are for beginners and intermediate players while Spinshot machines are for advanced and professional pickleball players.

Lobster Pickleball Machine Drills

A Lobster Machine is perfect if you just started playing pickleball. These are simple-to-use machines designed for beginners who are drilling fundamental pickleball shots. The Lobster machine is used for learning consistency and control.

It has various futuristic features including oscillation and programming. The oscillation feature enables the machine to start firing the ball in a direction and change the angle or direction with each shot. The feature is very useful for beginners who are training to hit the ball while moving from one end to another.

Programming is a feature that helps you design the entire game with the machine. You can set the angles, elevation, speed, and intensity of the shots. Once you program the Lobster machine to fire according to certain instructions, it will throw balls following the program.

Spinshot Pickleball Machine Drills

If you are familiar with all kinds of fundamental shots, you can use the Spinshot Pickleball Machine. It is designed for advanced and professional-level players who lack the skills of topspin, backspin, and deceptive shots. The Spinshot pickleball machine has upgraded software compared to the Lobster machine.

Users can customize all kinds of features such as pace, trajectory, angles, flexibility, spin, and placement. It also offers upgraded oscillating and programming features compared to the Lobster machine.

It can throw the ball in various directions from left, right, or in the middle without letting the player know the ball’s next direction. Anyhow, you can choose one of them based on your game level and requirements.

Frequently Asked Questions

What Is The Maintenance Of A Pickleball Tutor?

A pickleball machine does not require maintenance like other sports, such as tennis or football tutor machines. However, the user should regularly clean the internal ball-throwing wheel for desired results if he uses the machine daily.

Can You Practice Pickleball At Home?

Yes, you can practice at home by using a pickleball machine. The machine does not require more room nor is it complicated to use. It is designed in a way that all levels of players can use it if they do not have a practice partner or cannot visit a court daily.

How Long Does A Lobster Battery Last?

The battery duration depends on multiple reasons, such as the way you use it, overall battery quality, or your game style. However, the average recorded duration is 3 to 4 hours.

The Machine’s Blind Spot: Perfect Feeds, Imperfect Preparation

A machine’s strength is also its trap: it never feeds you a bad ball. Groove a stroke against identical feeds and it can collapse the moment a human hits you something awkward. So use the machine like a scientist: change one setting at a time — speed for a block of balls, then placement, then a shorter interval — and note which change breaks your form first, because that weakness is where your drills should aim. Then finish against a human when you can: as every solo practice player learns, repetition builds the shot, but only variety builds the player.

Final Thoughts

Talent alone does not make someone a winner unless he works on polishing his skills and learning new techniques and tactics. Pickleball is a simple game for those who know how to play it, but it can become a nightmare if they visit the court without proper practice. The major problem people face is that their practice partners are not available 24/7, as well as coaches or trainers charge hundreds of bucks for 1 or 2 hours of training.

If you also have similar problems then I advise you to get a pickleball training machine and start drilling the shots. I have explained everything about pickleball machines and how you can use them for drilling. Whether you are a beginner or a professional player, you need to practice properly with dedication and repeat each shot again and again to learn it perfectly, so get a machine and start working on yourself.


Other Related Posts:
  • Best Pickleball Shoes
  • Rally Scoring Pickleball
  • Pickleball History
  • Is Pickleball In The Olympics?
  • Best Pickleball Shirts


Jeena Noven, Pickleballcard Author
Jeena Noven

Jeena Noven is one of Pickleball Card’s main writers for rules, ratings and everyday play. She focuses on the questions players actually argue about on court — scoring, faults, ratings and match situations — and checks each answer against the current USA Pickleball rulebook before it goes live. Her guides are written for real club players: clear first, technical when it matters, and updated when the rules change.

Filed Under: Strategy & Training

7 Pickleball Dinking Strategies To Win The Game

September 14, 2026 by Jeena Noven

Explore simple pickleball dinking shot strategies and dinking drills as well as see how to play pickleball shots effectively.

Pickleball has become one of the fastest-growing games in America due to its simple rules and entertaining nature. People take it as a fun game; additionally, it is a low-impact activity so aged people, slightly disabled, and young all can play it. Pickleball enthusiasts find ways to trick their opponents, use strategies, such as dink shots or hard shots as well as plan the entire game to win the match.

Pickleball is an easy-to-play game, but if your opponent is more skilled compared to you, the chances are high that he wins the match. Therefore, you should learn the strategies of pickleball, such as dink shot methods, dinking drills, and rules of the game so you can also leave your opponent astonished when the match finishes. If you want to become undefeatable then follow my lead to learn the dinking strategies of pickleball.

What Is A Dink Shot?

The majority of beginners find pickleball terms hard to understand such as dinking, volley zone, kitchen, etc. Dinking is a soft short used in pickleball to take the ball to the other side of the net. It is not as simple as it seems because one has to plan the placement, pace, and consequences of the shot.

Dinking requires a slight swing that you can execute by brushing your paddle on the back of the ball. It also requires accuracy because if you imperfectly hit the ball, your opponent can get a chance to hit it back on a spot where you cannot approach it. In short, dinking is a complex soft short that requires a considerable amount of planning before execution.

What Is The Purpose Of Dink Shot?

People often ask about the purpose of a dink shot because it is a soft delivery that your opponent can play effortlessly so why is it required? Dinking is a strategic short that can affect the pace of the game and help you plan further strategies. For example, you are on the court with your opponent, both are highly confident about the victory and the game is getting faster as it advances.

A fast-paced ball comes toward you and you hit it softly instead of attacking with full power. Your action will certainly slow down the pace of the game and your opponent who was expecting a quick attack will be confused to anticipate the slow-paced ball near the non-volley zone. As well, it will also help you plan further strategies as the game is slow now, you can plan whether you need to be attacking or defensive.

Furthermore, a dink shot is used when a player is losing control over the non-volley zone of the opponent. If you continuously focus on the dinking shots, you can push the opponent near the baseline and leave him with no choice except to hit the ball from the end of the court. Lastly, it helps you test the patience of the opponent and if you use dinking shots efficiently, you can bring down the stamina of your opponent.

Slow Vs Fast Paced Games

Beginners often underestimate the importance of dink shots while advanced and professional players are familiar with the fact that dinking can make them win within minutes. Beginners focus on fast-paced games and consider that playing pickleball at a high pace can transform them into advanced players. But the best pickleball player is one who can control the court whether the game is fast or slow.

Additionally, a fast game is simple to play if you compare it with a slow-paced match. Because we cannot implement strategies except a few in fast-paced games but we can make the slow-paced game complicated so we should rely upon dink and soft shots compared to attacking deliveries. Let’s begin understanding how to use dink shots.

Pickleball Dinking Drills

The posture you acquire, the way you grab the pickleball paddle and your focus can shape the effectiveness of a dink shot. Therefore, it is highly recommended that one acquire the perfect position, grip the paddle in the right way, and focus on the ball as well as on the opponent.

Positioning

Bend your knees slightly and acquire a balanced stance when the opponent is about to hit the ball. The majority of the players reveal their further strategies of the game by acquiring a position before it is required. So you should prepare right before you intend to hit the ball softly so the opponent cannot assess your next move.

Let’s say you planned that as your opponent starts attacking with fast-paced shots, you will immediately give the ball a soft touch to trick him. As your opponent attacks, you also hit the ball at a fast pace but acquire the position right after you hit the ball and when your opponent hits it back with strength, you give it a slight touch.

Gripping

Grip plays a pivotal role when it comes to a dink shot because it determines the accuracy, position, pace, and swing. If you are playing a fast-paced game then grip your paddle tight, but dinking requires a soft grip; therefore, slightly loosen your grip to maintain the control. Keep your paddle facing your body and try to hit the ball with the sweet spot of your paddle to get the desired results.

Pickleball Dinking Strategies

1. Placement

Dinking is a simple way to trick the opponent by launching a soft shot but it does not mean that we should execute dinks whenever we want. Instead, we should use the dink short very smartly so the opponent is unable to anticipate the ball’s position. For this, you need to identify the weakness of your opponent and then dink the ball in that direction.

The majority of the players are right-hand oriented so they face a hard time hitting the ball on their left side. If you want to make it more interesting, then you can dink the ball on the left side of the player with a balanced force.

Its height should stay low and go near the baseline of the opponent’s side. In this way, you are not only limiting the activity of your opponent but also getting enough time to prepare yourself for another strategic hit.

Pickleball court is designed in a way that players require more energy to hit the ball on the sidelines. So if you are planning a dink, you can hit it in the direction of the sidelines. In my opinion, you should hit straight but brush the paddle on the back of the ball so it swings in the direction of the sideline, and as a result, your opponent will fail to hit the ball.

In case you cannot find a weakness of your opponent then I will advise you to target his feet. Hitting a ball coming towards feet is not only difficult but also troublesome as one loses balance while spotting the ball’s direction. Try to force your opponent to hit upward and then target the feet.

2. Changing Angles

Angles can make you a winner, and a tough player and if you understand their use, you can defeat anyone. Usually, people do not focus on the angle at which they hit the ball but it can determine the fate of the game. Mindlessly hitting the ball without considering the importance of the angle can result in your defeat.

3. Cross Court Angle

Instead of hitting the ball in the same direction one after another, you should hit it in a direction that is opposite to you. For example, your stance is in the right sideline of the court so you can hit in the left direction towards the baseline, keeping the ball height low and speed at slow. Cross-court angle dink shots are useful because they force the opponent to cover a large distance from one position to another in a diagonal line.

Cross Court Dink
Cross Court Dink

Cross-court angle dink shots are very useful if your opponent is playing fast and you launch a slow-paced shot in the middle of the game. It helps you create openings because the opponent requires you to hit the ball after approaching in the opposite direction and as a result, you can exploit the gap created by your opponent. It also helps to affect the stamina of the opponent.

4. Straight-Line Dinks

Straight-line dink shot is very simple to play, that’s why majority of the beginners do not use it but they should know that it is more crucial compared to the cross-court dink shot. The purpose of a straight-line dink shot is not to trick the opponent or to slow down the pace of the game but to gain control over the non-volley zone.

Straight-Line Dinks
Straight-Line Dinks

If a player loses control over his non-volley zone, he can lose the game but we can use straight-line dink shots to neutralize the speed of the game and gain the area of non-volley. All you need is to hit the ball in the same direction at a low pace and height so the game goes slower and you gain control over the area.

5. Determining Height

Strategies should be changed as the match progresses; therefore we cannot say that one should always keep the height of the ball low in all conditions. Sometimes, the weakness of an opponent is the heighted shot and he can effortlessly play the low shot. Majority of the pickleball players consider that a dink shot always has a low trajectory but this is not true.

A dink shot is not extraordinarily heightened, nor is it very low but balanced. However, a dink shot is low compared to the average pickleball shot and we can increase the height of the ball based on the conditions. If you hit the ball in the same manner one after another, you cannot win the game; therefore you need to change the height and hit mixed shots.

6. Alter Speed

A pickleball player always keeps the ball in control by maintaining its speed. Whether you are an active player or you like passive or slow games, you need to learn the art of controlling the speed. Controlling and maintaining speed does not mean that a player always hits the ball with the same force he used in the previous shots but it means one should be efficient enough to decrease or increase the speed of the ball.

A dink shot is always slower than the average shot. Some people consider that a fast, low-height hit is also a dink shot but the fact is the opposite. However, one should always change the speed of the ball with each hit to keep the game challenging for the opponent.

If you hit the ball with the same force, your opponent will understand the weakness and return the ball in a way that you will be unable to approach it; therefore, always alter the speed of the ball with the passage of time and conditions. Then comes the space, timing, and flow of the ball that should be changed with speed.

The rhythm of the game is very important to control the court, it involves the space, time, and flow of the match. If you play pickleball with the same rhythm, you can lose the match. The purpose of a dink shot is to change the rhythm, it is a way to alter the speed, flow of the match, and timing.

7. Tricky Shots

Pickleball seems simple but when it comes to the tricky shots, it is one of the most interesting games in the world. Some people consider that pickleball requires only physical energy but they ignore the fact that one also needs high mental activity to win the match. It is the only game in which you can win if you know how to execute a deceptive shot.

You can practice fake dinks by learning how to portray yourself as you are preparing to hit the ball with full force but in the end, you touch the ball softly. You also need to learn the fake posture of a dink shot in which you convey an indirect message through your posture that you will launch a dink shot but hit the ball with full force and at a maximum height.

Moreover, you should learn how to spin the ball in the left and right direction. Spinning is not difficult to practice as one has to brush the paddle on the back of the ball in a way that changes the direction when it hits the ground. Without spin, you cannot make a difference, but it is simpler to trick the opponent if you practice spin.

Spinning makes it harder for an opponent to anticipate the direction of the ball after it bounces. You can use backspin in which the ball rotates backside when it bounces on the court, you can also practice topspin in which you can change the direction of the ball from low to high.

How To Hit Dink Shot Effectively?

The only way that can help you use dink shots effectively is by practicing. Mostly, beginners do not focus on the practice and try to use complex shots on the court in the middle of a match but it cannot make you an efficient pickleball player. If you want to become an extraordinary player then use pickleball shots smartly.

As a coach, I frequently advise my trainees to learn a unique shot for a specific timeframe. For example, if you are learning a cross-court dink shot, you need to practice it for more than 2 weeks to become efficient. Once you consider that you have practiced enough and can play the specific shot on the court then advance forward learning a new unique shot.

Frequently Asked Questions

What Is A Dink Shot?

A dink shot is a soft shot to land the ball near the non-volley zone of the opponent so he cannot approach it and if he does then he cannot play it efficiently. A dink shot should be slow and have low height compared to an average pickleball shot.

What Is The Best Way To Dink Pickleball?

The best way to dink the ball is to hit it in a way that it softly approaches the non-volley zone of the opponent. The best dink is not a low shot but when we dink over the net above a foot.

Why Is There So Much Dinking In Pickleball?

There are various reasons why people use dink shots as some use it to control the game while others launch dink shots to trick the opponent. It is a useful shot that’s why there is so much dinking in pickleball.

The Middle Dink: The Strategy That Starts Arguments (Theirs)

When in doubt, dink to the middle. A ball placed at the seam between two partners forces a split-second decision — whose ball is it? — and that hesitation is worth as much as perfect placement. Middle dinks also shrink the angles your opponents can create, since a return from the centre rarely pulls you wide. Pair the middle dink with its natural partner: the dink at the feet of a player who is still moving forward through the transition zone, which is the hardest ball in pickleball to lift cleanly. Both depend on the same skill — keeping the ball low and unattackable — so revisit how to keep the ball low and the basics of the dink shot itself.

Final Words

Pickleball is one of the most popular games in America, promoted by clubs and communities due to its low-impact activity and entertaining nature. The game is simple to play compared to others, such as tennis or squash but we can use tricks and techniques to make it a bit complex and interesting to enjoy it more. There are several techniques and strategies we can use like dink shots to trick the opponent and win the game.

Dink shots are very useful for controlling the game, managing the speed, maintaining the rhythm, and neutralizing the match. A dink shot is not as simple as it seems because one has to plan a proper strategy to launch and react after the opponent’s delivery. I have explained everything about dink shots, positioning, timing, flow, speed, and other strategies so now follow my guidelines and become an undefeatable player.


Other Related Posts:
  • Pickleball Dinking Mistakes
  • Pickleball Rally Scoring
  • Lob Shot In Pickleball
  • Best Pickleball Serves
  • Pickleball 3rd Shot Drop


Jeena Noven, Pickleballcard Author
Jeena Noven

Jeena Noven is one of Pickleball Card’s main writers for rules, ratings and everyday play. She focuses on the questions players actually argue about on court — scoring, faults, ratings and match situations — and checks each answer against the current USA Pickleball rulebook before it goes live. Her guides are written for real club players: clear first, technical when it matters, and updated when the rules change.

Filed Under: Strategy & Training

  • Page 1
  • Page 2
  • Go to Next Page »

Latest Posts

  • Skinny Singles Pickleball: Rules, Court Setup & Strategy
  • Quiet Pickleball Paddles & Noise Rules
  • Tournament Balls: Franklin X-40 Vs Onix Dura Fast 40
  • Games Like Pickleball: Badminton, Racquetball, Tennis, Padel And More
  • Drills for Beginners in Pickleball: Dinks, Serves, Volleys and Drops
  • Timeout Rules in Pickleball: Standard, Medical and Between-Game Timeouts
  • Pickleball Safety And Eye Protection
  • What To Wear To Play Pickleball: Shoes, Clothes, And Court Essentials
  • Pickleball Statistics: Participation, Growth, And The Numbers That Matter
  • Paddle Generations Explained: From Thermoformed To Foam (Gen 2, Gen 3, Gen 4)
  • About
  • Privacy Policy
  • Terms And Conditions
  • Affiliate Disclosure

COPYRIGHT © 2026 · Pickleballcard.COM, ALL RIGHTS RESERVED.

PICKLEBALLCARD.COM IS A PARTICIPANT IN THE AMAZON SERVICES LLC ASSOCIATES PROGRAM, AN AFFILIATE ADVERTISING PROGRAM DESIGNED TO PROVIDE A MEANS FOR SITES TO EARN ADVERTISING FEES BY ADVERTISING AND LINKING TO AMAZON.COM. AMAZON, THE AMAZON LOGO, AMAZONSUPPLY, AND THE AMAZONSUPPLY LOGO ARE TRADEMARKS OF AMAZON.COM, INC. OR ITS AFFILIATES. AS AN AMAZON ASSOCIATE WE EARN AFFILIATE COMMISSIONS FROM QUALIFYING PURCHASES.