• Skip to primary navigation
  • Skip to main content
  • Skip to primary sidebar

Pickleballcard

All About Pickleball Gears

  • About Pickleball
    • How To Play Pickleball
    • Pickleball Rules
    • Pickleball Kitchen Rules
    • Serving Rules
    • Pickleball Ratings
    • Pickleball Tips
    • Pickleball History
  • Pickleball Shoes
    • Best Pickleball Shoes
    • Best Pickleball Shoes For Men
    • Best Pickleball Shoes For Women
  • Pickleball Paddles
    • Best Pickleball Paddles
    • Elongated Pickleball Paddles
    • Graphite Pickleball Paddles
    • Onix Pickleball Paddles
    • Pickleball Paddles for Women
    • Pickleball Paddles For Spin
  • Vs
    • Pickleball Vs Tennis
    • Paddle Tennis Vs Pickleball
    • Indoor Vs Outdoor Pickleball

Pickleball Singles Strategy: Serve Deep, Track Forward, Force the Error

October 18, 2026 by shoaib

Singles pickleball looks like doubles played alone. It is not. It is a different game wearing the same court.

One player covers everything, every rally is a footrace and a chess problem at once, and the shots that win doubles points routinely lose singles points.

This guide organises singles as one connected system: serve, return, approach, life at the kitchen line, and defending the pass when your opponent gets there first.

Key Takeaways

  • Depth wins singles. Serve deep and return deep; short balls are invitations your opponent will accept.
  • The T is your home serve. Serving toward the middle cuts return angles and shortens your own recovery run.
  • Track your shot forward. The first player established at the kitchen line controls most rallies.
  • Come in behind quality only. Approach behind deep, low balls that push your opponent back — never behind a floater.
  • Play against momentum. A moving opponent is beaten by the ball behind them more often than by open space.
  • Force the error, do not chase the winner. In a full-court game, consistent pressure outscores highlight shots.

The Short Answer

Singles is won by depth and court position, not by winners. Serve deep, mostly toward the T, and return deep to your opponent’s weaker side.

Then follow your own shot forward. The player who reaches the kitchen line first, behind a ball that deserves it, dictates where the next ball goes.

USA Pickleball’s singles guidance makes the same core points: deep serves with margin, the T serve, deep returns, playing against momentum, tracking forward, and letting the opponent make the mistake.

What follows turns those points into a phase-by-phase system you can run through during a match, one rally at a time.

How Singles Differs Strategically From Doubles

The rules barely change. The same court, the same non-volley zone and the same two-bounce rule apply, with one server instead of two.

The full rules are covered in our guide to pickleball singles rules. This article assumes them and stays with strategy.

What changes is coverage. In doubles, a partner owns half your problems. In singles, the sideline you ignore is the sideline the ball finds.

That single fact reshapes everything: depth matters more, patience matters more, recovery position matters more, and low-percentage winners matter far less.

If you are still choosing between formats, our comparison of singles and doubles pickleball covers the differences in rules, fitness and feel.

Phase One: The Serve

Deep, With Margin

A deep serve pushes your opponent behind the baseline and makes a strong return physically harder to produce.

Aim for the back third of the service box, not the back line itself. Margin matters because a missed serve in singles is a point handed over with no rally at all.

Height helps depth. A serve with a comfortable arc clears the net safely and still lands deep, while a flat, skimming serve faults too often to build a game on.

The T as Your Home Serve

Serve toward the T — the junction of the centre line and the non-volley zone’s opposite service box — as your default location.

A T serve cuts the returner’s angles. They cannot open the court wide without hitting a much sharper angle, and most returns come back through the middle, close to you.

It also shortens your recovery. After a T serve you are already near where the rally will develop, instead of stranded out wide.

The Occasional Wide Serve

The wide serve is a change-up, not a home. Used sometimes, it drags the returner off court and opens the middle for your next ball.

Used often, it opens angles against you and lengthens your run back. Serve wide to remind, serve to the T to live.

Phase Two: The Return

The return is your first approach shot, and in singles it may be your most important one. Treat it as the start of your advance, not a defensive reply.

Deep, to the Weaker Side

Return deep, ideally to your opponent’s weaker side — for most players, the backhand corner.

Depth does two jobs at once. It pushes the server back for their third shot, and it buys you the seconds you need to move forward.

A short return does the opposite. It invites the server to step in, drive or drop on their terms, and leave you covering the whole court from the baseline.

The depth principles are shared with doubles. Our guide to pickleball return of serve tips covers stance, height and handling pace in full.

Then Forward, Immediately

Do not admire the return. The steps you take in the first second after contact decide where you play the next ball from.

Move forward behind your return, split-step as the server swings, and be ready to keep coming if your return has done its job.

Returning and staying back is the most common singles error at club level. It concedes the kitchen line — and usually the rally — before the third shot lands.

Phase Three: The Approach Decision

This is where most club singles points are actually decided: not at the line, not at the baseline, but in the choice of whether to come in.

Come In Behind Quality

Approach behind balls your opponent cannot attack: deep balls at their feet, low balls that push them backward, balls that move them off balance.

Behind those shots, your opponent must hit up, from behind the baseline, while you close the net. That is the exchange singles strategy is built to create.

Track the ball’s flight as you move. Following your shot in means your position mirrors its quality, step for step.

Stay Back Behind Anything Weak

A short or floating approach shot is not an approach shot. Following it in simply moves you closer to the passing shot it invites.

Behind a weak ball, hold or retreat, re-balance near the baseline’s centre, and rebuild the rally with your next deep ball.

Discipline here feels passive and wins matches. The points you save by refusing bad approaches outnumber the points any extra rush would steal.

Your shot Decision Why
Deep, low, opponent moving backward Come in fully They must hit up; you own the line
Deep but sitting up, opponent set Come in cautiously, split-step early Expect a firm pass attempt at your feet
Mid-court, neutral ball Advance halfway, stay balanced Take space without selling out to the pass
Short or floating Stay back and rebuild Approaching behind it concedes the pass
You are stretched or off balance Recover to centre first Position beats speed when you are beaten
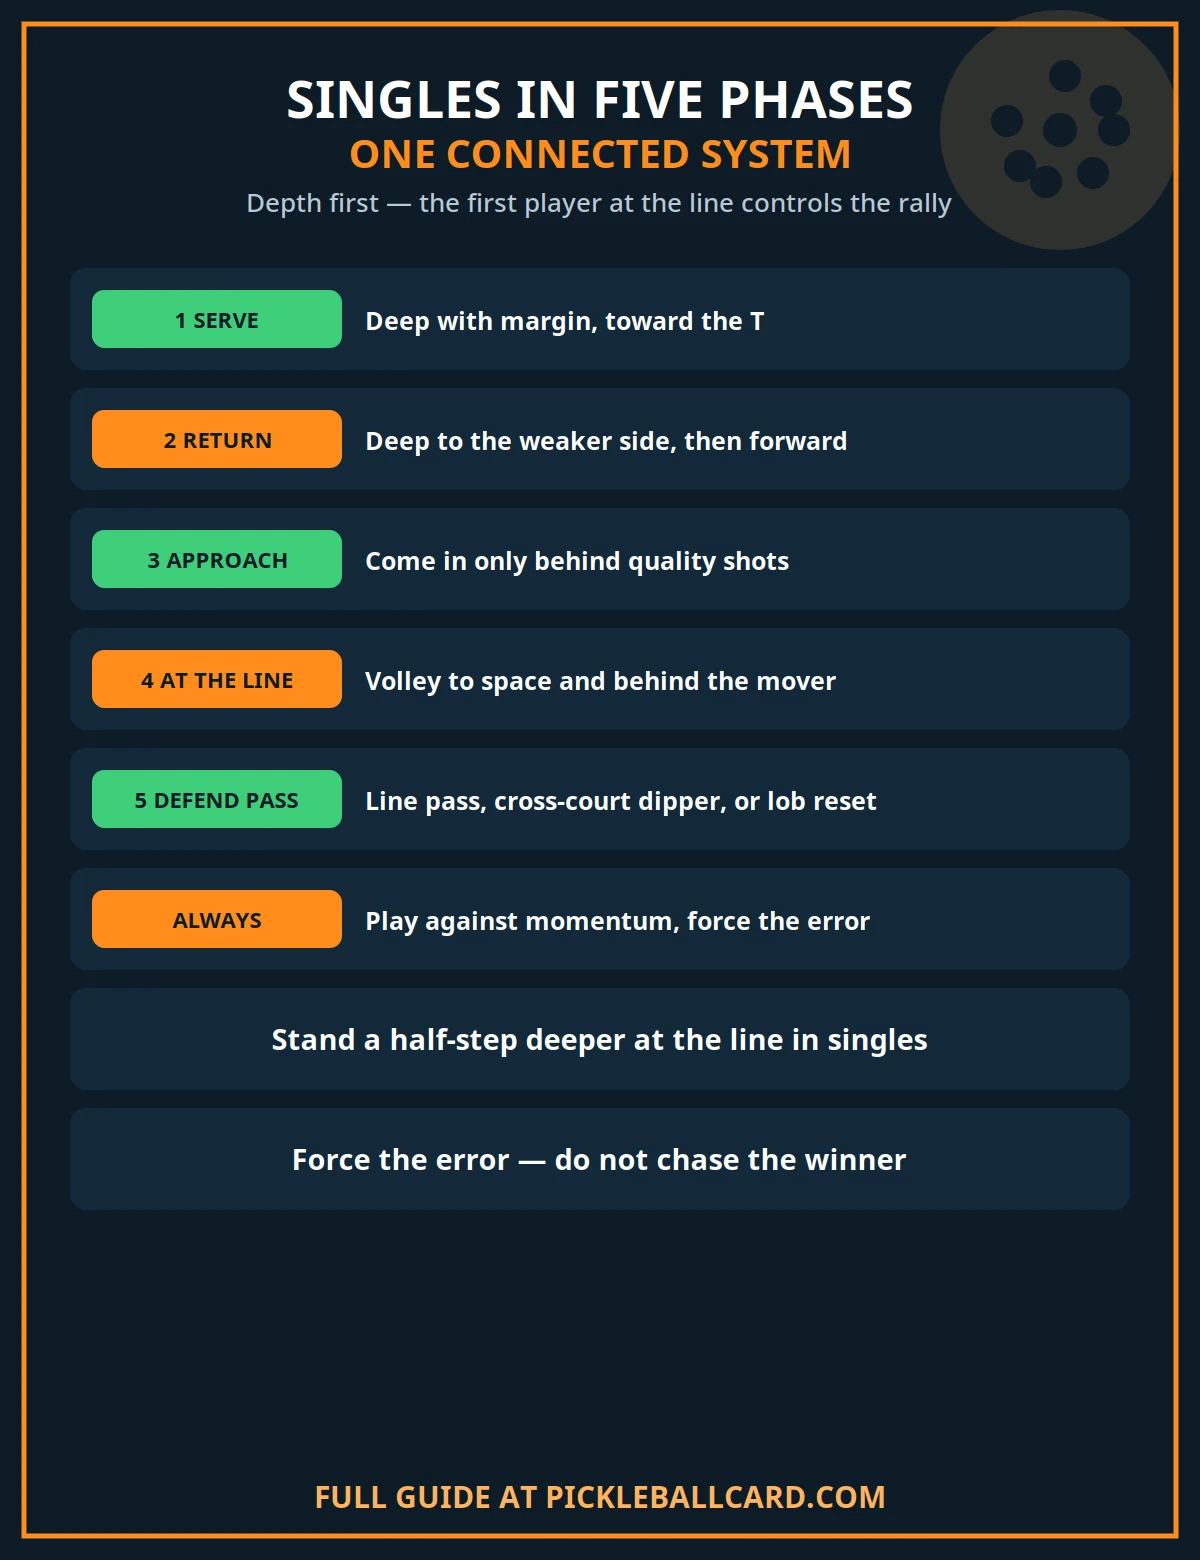
Pickleball singles strategy in five phases diagram showing deep serve to the T, deep return, approach decision, play at the kitchen line and defending the pass

Phase Four: At the Kitchen Line

Arriving is not the end of the system. What you do at the line decides whether the long approach was worth it.

Volley to Space — and Behind the Mover

Your first volley target is the open court your opponent has just left. Your second, often better target is directly behind a still-moving opponent.

A player sprinting wide cannot reverse instantly. The ball placed back into the space they came from wins without needing pace or a line-hugging angle.

Keep volleys low and deep rather than spectacular. A deep volley at the baseline keeps your opponent pinned while you hold the position they want.

Stand a Half-Step Deeper Than Doubles Habit

Doubles players hug the kitchen line. In singles, a half-step deeper buys reaction time against the pass and the lob, and costs almost nothing on volleys.

From that half-step you can still step in to volley low balls. What you gain is the extra fraction of a second that passing shots are designed to steal.

Expect the Lob

A pinned opponent’s escape is often upward. A deep lob over a net player is a legitimate singles reset, especially against a player camped tight to the line.

Your half-step depth helps, but the movement still matters: turn, do not backpedal, and decide early between overhead and letting it bounce.

Our guide to how to defend the lob in pickleball teaches that full movement system, and it transfers directly to singles.

Phase Five: Defending the Pass From the Baseline

Sometimes your opponent reaches the line first. Your game then becomes passing shots and patience, played from behind the baseline.

The Two Passing Shots

Down the line is the shorter, faster pass. It suits a ball you meet early and in balance, and it punishes a net player leaning toward the middle.

The cross-court dipper is the safer, cleverer pass. Topspin or a soft, angled ball drops below net height as it crosses, forcing the volleyer to hit up from their feet.

Choose by the volleyer’s position, not by preference. A line pass into a player waiting on that line is a donation; the dipper was there instead.

The Lob as a Reset

When you are stretched wide or pushed deep, the lob buys back the rally. Hit it high and deep, recover to centre, and make the net player prove the overhead.

Used sparingly, it also changes your opponent’s positioning. A player who respects your lob stands deeper, and a deeper net player volleys less sharply at your feet.

Used constantly, it becomes a feeding drill for their overhead. The lob is a reset button, not a game plan.

Playing Against Momentum

Open space is visible. Momentum is decisive, and most club players never look for it.

Watch your opponent’s hips and direction of travel as you choose a target. A player moving strongly one way is weakest in the space directly behind that movement.

Against a set, balanced opponent, open space is the right target. Against a committed mover, the wrong-footing ball wins more often and needs less precision.

This is why deep balls to a corner work twice in singles. First they move the opponent, then the reply behind them ends the rally the move created.

Rally Patience and Shot Tolerance

Singles rewards the player who can hit one more good ball. Not one more spectacular ball — one more deep, low, unglamorous ball.

Build points in layers: depth first, position second, angle third, winner last and only when the rally has already been won twice over.

Manage your errors across the whole match, not the rally. Track which shot is leaking points — often the rushed approach or the low-percentage pass — and simplify that one choice.

Between points, reset deliberately. Singles rallies are sprints; the walk back, the breath and the next serve target are part of the system, not downtime.

Fitness supports all of this as repeat effort, not general cardio. Short rallies, full recoveries and honest shot tolerance are what the strategy actually demands from your legs.

Common Singles Mistakes

Mistake Cost Fix
Serving short Returner steps in and owns the rally Aim for the back third, with arc and margin
Returning, then staying back Kitchen line conceded before the third shot Move forward in the first second after contact
Camping on the baseline Every drop and angle plays against you Track quality shots forward, phase by phase
Following a weak approach in Passing shot passes a stranded player Stay back behind short or floating balls
Going for winners from defence Errors end rallies you were still in Pass, dip or lob — then rebuild
Hugging the kitchen line Lobs and passes steal your reaction time Hold a half-step deeper in singles

A Simple Singles Practice Session

Strategy only survives if practice rehearses decisions, not just strokes. This short session trains the phases in order, in about forty minutes.

  1. Deep serve and return game. Play points where serve and return must land in the back third to count. Ten minutes builds the depth habit under score pressure.
  2. Approach-or-stay calls. A feeder plays mixed third shots while you call approach or stay before moving. The call trains the decision, which is the skill that decides points.
  3. First-to-the-line points. Play rallies where the first player established at the kitchen line scores double for winning the point. The incentive rewires passive baseline habits quickly.
  4. Passing-shot rotations. One player holds the line while the other alternates down-the-line passes and cross-court dippers. Five of each, then swap roles.
  5. Wrong-footing rallies. Finish with live points where a winner hit behind a moving opponent counts double. Momentum reading becomes instinct instead of theory.

Finish every session with ordinary games to fifteen. Practice incentives are scaffolding; the real score is where the new habits must learn to live.

Frequently Asked Questions

Are the kitchen rules different in singles?

No. The non-volley zone works exactly as in doubles: no volleying with a foot in the zone or on its line, and momentum carrying you in after a volley is still a fault.

Should I always come to the net in singles?

No. Come in behind quality — deep, low balls that push your opponent back. Behind short or floating shots, staying back and rebuilding wins more points than rushing in.

Where should I stand to receive serve in singles?

Just behind the baseline, near the middle of your service box, favouring your weaker side slightly if an opponent targets it. Depth matters more than the exact spot.

Is singles good practice for doubles?

Yes. Singles builds deep returns, approach judgement, passing shots and honest footwork — all of which transfer. It will not teach partner communication or stacking, which remain doubles skills.

What is skinny singles?

It is a half-court practice format played in one diagonal corridor. It is useful training, and it deserves its own guide rather than a section here.

How do I beat a faster opponent in singles?

Slow the geometry, not just the ball. Serve and return deep, play behind their momentum, extend rallies with depth, and make speed run the longest possible distances.

The Bottom Line

Pickleball singles strategy is a system, not a tip list: serve deep to the T, return deep to the weaker side, and track your shot forward.

Come in only behind balls that earn it, hold a half-step deeper at the line, volley behind the mover, and defend the pass with the dipper, the line ball or the resetting lob.

Above all, let depth and patience do the scoring. The opponent who must hit one more ball, from one step further back, is the opponent who eventually misses.

Sources: USA Pickleball, Pickleball Singles Strategy Tips and Official Rules (non-volley zone and singles scoring). Coaching content in this article is original; no competitor content is linked or reproduced.

shoaib
shoaib

Shoaib is the publisher of Pickleball Card. He oversees the site’s guides to pickleball rules, ratings, strategy and gear, all researched from primary sources — the USA Pickleball Rulebook, DUPR and manufacturer documentation — and updated as the game changes.
pickleballcard.com

Filed Under: Strategy & Training

Third Shot Drop vs Drive: How to Choose the Right Shot Every Time

October 18, 2026 by shoaib

Most third-shot advice forces a false choice. One camp says always drop. The other says drive everything and trust your hands.

Neither camp is reading the return. The return has already made most of the decision for you, if you know what to look for.

This guide gives you that read. It covers the four things to check at contact, a decision table you can memorise, the hybrid shot between drop and drive, and the fifth-shot plan that follows a drive.

Key Takeaways

  • The return decides, not a preset plan. Depth, height, pace and opponent position tell you whether to drop, drive or play the hybrid.
  • Deep or low return, opponents set: drop. A drive from deep gives set volleyers time and height to punish.
  • Short, sitting-up return, opponent moving: drive. Attack the player in motion before the pair is set at the line.
  • Balance overrides bounce location. A ball you reach off balance is a drop ball, wherever it bounced.
  • Drive the third, drop the fifth is a real plan. A firm third often earns a weaker fourth that is far easier to drop.
  • Never pre-decide during the serve. Choosing before the return is hit is the most common third-shot mistake at club level.

The Short Answer

Read four things as the return comes back: how deep it is, how high it sits at contact, how much pace it carries, and whether both opponents are already set at the kitchen line.

Deep, low or fast returns against a set pair point to the drop. Short, high returns, or an opponent still moving forward, point to the drive.

USA Pickleball states a compact version of the same rule in its skill guidance: drop low balls, drive high balls, and follow your shot in. That rule is the starting point here, not the whole system.

The sections below turn that one line into a complete decision you can make in the half-second you actually have.

What Each Shot Is Actually For

Players choose better when they stop thinking about technique and start thinking about jobs. The drop and the drive do different jobs.

What the Drop Buys You

The drop buys you the advance. A soft ball arcing into the kitchen cannot be volleyed down at your feet.

While it travels and bounces, you and your partner move forward together. A good drop is how the serving team earns the kitchen line without sprinting through danger.

The drop is therefore the neutralising shot. It answers a strong return by taking the rally back to even terms.

What the Drive Buys You

The drive buys you a weaker fourth shot. It rarely wins the point outright against players already set at the line.

Its real value is pressure. A firm drive at a moving opponent, at feet, or through the middle forces a rushed block that often sits up or floats short.

That weaker fourth is then your chance. You step in and drop the fifth shot against a pair that is no longer comfortably set.

Why Mechanics Are Not Covered Here

This article is the decision article. Stroke mechanics for the drop itself are covered in full in our guide to the third shot drop.

Read that guide for grip, arc and contact point. Come back here for the harder skill: choosing correctly, return after return, under pressure.

The Decision Table: Read the Return

Read on the return Best choice Why
Deep, near the baseline, and you are moving backward Drop A drive from deep gives set opponents time, height and an easy volley
Low or skidding, below net height at contact Drop You cannot get on top of it; driving produces a rising, attackable ball
Short, in the transition zone, sitting up at or above net height Drive You are forward and balanced, with a target to attack
One opponent late to the line, or a pair still unwinding a stack Drive Pressure the player in motion before the pair is set
Heavy pace straight at you, feet not yet set Drop or hybrid Absorb and soften; do not swing back at a ball you cannot control
Mid-depth and ambiguous, no clear signal either way Your stronger shot, or the hybrid Balance and contact height override bounce location alone
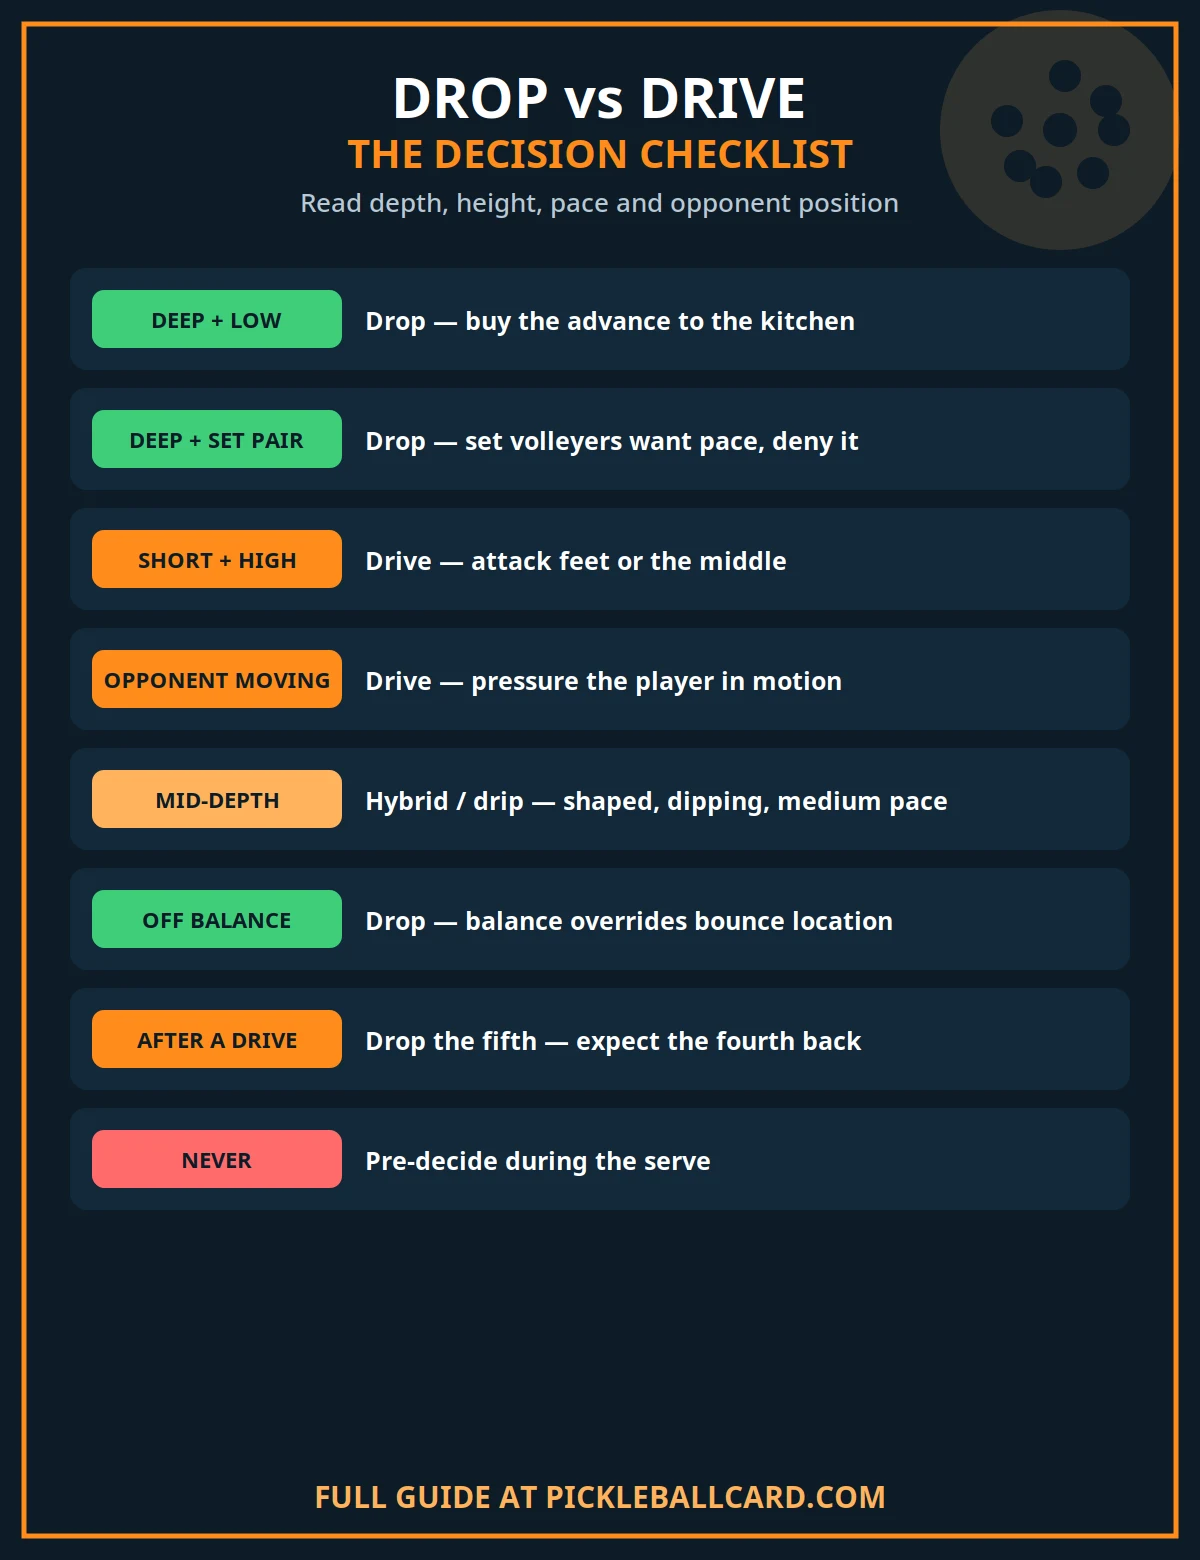
Third shot drop vs drive decision checklist showing deep and low returns mean drop, short and high returns mean drive, and mid-depth returns mean the hybrid shot

Notice what the table does not do. It never asks what you planned during the serve, and it never asks which shot you prefer.

Preference still matters on the truly ambiguous ball. On every other ball, the return has outvoted your preference before you swing.

Read One: Depth

Depth is the first and loudest signal. A return landing within a step or two of your baseline pushes you deep and steals your forward momentum.

From there, a drive must travel the full court. Set opponents at the kitchen have time to track it, set their feet and volley it back at yours.

A drop from deep travels the same distance softly. It asks the opponents to wait, bend and hit up, which is exactly what you want.

Short returns reverse the logic. A return bouncing in the transition zone brings you forward, shortens the court, and puts an opponent in your sights while they are still moving.

That is the drive ball. Passing it up to attempt a delicate drop usually wastes the one clear attacking chance the rally offered.

Read Two: Height at Contact

Height decides what your paddle can physically do. A ball below net height at contact cannot be driven downward.

Every drive from below the net must start by going up. Opponents at the line live for that rising ball.

Below net height, the honest options are the drop and the hybrid. Both accept the ball’s height instead of fighting it.

Above net height, with time to set, the drive becomes real. You can hit through the ball, keep it low over the net and aim at feet or the middle.

This is the sense behind the coaching phrase about driving high balls. It describes contact height, not bounce height and not ambition.

Read Three: Pace

A hard, flat return shortens your preparation whether it is deep or mid-court. Swinging a full drive back at it compounds the problem.

Against pace, soften first. A drop or hybrid with a shorter motion absorbs speed and restores your balance for the next ball.

A slow, floating return gives you the opposite gift: time. Time lets you step in, choose a target and drive with your feet underneath you.

Pace also tells you about the returner. A player who drives returns hard usually expects a hard reply and is ready for it.

Denying that expected pace, with a calm drop into the kitchen, often draws the error the drive would never have forced.

Read Four: Opponent Position

Look up before you look down. Where the opponents are matters as much as where the ball is.

Both opponents set at the kitchen line, paddles up and balanced, is the strongest possible case for the drop. There is no gap to drive into.

One opponent still travelling forward is the strongest case for the drive. Hit at the moving player, or into the space their movement has opened.

A pair unwinding a stack is a special version of the same read. For a few seconds their middle and sidelines are unsettled and their communication is busy.

Driving the middle in that moment creates hesitation. Our guide to who should take the middle in pickleball explains why unsettled pairs concede that space.

When to Drop: The Full Case

  • The return is deep and you are near or behind the baseline. Your priority is neutralising, not attacking.
  • The ball is low at contact. You cannot drive a ball upward and expect it to survive the kitchen line.
  • Both opponents are set. Set volleyers want pace; the drop denies them the ball they are waiting for.
  • You are off balance or moving backward. The drop is the only shot your body position can honestly support.
  • Your drive has been read all match. Changing to the drop breaks a pattern set opponents have started timing.
  • Wind is pushing drives long. A soft shot with margin is the safer tool when pace keeps sailing.

A good drop still needs a follow-through of a different kind: your feet. Dropping and then standing at the baseline to admire it wastes the shot completely.

Move in behind every drop you trust. Split-step if the opponents play it early, and keep advancing if it lands low and forces them to hit up.

When to Drive: The Full Case

  • The return is short and sits up. You are forward, balanced and hitting down toward feet.
  • An opponent is still moving up. Attack the mover before their feet and paddle are set.
  • The pair is unwinding a stack. The middle is briefly nobody’s clear responsibility.
  • Your forehand is loaded and balanced. A set forehand drive is a different weapon from a stretched backhand swipe.
  • Opponents are camping on your drop. If every drop is being taken out of the air early, pace changes their timing.
  • You have a clear fifth-shot plan. The drive is chosen because you want the fourth shot it will produce.

Drive targets matter more than drive speed. Feet are first, the middle is second, and a body at the transition line is third.

Drives aimed at a set player’s paddle, at shoulder height, are gifts. That player simply blocks, and the rally you tried to speed up speeds up against you.

For what that block looks like from the other side, see how to beat bangers in pickleball — and drive in a way that does not feed it.

The Third Option: The Hybrid or Drip Shot

Many returns are neither clean drop balls nor clean drive balls. They land mid-depth, sit at about net height, and punish a binary decision.

The hybrid answers them. It is a shaped, medium-pace ball, usually with topspin, that dips down toward the opponents’ feet or the kitchen edge.

Hit harder than a drop, it still arrives low. Hit softer than a drive, it still pushes opponents back off the line they wanted to hold.

Use the hybrid when the return is mid-depth, when you are moving forward but not fully set, or when a full drive has started sailing long.

Think of it as buying drive pressure at drop risk. For developing players, it is often the highest-percentage third shot they own.

Drive the Third, Drop the Fifth: The Two-Shot Plan

The most misunderstood idea in third-shot strategy is that a drive is a failed drop. Played deliberately, it is the first half of a two-shot plan.

Drive the third firmly at a mover or the middle. Most returns of that drive — the fourth shots — come back shorter, higher or slower than the original return.

Now drop the fifth. You are closer to the net, the ball is easier, and the opponents have just been pushed out of their set positions.

The plan fails only when the third-shot driver expects to win the point immediately and stops moving. Expect the fourth, step in behind your drive, and be ready.

Playing the Fourth Shot You Get Back

If the fourth comes back soft and short, drop it and advance. The plan has worked exactly as drawn.

If the fourth is blocked hard and low at your feet in transition, do not force another drive. That ball is a reset.

Our guide to the pickleball reset shot covers that exact situation: absorb it, drop it into the kitchen, and keep your advance alive.

If the fourth sits up high, you may drive again or counter. Two drives in a row are justified by the ball, not by momentum or frustration.

After the Shot: Do Not Get Marooned

The decision does not end at contact. Where you go next decides whether a correct choice actually wins anything.

Behind a good drop, advance together. Move while the ball travels, split-step before the opponent contacts it, and take the line the drop earns.

Behind a drive, advance with caution. Step in ready to play a fifth, but do not sprint into the block that is coming back.

Behind a poor shot of either kind, hold and defend. Advancing behind a floaty drop or a weak drive simply shortens the distance on the smash it invites.

The transition zone punishes indecision more than it punishes either shot. Pick your line, move with your partner, and be balanced before the next contact.

Common Third-Shot Mistakes

Mistake What happens Fix
Pre-deciding during the serve You drive deep returns and drop short ones — exactly backwards Decide only after the return bounces
Driving from deep, off the back foot Rising ball, easy volley, point ends at your feet Deep plus off balance always means drop
Dropping every ball by habit Set opponents step in and take drops out of the air Drive short, high returns to keep volleyers honest
Aiming drives at a set paddle Simple block comes back faster than your drive Target feet and the middle instead
No plan for the fifth shot You admire the drive while the block passes you Step in expecting the fourth shot
Dropping, then standing still The advance the drop bought is never taken Move in behind every drop you trust

A Simple Drill: Feed and Call

Practise the read, not just the shots. Stand at the baseline as the serving player while a partner feeds returns of mixed depth and height.

Before you swing, call your choice out loud: drop, drive or hybrid. The call forces the read to happen before the stroke, which is the whole skill.

Play each ball out as a fifth shot where possible. A correct call followed by a normal error still counts as a win in this drill.

Ten minutes of feed and call teaches more third-shot judgement than an hour of dropping fed balls you already knew were drops.

Frequently Asked Questions

Should beginners just always drop the third shot?

No, although the drop deserves the most practice time. Beginners should learn the drop first, then add the drive for short, high returns that are clearly attackable.

What if my drop is unreliable under pressure?

Use the hybrid more often while you build the drop in practice. A shaped, medium-pace ball at the feet is far safer than a full drive from deep.

Is driving at the body acceptable in pickleball?

A firm drive at feet, hips or the middle is normal competitive play. Deliberately head-hunting a set opponent is poor practice and, in recreational play, poor etiquette.

What does driving high balls actually mean?

It means contact height. A ball you meet above net height, with your feet set, can be driven flat and low. A low ball must be lifted, so drop it instead.

How often should I drive the third shot?

There is no correct quota. Let the returns you actually receive set the mix, match by match. A set percentage chosen before the match is pre-deciding by another name.

What is the drip or hybrid shot?

It is a medium-pace, shaped ball between a drop and a drive, usually with topspin that makes it dip. It suits mid-depth returns that are neither clean drops nor clean drives.

The Bottom Line

Third shot drop vs drive is not a loyalty test. It is a reading test you take on every single rally.

Check depth, height, pace and opponent position. Drop the deep and low balls against set opponents, drive the short and high balls at movers, and use the hybrid between them.

Then play the shot after the shot: advance behind a good drop, and drop the fifth behind a good drive. That complete system, not either shot alone, is what reaches the kitchen.

Sources: USA Pickleball, Skill Level Three guidance (third-shot rule: drop low balls, drive high balls, follow your shot in) and Official Rules. Coaching content in this article is original; no competitor content is linked or reproduced.

shoaib
shoaib

Shoaib is the publisher of Pickleball Card. He oversees the site’s guides to pickleball rules, ratings, strategy and gear, all researched from primary sources — the USA Pickleball Rulebook, DUPR and manufacturer documentation — and updated as the game changes.
pickleballcard.com

Filed Under: Strategy & Training

Around-the-Post Shot in Pickleball (ATP): Is It Legal and How to Hit It

October 17, 2026 by shoaib

Few shots stop a game on the next court like an around-the-post. A dink is angled so wide that it pulls a player completely off the side of the court — and instead of trying to lift the ball back over the net from an impossible position, that player swings it around the outside of the net post, a few inches off the ground, and watches it skid into the opponent’s court. Half the spectators cheer. The other half ask whether that can possibly be legal.

It can, it is, and it is one of the most useful defensive weapons an intermediate player can add. This guide covers the ATP properly: the exact legality in plain language, the situations that create one, a step-by-step technique that works at club level (not just on highlight reels), how to defend against it, and the drills that build the recognition the shot actually depends on.

Key Takeaways

  • The ATP is fully legal. Under the USA Pickleball Official Rules a ball may travel around the outside of the net post; it does not have to cross over the net at all.
  • There is no height restriction. An ATP may pass around the post below net height — that low, skidding trajectory is the whole point of the shot.
  • It must still land in. The ball must land in the opponent’s correct court, and it must not touch the post or the net system on the way.
  • Your body has rules too. After contact you may cross the imaginary extension line of the net around the post, but you must not touch the opponent’s court, the net system or the opponent while the ball is live — and crossing that line without making contact is a fault.
  • The ATP is created by your opponent’s angle, not by your ambition. The setup is a wide, low, angled ball that bounces and travels outside the sideline. No wide ball, no ATP.
  • Recognition beats mechanics. Most failed ATPs are decided before the swing — the player spotted the opening a step too late.

What Is an Around-the-Post Shot?

An around-the-post shot — ATP for short — is a return hit from outside the sideline in which the ball passes around the outside of the net post rather than over the net, and then lands in the opponent’s court. Because the ball goes around instead of over, it can travel far below the height of the net tape: many ATPs are hit from near ankle height and never rise above knee height before they land.

That trajectory is what makes the shot so hard to defend. A normal reply from a wide position has to go up and over the net, which gives defenders time and height to attack. An ATP stays low, arrives fast along the ground, and often lands at an angle the defending team cannot reach because they are still covering the cross-court reply they expected. It is less a power shot than a geometry shot: you are using the space outside the post that most players forget exists.

Is the ATP Legal? The Rules in Plain Language

Yes. The USA Pickleball Official Rules deal with returns around the net post in the rules on the plane of the net and legal returns. Summarised in plain language:

  • The ball may go around the outside of the post. A return does not have to travel back over the net to be legal.
  • There is no restriction on the height of that return. It may pass the post below the height of the net.
  • The ball must land in the opponent’s correct court and must not strike the post or another part of the net system on the way. A ball that clips the post is a fault, just like a ball into the net.
  • The hitter may follow through around the post and cross the net’s imaginary extension line after making contact, provided neither the player nor anything they wear or carry touches the opponent’s court, the net system or the opponent while the ball is live.
  • Crossing that extension line without hitting the ball is a fault. You cannot pre-run to the other side in case the ball comes; contact comes first, crossing second.

Two common confusions are worth clearing up. First, an ATP is a rally shot, not a serve: a serve has its own legal delivery and must be played under the serving rules into the service court, so there is no such thing as a legal around-the-post serve. Second, an ATP does not excuse a non-volley-zone fault. If you volley the ball, the usual kitchen rules still govern where your feet may be and where your momentum may carry you. Most ATPs are hit off a bounce from outside the sideline, which is why the kitchen rarely enters into it — but a volleyed ATP taken while stepping into the zone is still a fault. For the full fault list, see what is a fault in pickleball.

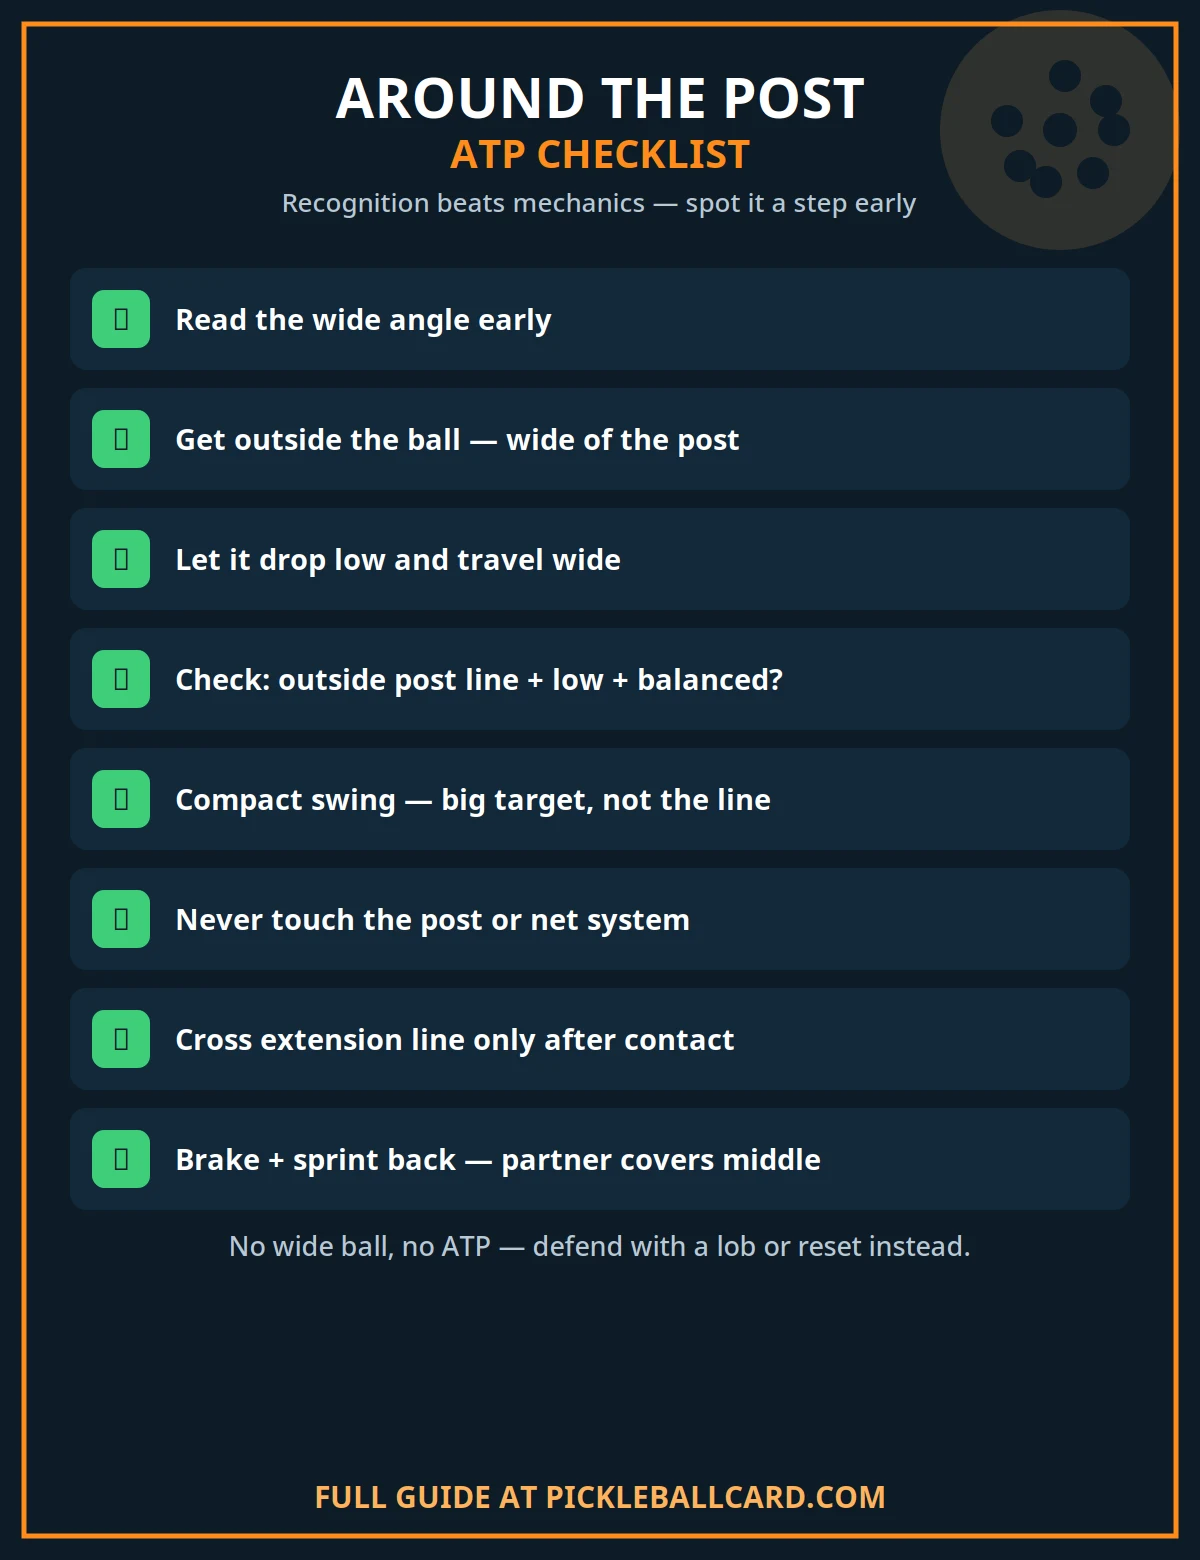
Checklist infographic for the around-the-post shot in pickleball covering legality, recognition, technique and defence
The ATP checklist: legal around the post, no height limit, land it in — and recover like the rally is still on.

When an ATP Opportunity Actually Appears

You do not decide to hit an ATP the way you decide to hit a drive. The opportunity is handed to you by a specific kind of ball, and learning to recognise that ball is 80 per cent of the shot.

The Classic Setup: The Wide Angled Dink

The most common ATP is born at the kitchen line. Your opponent hits a sharp cross-court dink that lands near your sideline inside the non-volley zone and then bounces outward, travelling away from the court at a low angle. By the time you reach it, you are outside the sideline, the ball is low and still moving away from the net, and the direct line back into the opponent’s court passes outside the post. That is the moment. Trying to lift that same ball back over the net means hitting up into two waiting paddles; going around the post turns a desperate defensive position into an attacking one.

Other Setups

  • A wide angled drive or passing shot that pulls you beyond the sideline on the run. If it bounces and carries wide and low, the ATP lane may be open — though pace makes this version much harder.
  • A sharply angled return or third shot in singles, where one player covers the whole width and angles naturally run wider.
  • A defensive scramble wide of the court where your partner has the middle covered and you have time to choose the around-the-post line rather than a lob. The lob is the safer default; the ATP is the choice when the ball is low, wide and still travelling outward.

The Three Checks Before You Swing

  1. Is the ball outside the post line? If a straight reply would still have to cross the net, it is not an ATP ball — play the normal shot.
  2. Is it low enough that going over is the worse option? If the ball sits up, a conventional cross-court reply is higher percentage.
  3. Can you get there balanced? An ATP hit while falling sideways usually finds the post, the net or the fence. If you cannot set, defend with a lob or a reset instead.

How to Hit an ATP: Step by Step

Step 1: Go Early and Go Wide

Start moving the instant you read the angle, and aim to get outside the ball — further wide than feels natural — so the ball is in front of you and slightly to your side as you contact it, rather than behind you. Players who chase straight at the ball arrive with it at their ankles and no lane around the post. Give the post a wide berth: your swing path and the ball’s flight both need clear space outside it.

Step 2: Let It Drop and Travel

Patience is the technical core of the ATP. Because there is no net to clear, you can — and usually should — let the ball drop low and travel well outside the sideline before you hit it. The lower and wider it gets, the flatter and safer the lane around the post becomes. Beginners ruin ATPs by hitting early, while the ball is still inside the post line and high enough that their “ATP” is really a wild cross-court swipe. Wait. The ball bouncing and running wide is your friend.

Step 3: Compact Swing, Open Lane, Target the Court — Not the Line

Use a short, firm, mostly forward swing — a guided punch with a stable wrist rather than a full groundstroke — and aim for a generous target inside the opponent’s court, not for the sideline. The most common club-level misses are hitting the post (aiming too tight to it) and hitting wide beyond the far sideline (aiming for a highlight). The middle of the available court, hit low and firm, wins far more points. A touch of topspin helps the ball dip after passing the post, but at club level a flat, controlled contact is the reliable version.

Step 4: Recover Like You Missed

Your momentum will carry you further from your court, and you are allowed to cross the net’s extension line after contact — but you must not touch the opponent’s court while the ball is live, and you must get back. Good ATP hitters treat recovery as part of the shot: hit, brake outside the opponent’s court, and sprint back to your position, because a saved ATP comes back quickly and your side of the court is wide open. In doubles, your partner should shift to cover the middle the moment you commit wide — the same covering principle that makes our guide to pickleball dinking strategies work: wide balls move the whole team, not just the player chasing them.

ATP vs Erne: The Two Wide Shots Compared

Around the Post (ATP) Erne
Ball path Around the outside of the net post, below or at net height Over the net, hit early near the sideline
Usual contact Off a bounce, wide outside the sideline, often very low A volley, taken in the air beside the non-volley zone
Player position Outside the sideline, beyond the post line as the ball travels wide Outside (or jumping from outside) the non-volley zone at the side of the kitchen
Key legality point Ball need not cross over the net; no height restriction; do not touch the post or opponent’s court Feet and momentum must stay out of the non-volley zone on a volley; do not touch the net system
What creates it An opponent’s wide, angled, low ball that bounces away from the court An opponent’s predictable, floaty ball close to your sideline at the kitchen
Main risk Hitting the post, hitting wide, or being caught out of position Kitchen foot faults and being countered while airborne / off balance

The two shots are siblings, which is why they are so often taught together: both punish predictable width, and both are decided by feet and timing more than by swing. If you are learning one, read the other next in our guide to what is an Erne in pickleball — and notice that an Erne threat and an ATP threat defend each other: a player who shows they can Erne forces wider dinks, and wider dinks are exactly what feeds the ATP.

How to Defend Against an ATP

  • Respect the angle you just hit. The moment your dink or drive pulls an opponent wide and low, expect the ATP lane to open. Shade toward the post on your side and get low, paddle in front, ready for a ball arriving around — not over — the net.
  • Cover the post, then the middle. The defending player on the ATP side has first responsibility for the around-the-post ball itself; their partner squeezes the middle. Both players watching the wide chase is how the middle is left empty for a fake.
  • Do not crowd the net post area illegally or dangerously. You are defending your own court; there is no need — and no permission — to interfere with the hitter on the other side of the post.
  • Make your wide balls safer when it matters. Against a player with a proven ATP, hit your angled dinks with a little more margin inside the sideline, or mix in balls at their feet. The ATP needs extreme width; deny the extreme and you deny the shot.
  • Stay in the rally after it lands. Many ATPs are hit well but not for clean winners — a low, ready defender who simply blocks the ball back into the open court wins a surprising share of these exchanges, because the ATP hitter is metres out of position.

Drills That Build an ATP

  1. Feed-and-recognise (cooperative). A partner at the kitchen feeds angled dinks wide to one side. Your only job is to call “ATP” or “normal” before the second bounce and then play the shot you called. Ten balls per side. This trains the recognition that decides the shot, without pressure.
  2. Wide-bucket targets. Place a large target — a towel — well inside the opponent’s court on the ATP side. From fed wide balls, hit around the post into the bucket area, ignoring the lines. Shrink the target only after you can clear the post ten times in a row; post contact in practice is your margin warning.
  3. Hit-and-recover rallies. Play out every practice ATP: after you hit it, a third player (or your feeding partner) plays the next ball into your empty court if your ATP is returned. This builds the brake-and-sprint recovery into the habit instead of letting practice end at the pretty part.
  4. Live wide-dink games. Play cross-court dink games where a rally ball that goes wide enough to attempt an ATP scores double. Constraints like this manufacture repetitions in real rally conditions, which is where recognition has to survive.

Common ATP Mistakes

  • Trying to create an ATP from a ball that is not wide. If the ball has not travelled outside the post line, there is no lane. Forcing it produces post contact and wide misses.
  • Hitting too early. Contact before the ball has dropped and travelled wide turns an open lane into a tight one. Let the ball do the travelling.
  • Aiming at the line or at the post’s edge. The spectacular target is the low-percentage one. Big court, low ball, firm contact wins club matches.
  • Watching it. The shot is not over at contact. Brake without touching the opponent’s court and recover — the counter is coming to where you used to be.
  • Forgetting the fault lines. Grazing the post, touching the net system, stepping on the opponent’s court while the ball is live, or crossing the extension line without making contact all turn a legal idea into a fault.
  • Attempting it on every wide ball. A lob or a patient reset is often the better defensive play, especially when you are off balance. The ATP is a bonus weapon on the right ball, not a default reply to width.

Frequently Asked Questions

Is an around-the-post shot legal in pickleball?

Yes, completely. The official rules allow a return to travel around the outside of the net post, with no requirement that it cross back over the net and no restriction on its height, provided it lands in the opponent’s correct court and does not touch the post or net system.

Does an ATP have to go below the top of the net?

No. There is no height restriction in either direction. Most ATPs are hit low because the ball that creates them is low and wide, and a low trajectory is tactically hardest to defend — but a ball that passes around the post above net height and lands in is equally legal.

Can I hit an ATP as a volley, or does the ball have to bounce?

It can be volleyed in principle, provided every other rule is satisfied — in particular the non-volley-zone rules if you are volleying near the kitchen, and the rule against crossing the net’s extension line before contact. In practice the classic ATP is hit off a bounce, because the wide, angled balls that create it are usually dinks that land in or near the kitchen and travel out wide.

What happens if my ATP hits the net post?

It is a fault. The post is part of the net system for this purpose, and a ball that strikes it has not made a legal return — the rally goes to your opponents, however close the shot looked. This is why margin around the post matters more than a tight, spectacular line.

Can I run around the post before I hit the ball?

You may move wide and around on your own side in anticipation, but you may not cross the imaginary extension line of the net around the post without making contact with the ball — doing so is a fault. The legal sequence is: get wide, make contact, then your momentum may carry you across that line, without touching the opponent’s court while the ball is live.

What is the difference between an ATP and an Erne?

An ATP sends the ball around the post, usually off a bounce from well wide of the sideline. An Erne sends the ball over the net: the player steps or jumps outside the non-volley zone at the side of the kitchen and volleys a ball early, before it travels wide. They are created by related balls — predictable width at the kitchen — but the ball path, footwork and main fault risks are different, as the comparison table above shows.

The Bottom Line

The around-the-post shot is legal, learnable, and far more about recognition than flair. The rules give you the space outside the post and put no height limit on using it; your job is to spot the one ball that opens that lane — wide, low, angled and travelling away from the court — let it drop and run, hit a compact, controlled shot into a big target without touching the post, and then recover like the rally is still on, because it is. Add that single pattern to your game and opponents will have to stop hitting the wide dink that used to trouble you. Few shots change how a whole rally is played quite like that.

Sources: USA Pickleball, Official Rules (returns around the net post, plane of the net). Technique in this article is original coaching guidance; no competitor content is linked or reproduced.

shoaib
shoaib

Shoaib is the publisher of Pickleball Card. He oversees the site’s guides to pickleball rules, ratings, strategy and gear, all researched from primary sources — the USA Pickleball Rulebook, DUPR and manufacturer documentation — and updated as the game changes.
pickleballcard.com

Filed Under: About Pickleball

Pickleball Reset Shot

October 17, 2026 by shoaib

Every pickleball player knows the feeling. You are halfway to the kitchen line, the ball arrives hard and low at your feet, you swing hopefully — and watch it sail into the net or float up to be smashed.

That halfway place is the transition zone, and the shot that survives it is the reset: a soft, controlled reply that drops into the kitchen, neutralises an attack, and lets you advance safely.

This guide teaches the reset properly — what it is, when to use it instead of driving or dropping, the exact mechanics, how to move through the transition zone, and the drills that make it reliable under pressure.

Key Takeaways

  • A reset is a soft shot from a hard situation. It takes pace off an attacking ball and drops it unattackably into the kitchen.
  • Ball height decides. Below net height in the transition zone, reset. Above net height with your feet set, you may attack instead.
  • Push, do not swing. A short, stable push with a slightly open paddle face replaces any backswing. Big swings cause most reset errors.
  • Get low and stay still at contact. Bent knees, weight balanced, contact in front of your body. Lunging resets rarely land softly.
  • Split-step before the opponent hits. Arriving balanced in the transition zone matters more than arriving fast.
  • The reset buys your advance. A good reset is not the end of the move — it is what earns you the kitchen line, one step at a time.

What Is a Reset Shot?

A reset is a defensive soft shot, usually hit from mid-court or the transition zone, that absorbs the pace of an opponent’s attacking ball and drops softly into the non-volley zone.

Its purpose is to restart the rally on neutral terms. Before the reset, your opponents are attacking and you are scrambling. After a good reset, the ball is bouncing low in their kitchen and they must hit up.

A player who can hit up on the ball cannot attack you. That single exchange — their hard ball for your soft, low one — is how rallies that looked lost turn back into ordinary dink rallies at the line.

What Is the Transition Zone?

The transition zone is the area between the baseline and the non-volley zone line — roughly the middle third of your half of the court. Coaches often call it no-man’s land, which tells only half the story.

It is dangerous ground, because balls arrive there at your feet while opponents at the kitchen hit down at you. But it is also unavoidable ground: every trip from the baseline to the kitchen passes through it.

The goal is therefore not to avoid the transition zone or sprint through it blindly. The goal is to pass through it under control, ready to reset any ball that arrives before you reach the line.

That control connects the reset to its closest relative, the drop. If you already know the third shot drop, you know the target and touch — the reset applies the same softness while you are moving and under attack.

When to Reset — and When Not To

Situation Best choice Why
Hard ball at your feet, below net height, mid-court Reset Attacking a low ball from here produces nets and pop-ups
You are off balance, stretched, or moving backwards Reset (or a high defensive lob if very deep) Softness restores the rally; hero shots end it
Ball sits up above net height and your feet are set Attack or drive A high ball in transition is an opportunity, not a threat
You are already at the kitchen and the ball is driven at you Block or counter, not a transition reset Same soft hands, different position and target — see the bangers section below
Ball is slow, high-bouncing and you are balanced at the baseline Drop or drive as a normal third/fifth shot You have time to choose a full shot; a reset undersells the position

The Height Rule

Make height your first filter, before tactics or ambition. A ball below the top of the net, arriving with pace while you are mid-court, is a reset ball in almost every case.

A ball above net height is different only if your feet are set underneath it. A high ball taken while lunging is still a defensive ball — treat it as one and you will stop donating points.

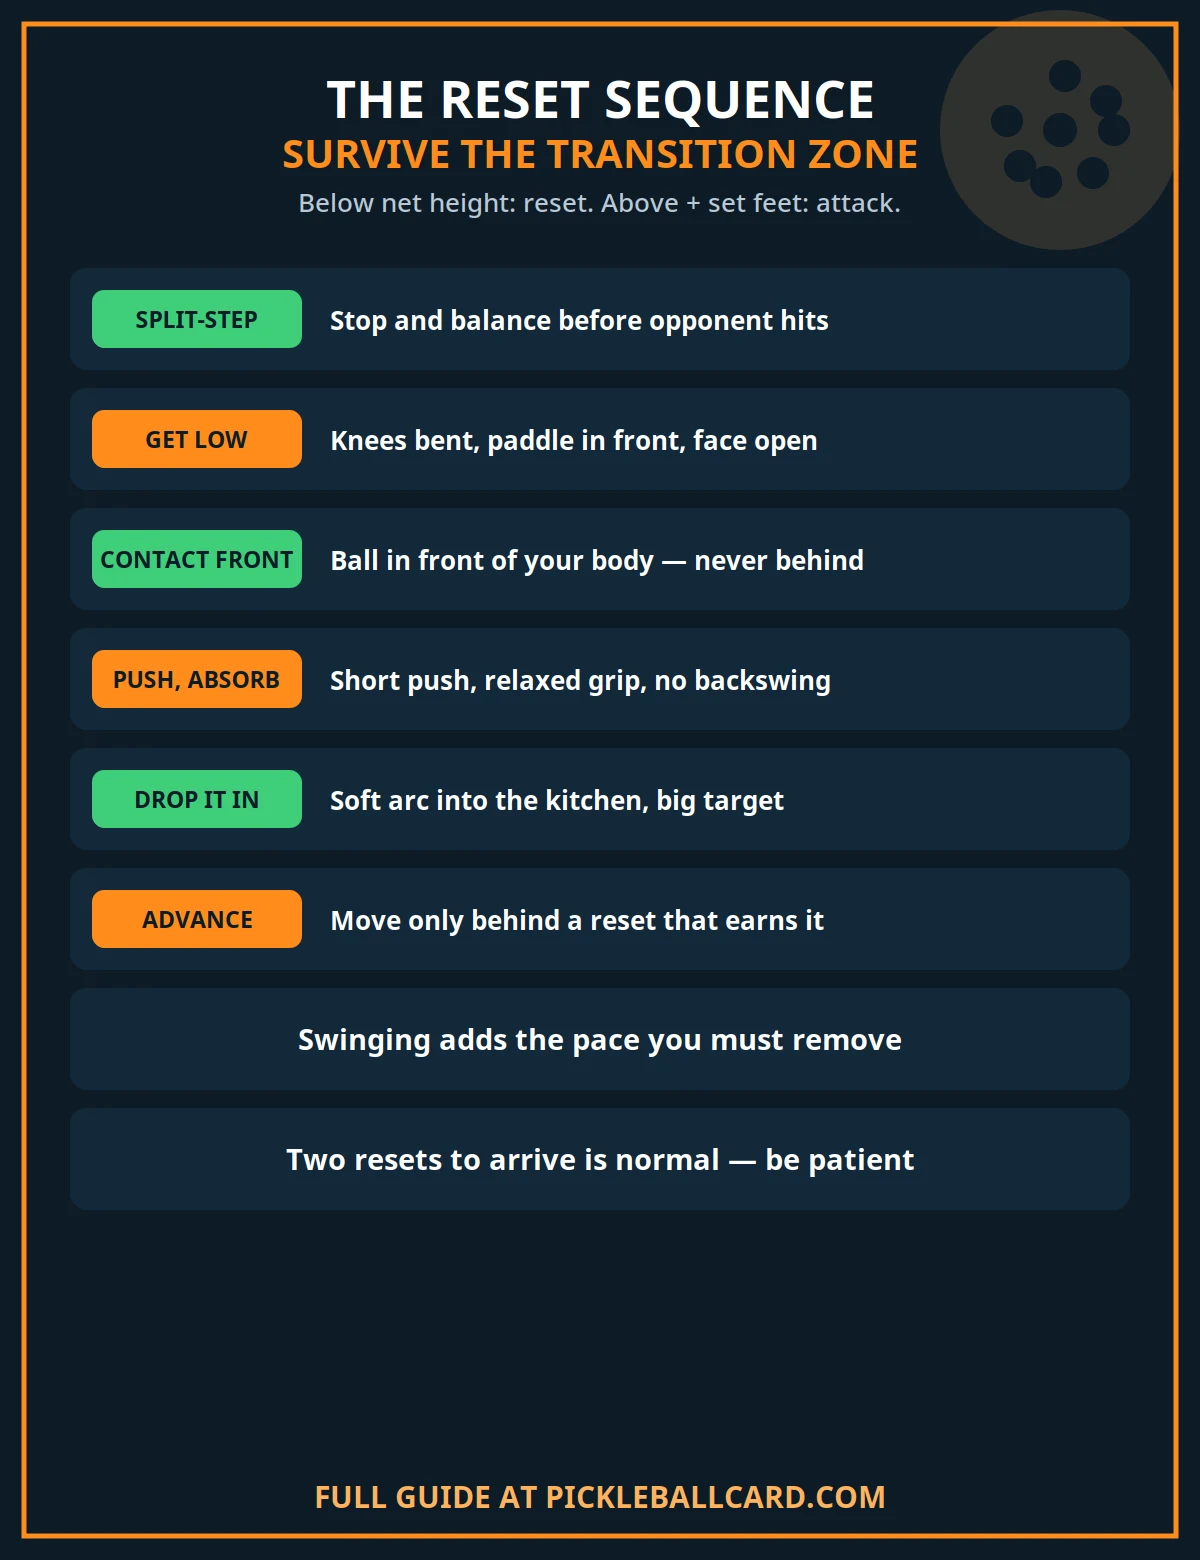
Pickleball reset shot sequence diagram showing the split-step, low ready position, soft push contact and advance to the kitchen line

How to Hit a Reset: Step by Step

Step 1: Split-Step as Your Opponent Swings

Stop moving forward just before your opponent contacts the ball, with a small balanced hop onto both feet. This split-step is what turns a running player into a ready one.

From the split-step you can move in any direction, stay low, and present a stable paddle. Without it, most resets are attempted while falling forward — and fall into the net with their owner.

Step 2: Get Low, Paddle in Front

Bend your knees, keep your chest up, and hold the paddle in front of your body at roughly waist-to-chest height, face slightly open. Your non-paddle side should stay balanced, not reaching.

The reset is played from your legs and posture far more than from your arm. If your legs are straight and your paddle is down by your knee, the technique has failed before the ball arrives.

Step 3: Let the Ball Come to Your Contact Point

Contact the ball in front of your body, around the front of your lead foot’s line — never beside your hip or behind you. Move your feet in small steps so the ball arrives at that point.

Reaching and lunging stretch your contact point sideways and destroy the soft angle you need. Two small steps beat one big stretch on almost every reset you will ever hit.

Step 4: Push, Absorb, and Lift Just Enough

Use a short push rather than a swing. Let the paddle absorb the incoming pace — a relaxed but stable grip, minimal backswing, and a gentle lift through contact to clear the net.

The paddle face, slightly open, does the softening for you. Think of catching the ball on the strings and placing it over, rather than striking it back at your opponents.

Your target is the kitchen in front of the opponent who is least ready to bend — usually the player who just attacked, now recovering, or the middle between two partners.

Step 5: Recover and Advance Behind Your Own Shot

Watch your reset land. If it drops low into the kitchen, advance — in balance, split-stepping again if another ball comes before you arrive at the line.

If your reset sits up, hold your ground and prepare to reset again. Advancing behind a bad reset simply moves you closer to the smash it invites. The shot earns the steps; take only the steps it earns.

Forehand and Backhand Resets

Most players reset more reliably on one side, and opponents will find the weaker one quickly. Both sides use the same principles, with small differences.

  • Forehand reset: the more natural side for most players. Keep the elbow relaxed and slightly away from the body, and resist the urge to roll the wrist for extra lift.
  • Backhand reset: often steadier with two hands at club level, which stabilises the face against pace. One hand works if the grip stays relaxed and the push stays short.
  • Balls at your body: step aside to create a forehand or backhand rather than jamming the paddle into your chest. A small sideways step is the hidden skill in body-ball defence.

The same soft-hand principles defend you at the kitchen line against hard hitters. For the full game plan built around them, see how to beat bangers in pickleball.

Moving Through the Transition Zone: The Fifth-Shot Mindset

Think of your advance as a sequence, not a sprint. A typical pattern for the serving team is: third shot, move in, split-step, reset if needed, move in again, and arrive at the kitchen.

The fifth shot — the ball after your third — is very often a reset, because good opponents drive or roll it at the advancing team. Expecting that ball, instead of resenting it, changes your whole transition.

  • Advance in stages. Move when your team’s shot is good; stop and split-step when the opponent is about to hit.
  • Stay connected with your partner. Advance together, a step apart in timing at most. A lone advancer opens diagonal gaps that no reset can cover.
  • Expect the ball at your feet. Good opponents aim there deliberately. A paddle already low and in front is the answer prepared in advance.
  • Be patient with one more reset. Needing two resets to arrive is normal against strong opponents. Needing zero is a bonus, not a plan.

Once you arrive, the rally becomes the soft game at the line. Our guide to pickleball dinking strategies picks up exactly where the reset leaves off.

Reset vs Drop vs Block vs Counter

Shot Where Incoming ball Goal
Reset Transition zone, moving Hard or low, attacking Absorb pace, drop into kitchen, advance
Drop Baseline or deep, set Manageable, time to choose Soft arc into kitchen to move forward
Block Kitchen line, set Drive at you Short push back low, keep opponents back
Counter Kitchen line, set Speed-up that sits up Short punch back with pace at feet or body

The family resemblance is real: all four reward a stable face, a short motion, and contact in front. The differences are position, incoming pace, and how much pace you return.

Confusing them causes classic errors — countering from mid-court, which pops balls up, and resetting balls at the kitchen that should be countered, which gives attackers another free swing.

Drills That Build a Reliable Reset

  1. Feet-reset cooperative drill. One player at the kitchen drives controlled balls at a partner in the transition zone, who resets into the kitchen. Ten balls, then swap. Build pace only as resets keep landing softly.
  2. Advance-and-reset ladder. Start at the baseline. Hit a drop, advance two steps, reset a fed ball, advance again, and finish at the line. Repeat the ladder for five minutes to groove staged movement.
  3. Two-reset survival. Attackers may drive twice at the advancing player, who must reset both before any counter is allowed. This builds the patience that real transition rallies demand.
  4. Backhand-only resets. Feed only to the backhand for sets of ten. The weaker side improves fastest when it cannot be avoided — and opponents will not avoid it in matches.
  5. Live fifth-shot games. Play points where the serving team must hit a third shot and then play out the rally, scoring double if they reach the kitchen without error. The reset becomes a habit inside real decisions.

Common Reset Mistakes

  • Swinging. A backswing adds pace you are trying to remove. Push instead.
  • Running through the shot. Contact while sprinting forward sends the ball down into the net. Split-step, reset, then move.
  • Standing tall. Straight legs raise your contact and flatten the arc. Get low before the ball arrives, not as it passes.
  • Gripping too tightly. A locked grip rebounds pace straight back up. Relax the hand and let the face absorb the ball.
  • Aiming too fine. Resets aimed at the sideline or the net tape miss in both directions. Aim for the big middle of the kitchen.
  • Attacking low balls out of frustration. After three good resets, players often donate the fourth by driving a ball at their shoelaces. The height rule has no frustration exception.
  • Watching instead of recovering. A reset you admire is a smash you receive. Recover first, appreciate later.

Frequently Asked Questions

What is a reset shot in pickleball?

A reset is a soft, controlled shot, usually hit from the transition zone, that absorbs the pace of an attacking ball and drops into the kitchen. It neutralises an attack and lets the hitter advance toward the non-volley zone line.

What is the transition zone in pickleball?

It is the mid-court area between the baseline and the non-volley zone line. Players pass through it on their way to the kitchen, and it is where hard balls at the feet most often force reset shots.

Should I reset or attack a ball in the transition zone?

Use height and balance. Below net height, or any time you are off balance, reset. Above net height with your feet set underneath you, attacking is reasonable — and often correct.

Why do my resets keep going into the net?

Usually because contact is too low, too close to the body, or made while still running forward. Split-step earlier, get lower with your legs, keep the paddle face slightly open, and add a gentle lift through contact.

Why do my resets pop up to be smashed?

Pop-ups come from a tight grip, a flat or closing paddle face under pace, or swinging at the ball. Relax the grip, keep the face slightly open and stable, and replace the swing with a short push that absorbs pace.

Is a reset the same as a third shot drop?

They share a target and a soft touch, but they are not the same shot. A drop is usually hit from deep court with time to choose it; a reset is hit under attack, often while moving, specifically to neutralise an opponent’s pace.

The Bottom Line

The reset shot is how good players survive the transition zone: split-step, get low, push softly with a stable, slightly open face, drop the ball into the kitchen, and advance only behind shots that earn it.

It will not make highlight reels, and it will quietly win you rallies every single session — the drives at your feet that used to end points become the balls that get you to the kitchen.

Learn to love the boring shot. In the transition zone, boring is what winning looks like, one soft landing at a time.

Sources: USA Pickleball, Official Rules (non-volley zone definitions). Coaching content in this article is original; no competitor content is linked or reproduced.

shoaib
shoaib

Shoaib is the publisher of Pickleball Card. He oversees the site’s guides to pickleball rules, ratings, strategy and gear, all researched from primary sources — the USA Pickleball Rulebook, DUPR and manufacturer documentation — and updated as the game changes.

pickleballcard.com

Filed Under: Strategy & Training

How to Defend the Lob in Pickleball

October 17, 2026 by shoaib

A good lob does not beat you with power. It beats you with indecision. The ball goes up, both partners glance at each other, somebody backpedals, and by the time anyone commits, the point is already lost.

Defending the lob is a learnable system, not a scramble. It has four parts: read the lob early, move without backpedaling, choose the right response for the depth you are facing, and recover as a pair.

This guide covers defence only. It explains how to anticipate a lob, how to position and move, when to take an overhead, when to let the ball bounce, and when a lob is simply the wrong shot — so you can punish it.

If you want the offensive side — how and when to hit a lob yourself — read our separate guide to the pickleball lob shot after this one. The two posts are designed to work together.

Key Takeaways

  • Never backpedal. Turn sideways, drop-step, and move to the ball. Backpedaling is slow, unbalanced, and a common cause of falls.
  • Call it early and loudly. One clear call — “Mine”, “Yours”, “Help” or “Switch” — prevents the two-player freeze that loses most lob points.
  • Short lob: take the overhead. If you can get set with the ball in front of you, hit a controlled overhead. Do not try to hit a winner every time.
  • Deep lob: let it bounce. If the ball is passing beyond your comfortable reach, turn, run to its landing side, and play it off the bounce.
  • The partner covers, not chases. While one player tracks the lob, the other moves to cover the space left open and calls the switch if sides change.
  • A lob is often the wrong shot. Against set, balanced opponents with good overheads, a lob invites a smash. Learning when it fails tells you when to expect — and punish — it.

What a Lob Is Trying to Do to You

A lob is a high, deep shot meant to push you off the non-volley zone line, buy the hitter time, or force a weak reply from the back of the court. It is rarely hit to win the point outright.

Its real target is your formation. At the kitchen line, you and your partner control the rally. A good lob breaks that control for a few seconds, and what happens in those seconds decides the point.

That is why lob defence is a team skill before it is a shot skill. The overhead matters, but the read, the call, and the recovery matter more. Teams lose to lobs through hesitation far more often than through weak smashes.

Reading the Lob Early: The Tells

You gain the most time before the ball is hit. Most club players show a lob one or two movements early, if you know what to look for.

Paddle and Body Tells

  • A longer, lower backswing than a dink needs, with the paddle dropping below the wrist.
  • An opening paddle face angled up toward the sky instead of forward toward the net.
  • Extra knee bend and weight settling back, as the player prepares to lift rather than push the ball.
  • Eyes lifting early or a glance toward the back of your court before contact.

None of these guarantees a lob. Together, they are a warning. When you see two or more, take a small ready step back, raise your paddle, and prepare to turn — without leaving the kitchen line early.

Situational Tells

  • Your opponents are pinned deep and under pressure. A defensive lob is their reset option when a drop is too risky.
  • You have just hit a strong overhead or speed-up. Some players answer pressure with height in the next rally almost automatically.
  • The same player has lobbed twice already. Patterns repeat. Note who lobs, from where, and to which side — usually the backhand side of the less mobile defender.
  • Sun, wind or lights are behind you. Skilled opponents will lob toward the difficult look deliberately. Expect it on those points and shade your positioning accordingly.

Positioning Before the Lob Comes

Good lob defence starts from a position you can move from, not from the furthest forward position you can reach.

  • Stand at the kitchen line, balanced, not leaning in. Weight forward onto the balls of your feet, with your paddle up in front of your chest.
  • Do not hug the line so tightly that every deep ball is behind you. A half-step of depth costs nothing against a dink and buys real time against a lob.
  • Know your roles before the rally. As a default, the player with the forehand to the middle takes middle lobs. The more mobile player takes the deepest balls behind a partner.
  • Agree your calls in advance. Mine, yours, help, and switch mean the same thing to both of you, every time, with no discussion mid-rally.

These defaults connect directly to middle-ball responsibility. If your pair already has a clear system for who owns the middle, lob calls become much simpler — see our guide to who should take the middle in pickleball.

The Movement Rule: Turn, Do Not Backpedal

This is the single most important safety and performance rule in this article. When a lob goes over your head, do not shuffle or run backwards facing the net.

Backpedaling keeps you blind to where you are on court, puts your weight behind your heels, and gives you no power if you do reach the ball. It is also how players trip and fall.

The Drop-Step and Turn, Step by Step

  1. Drop-step with the paddle-side foot, turning your shoulders and hips sideways as the lob passes over you.
  2. Point at the ball with your non-paddle hand. This turns your shoulders correctly, helps you track depth, and can shade sun or lights.
  3. Move sideways and back in a controlled run or shuffle, keeping the ball in front of your intended contact point, not directly above or behind you.
  4. Plant and set before you swing whenever time allows. A balanced overhead at controlled power beats a falling smash almost every time.
  5. Recover forward immediately after contact, returning toward the kitchen line as a pair once the immediate danger has passed.
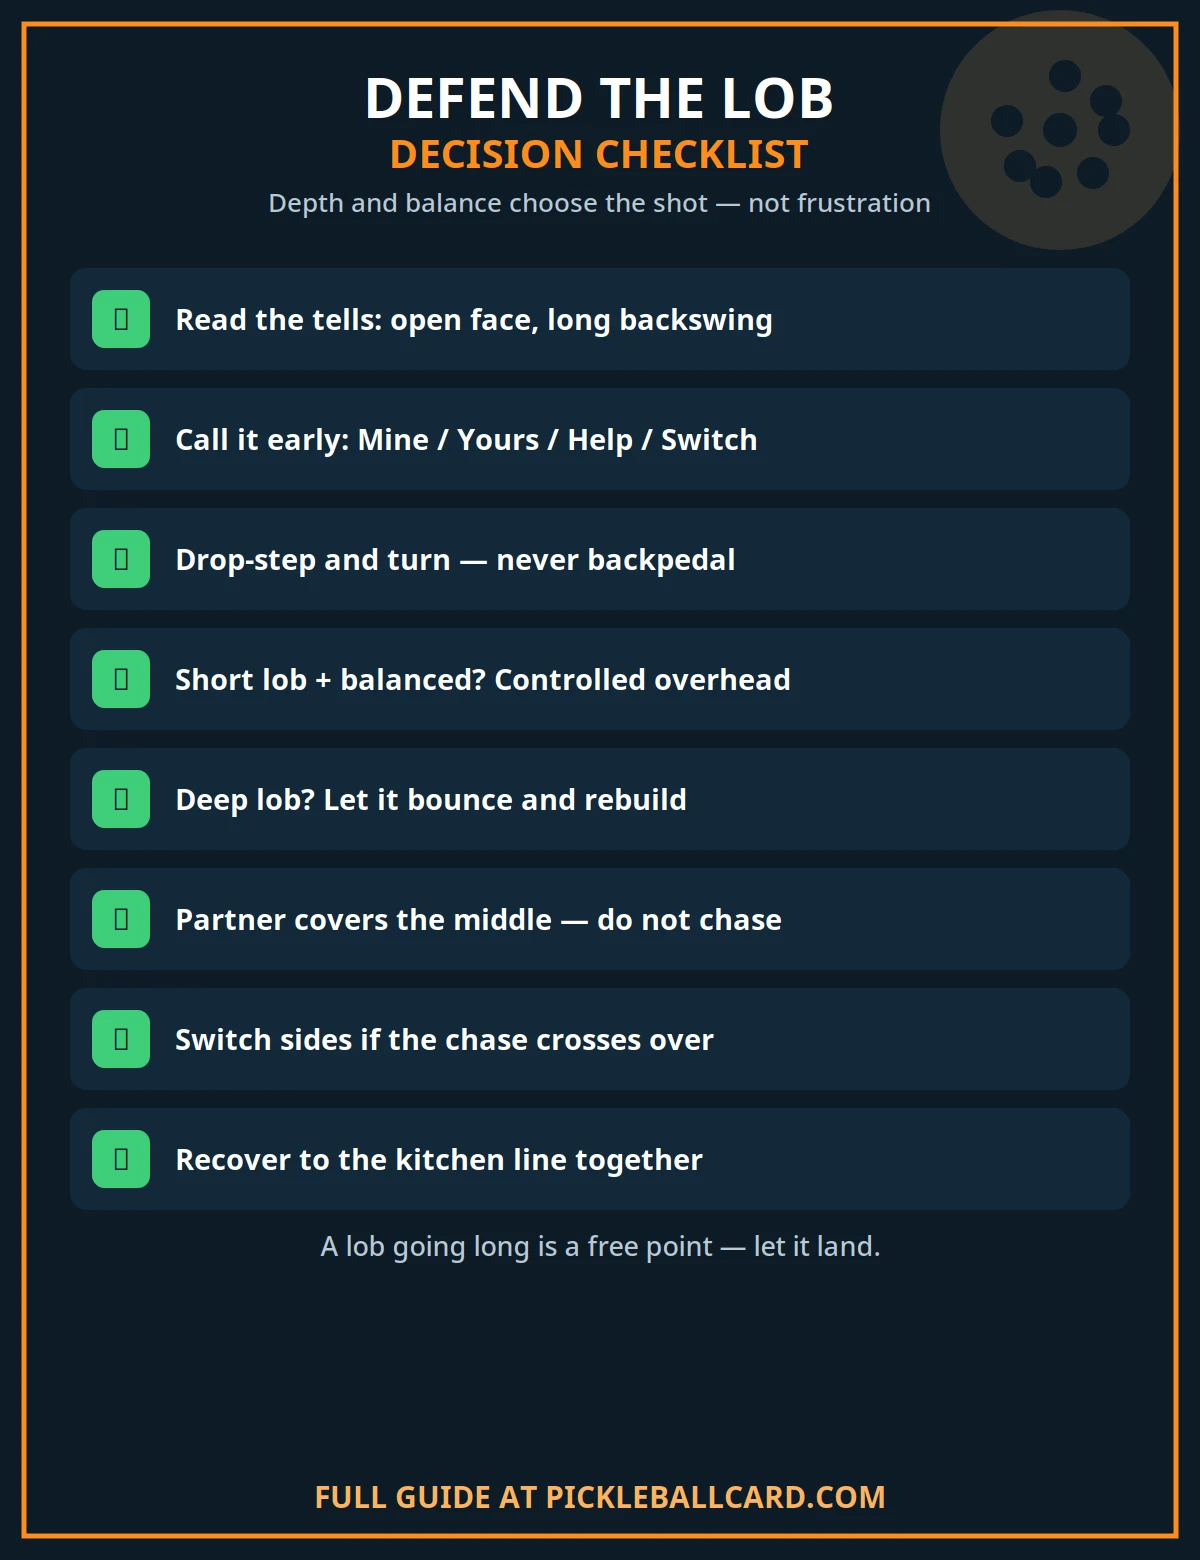
How to defend the lob in pickleball checklist covering the drop-step turn, early calls, overhead or bounce decisions and partner coverage

Choosing Your Response: A Decision Framework

Not every lob should be smashed. Use the depth and your balance — not your frustration — to choose.

What you face Best response Why Avoid
Short lob, you can set in front Controlled overhead You keep pressure and keep the opponents back Swinging at maximum power and missing long
Mid-depth lob, you are moving but balanced Firm overhead to feet or middle, or a high deep return if unsure You stay in the rally without giving an attackable ball Reaching behind your head while still moving backwards
Deep lob beyond comfortable reach Let it bounce, chase to its side, then drop or lob back You regain balance and time to rebuild the rally Backpedaling and flicking at the ball blindly
Lob clearly heading long Call it, let it land, watch it out Free points should stay free Hitting a ball that would have gone out
Lob over your partner, not you Cover and, if needed, switch The team stays connected instead of both chasing Both players running to the same landing spot

Hitting a Controlled Overhead

Set sideways, paddle up near your ear, and contact the ball slightly in front of your body at comfortable reach. Aim first for depth and placement — at feet, into the middle, or to an open angle.

Think in targets, not in winners. An overhead that forces another defensive shot has done its job. The spectacular smash that misses by two feet has not, however good it felt to swing.

After contact, do not admire it and do not fall into the kitchen. If you volleyed the ball, your feet and momentum must still obey the non-volley zone rules in the USA Pickleball Official Rules. Recover forward legally and ready.

Playing It Off the Bounce

When the lob is too deep for a balanced overhead, commit fully to the bounce. Turn, run to the side of the ball rather than directly under its flight, and let it drop into a hittable position.

From deep court, your best replies are usually a soft drop toward the kitchen, which lets both partners advance again, or a high defensive lob of your own, which buys the most time.

What you should not do from the baseline is drive hopefully at two set opponents. That ball comes back faster than you can recover, and the lob has then achieved exactly what its hitter wanted.

Partnerwork: Cover, Call and Switch

  • “Mine” means I am balanced and taking it. Your partner then stops, covers the middle and front space, and prepares for the reply.
  • “Help” or “Yours” means the lob has beaten the first player. The partner takes the diagonal route to the ball — usually a safer and faster path than the first player’s turn.
  • “Switch” means cross and stay. If the chasing partner ends up on the other side of the court, both players keep their new sides for the rest of the rally. Do not cross back mid-point.
  • The non-hitting partner moves back a step or two. This buys reaction time if the chaser’s return is attacked, and it keeps the team connected rather than split between baseline and kitchen.
  • Re-form at the line together. After the return, advance as a pair. One player sprinting forward alone simply opens the gap the next lob will find.

When a Lob Is the WRONG Shot — and How to Punish It

Understanding bad lobs helps you in two ways: you will stop hitting them yourself, and you will recognise — a fraction earlier — the lobs you should attack.

  • Against opponents who are set, balanced and overhead-ready. A lob here is an invitation. If that describes you and your partner, expect the smash opportunity and take it calmly.
  • From a comfortable, balanced position at the kitchen with better options available. A needless lob surrenders a strong position for a low-percentage hope. Punish it by holding your ground and making the overhead.
  • Into the wind, or with sun in the hitter’s own eyes on the return. Conditions cut both ways. A floated lob into wind often drops short — the easiest overhead in pickleball.
  • Repeatedly, to the same side, with the same shape. Predictability is the lob’s fatal flaw. Once you have seen it twice, shade back half a step against that player and dare them to try a third.
  • When the hitter is off balance or reaching. A lob needs lift and control. A stretched lob usually lands short or long, so hold your position longer before retreating.

Conversely, do not become so eager to punish that you chase every high ball. A genuinely good lob — deep, high, behind your backhand shoulder, hit from disguise — deserves the respectful bounce-and-rebuild response, not a heroic miss.

Brief Recap: What a Good Lob Looks Like (So You Can Spot It)

For defence, you only need the outline. A good offensive lob is disguised as a dink until late, lifts over the reach of the net players, and lands in the back third of the court.

It is most effective against players who crowd the line, turn slowly, or have a weak backhand overhead. That short description is the checklist of what you are defending against — nothing more is needed here.

Full hitting mechanics, disguise drills and shot selection for the attacking side live in the companion guide linked at the top of this article. Keep the two skills separate in practice and they will both improve faster.

Drills That Build Lob Defence

  1. Read-and-call drill. A feeder mixes dinks and lobs from the kitchen. Defenders must call “dink” or “lob” before the ball crosses the net, then play the point out. Ten minutes trains the read, not just the smash.
  2. Drop-step ladders. Without a ball, practise the drop-step turn to both sides, pointing with the non-paddle hand, for sets of eight. Footwork grooved slowly is footwork available under pressure.
  3. Overhead-or-bounce choices. A feeder lobs to varied depths. The defender must announce “air” or “bounce” early and then execute that choice. Score the decision, not only the shot.
  4. Switch rallies. Play points where every lob that crosses a partner must end with a called switch, and the rally continues from the new sides. This removes the mid-court crossing confusion that costs real matches.
  5. Two-lob survival. Attackers may lob twice in a row; defenders must defend both and re-form at the line between them. The second lob, against a disorganised pair, is the one this drill exists to save.

Common Lob-Defence Mistakes

  • Backpedaling. Slow, blind and unsafe. Turn, always.
  • Silence. Two players hoping the other will take it is the lob’s best friend. Call early, even if you are sometimes wrong.
  • Trying to smash everything. Deep lobs should bounce. Forcing an overhead from behind your head turns defence into an error.
  • Hitting balls that are going out. Track deep lobs to the line. Free points are only free if you let them land.
  • Both partners chasing. One chases, one covers. Every time.
  • Staying back after the return. Defending the lob and then remaining at the baseline simply concedes the kitchen you just saved.
  • Forgetting the kitchen rules on the overhead. A great smash with a foot in the non-volley zone on a volley is still a fault.

Frequently Asked Questions

Should I take a lob in the air or let it bounce?

Take it in the air only if you can get set, balanced, with the ball in front of you. If you would have to reach behind your head or hit while moving backwards, let it bounce and rebuild.

Who should take a lob down the middle?

By default, the player with the forehand to the middle, unless your pair has agreed otherwise. What matters most is that one player calls it early and the other covers, rather than which default you choose.

Why is backpedaling so dangerous in pickleball?

Backpedaling puts your weight behind your heels, hides the court behind you, and removes your balance for both the shot and the landing. Turning sideways and running to the ball is faster, safer, and produces a stronger overhead.

What should my partner do while I chase a lob?

Cover, do not chase. Move back a step or two, protect the middle and front space, call a switch if the chase crosses sides, and then re-form at the kitchen line together after the return.

How do I defend a lob if I am not very mobile?

Position half a step deeper, read tells earlier, communicate more, and rely on your partner’s diagonal help for the deepest balls. From deep court, answer with a drop or a high defensive lob rather than a drive, and advance together.

Can I volley an overhead from inside the kitchen?

No. Volleying while standing in the non-volley zone, or with momentum carrying you into it, is a fault under the official rules.

Set behind the line, and let your feet — not just the ball — decide whether the overhead is legal.

The Bottom Line

Lob defence is a system: read the tells, turn instead of backpedaling, call it early, choose the overhead only when you are balanced, let deep balls bounce, and recover as a pair.

Master that sequence and a lob stops being a threat and becomes information. It tells you your opponents are under pressure, out of ideas at the kitchen, or testing a defence that no longer works on you.

Then make them pay for testing it — calmly, in balance, and together. That, more than any single smash, is how you defend the lob in pickleball.

Sources: USA Pickleball, Official Rules (non-volley zone and volley rules). Coaching content in this article is original; no competitor content is linked or reproduced.

shoaib
shoaib

Shoaib is the publisher of Pickleball Card. He oversees the site’s guides to pickleball rules, ratings, strategy and gear, all researched from primary sources — the USA Pickleball Rulebook, DUPR and manufacturer documentation — and updated as the game changes.

pickleballcard.com

Filed Under: About Pickleball

  • « Go to Previous Page
  • Page 1
  • Interim pages omitted …
  • Page 7
  • Page 8
  • Page 9
  • Page 10
  • Page 11
  • Go to Next Page »

Latest Posts

  • Skinny Singles Pickleball: Rules, Court Setup & Strategy
  • Quiet Pickleball Paddles & Noise Rules
  • Tournament Balls: Franklin X-40 Vs Onix Dura Fast 40
  • Games Like Pickleball: Badminton, Racquetball, Tennis, Padel And More
  • Drills for Beginners in Pickleball: Dinks, Serves, Volleys and Drops
  • Timeout Rules in Pickleball: Standard, Medical and Between-Game Timeouts
  • Pickleball Safety And Eye Protection
  • What To Wear To Play Pickleball: Shoes, Clothes, And Court Essentials
  • Pickleball Statistics: Participation, Growth, And The Numbers That Matter
  • Paddle Generations Explained: From Thermoformed To Foam (Gen 2, Gen 3, Gen 4)
  • About
  • Privacy Policy
  • Terms And Conditions
  • Affiliate Disclosure

COPYRIGHT © 2026 · Pickleballcard.COM, ALL RIGHTS RESERVED.

PICKLEBALLCARD.COM IS A PARTICIPANT IN THE AMAZON SERVICES LLC ASSOCIATES PROGRAM, AN AFFILIATE ADVERTISING PROGRAM DESIGNED TO PROVIDE A MEANS FOR SITES TO EARN ADVERTISING FEES BY ADVERTISING AND LINKING TO AMAZON.COM. AMAZON, THE AMAZON LOGO, AMAZONSUPPLY, AND THE AMAZONSUPPLY LOGO ARE TRADEMARKS OF AMAZON.COM, INC. OR ITS AFFILIATES. AS AN AMAZON ASSOCIATE WE EARN AFFILIATE COMMISSIONS FROM QUALIFYING PURCHASES.